RECORDING FROM AN EXTERNAL COMPONENT ONTO THE HDD
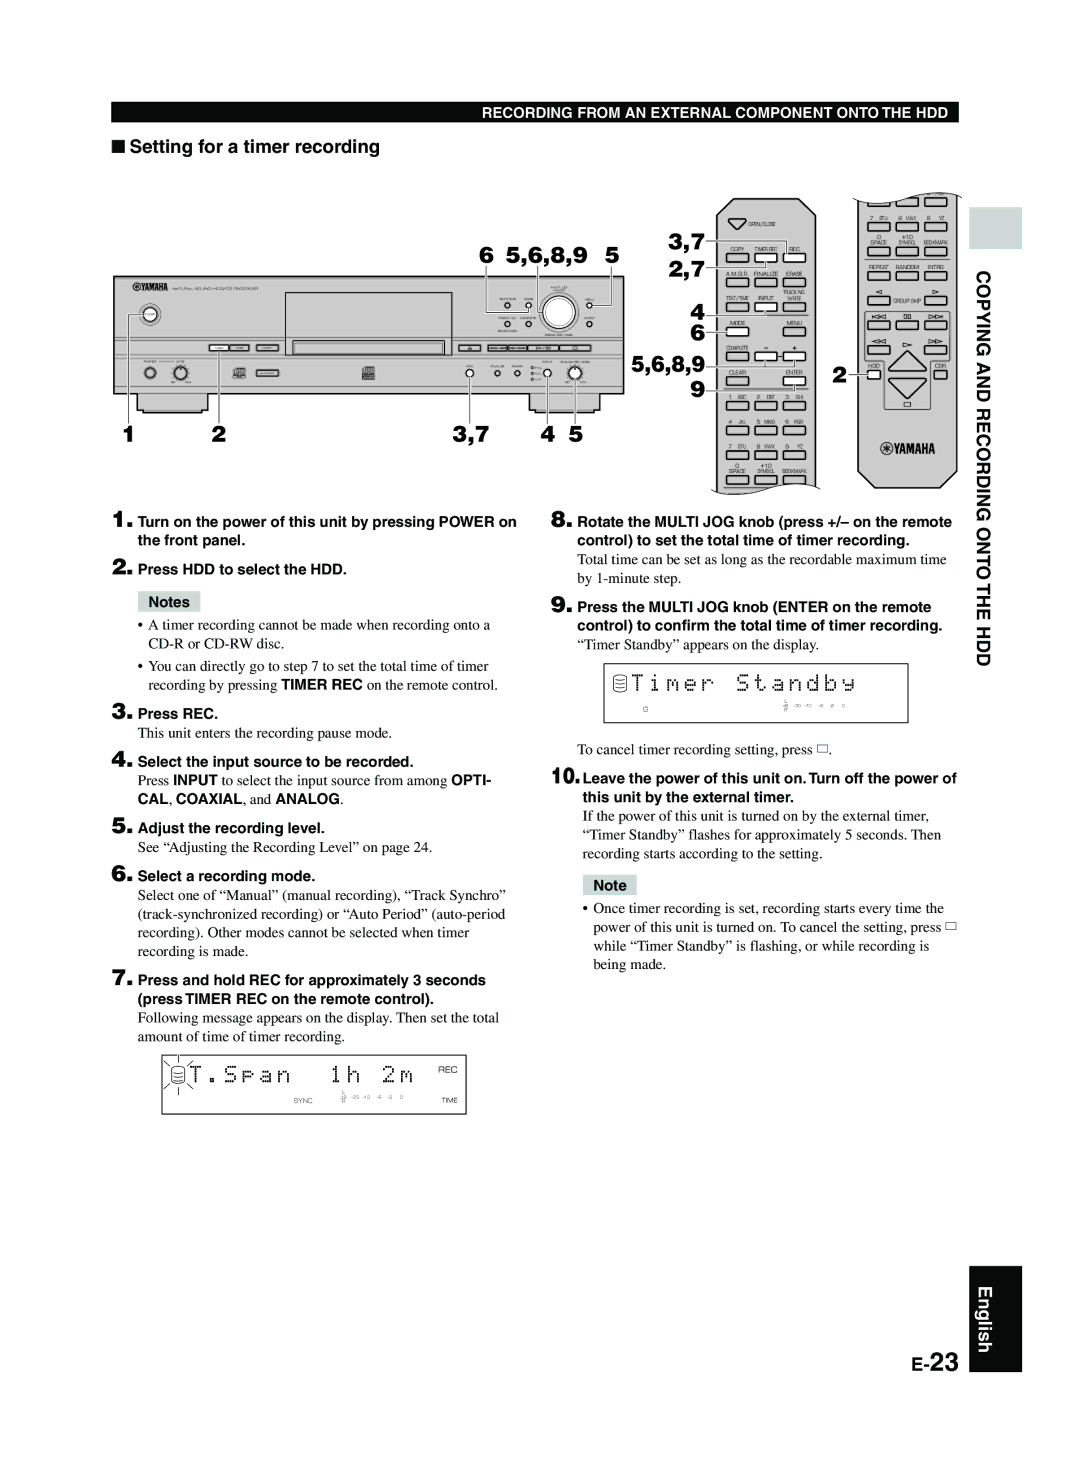
■Setting for a timer recording
4 JKL 5 MNO 6 PQR
7 STU 8 VWX 9 YZ
OPEN/CLOSE
|
|
|
| 6 5,6,8,9 | 5 | 3,7 | |||
|
|
|
| 2,7 | |||||
|
|
|
|
|
|
|
|
| |
NATURAL SOUND HDD/CD RECORDER |
|
|
| MULTI JOG |
|
|
| ||
|
|
| PUSH ENTER |
|
|
| |||
|
|
|
| TEXT/TIME | MODE |
| MENU |
| 4 |
POWER |
|
|
|
|
|
|
|
| |
|
|
|
| TRACK NO. | COMPLETE | CLEAR |
| ||
|
|
|
| BOOKMARK |
|
|
|
| 6 |
|
|
|
|
|
| DIGITAL REC LEVEL |
|
| |
|
|
|
|
|
|
|
|
| |
| HDD | CDR | COPY |
|
|
|
|
| 5,6,8,9 |
PHONES | LEVEL |
|
|
|
| INPUT ANALOG REC LEVEL |
| ||
|
|
| REC | FINALIZE ERASE | OPTICAL |
|
| ||
|
|
| A.M.Q.R. |
|
| COAXIAL |
|
| |
|
|
|
|
|
| ANALOG |
|
| 9 |
MIN | MAX |
|
|
|
| MIN | MAX |
| |
|
|
|
|
|
|
|
|
| |
1 | 2 |
| 3,7 |
| 4 5 |
|
| ||
|
|
|
|
|
|
| 0 | +10 |
|
|
|
|
|
|
|
| SPACE | SYMBOL | BOOKMARK |
COPY | TIMER REC |
| REC |
|
|
|
| ||
|
|
|
|
|
|
| REPEAT | RANDOM | INTRO |
A.M.Q.R. | FINALIZE | ERASE |
|
|
|
| |||
TEXT/TIME | INPUT | TRACK NO. |
|
|
|
| |||
WRITE |
|
| GROUP SKIP |
| |||||
|
|
|
|
|
|
|
|
| |
MODE |
|
| MENU |
|
|
|
| ||
COMPLETE |
|
|
|
|
|
|
|
| |
|
|
|
|
|
| 2 | HDD |
| CDR |
CLEAR |
|
| ENTER |
|
|
| |||
1 | ABC | 2 | DEF | 3 | GHI |
|
|
|
|
4 | JKL | 5 | MNO | 6 | PQR |
|
|
|
|
7 | STU | 8 | VWX | 9 | YZ |
|
|
|
|
COPYING AND
0 +10
SPACE SYMBOL BOOKMARK
REPEAT RANDOM NTRO
RECORDING
1. Turn on the power of this unit by pressing POWER on the front panel.
2. Press HDD to select the HDD.
Notes
•A timer recording cannot be made when recording onto a
•You can directly go to step 7 to set the total time of timer recording by pressing TIMER REC on the remote control.
3.Press REC.
This unit enters the recording pause mode.
4.Select the input source to be recorded.
Press INPUT to select the input source from among OPTI- CAL, COAXIAL, and ANALOG.
5.Adjust the recording level.
See “Adjusting the Recording Level” on page 24.
6.Select a recording mode.
Select one of “Manual” (manual recording), “Track Synchro”
7.Press and hold REC for approximately 3 seconds (press TIMER REC on the remote control).
Following message appears on the display. Then set the total amount of time of timer recording.
8. Rotate the MULTI JOG knob (press +/– on the remote control) to set the total time of timer recording.
Total time can be set as long as the recordable maximum time by
9. Press the MULTI JOG knob (ENTER on the remote control) to confirm the total time of timer recording.
“Timer Standby” appears on the display.
 T i m e r S t a n d b y
| L |
G | dB |
R |
To cancel timer recording setting, press a.
10.Leave the power of this unit on. Turn off the power of this unit by the external timer.
If the power of this unit is turned on by the external timer, “Timer Standby” flashes for approximately 5 seconds. Then recording starts according to the setting.
Note
•Once timer recording is set, recording starts every time the power of this unit is turned on. To cancel the setting, press a while “Timer Standby” is flashing, or while recording is being made.
ONTO THE HDD
T . S p a n | 1 h | 2 m REC | |
| L |
|
|
SYNC | dB | TIME | |
R |
| ||
|
|
|
|
English