Front and Rear of Unit
Rear Panel (with the SCSI Convertor)
| ➀ | ➁ | ➂ |
➃ | ➄ |
| ➅ |
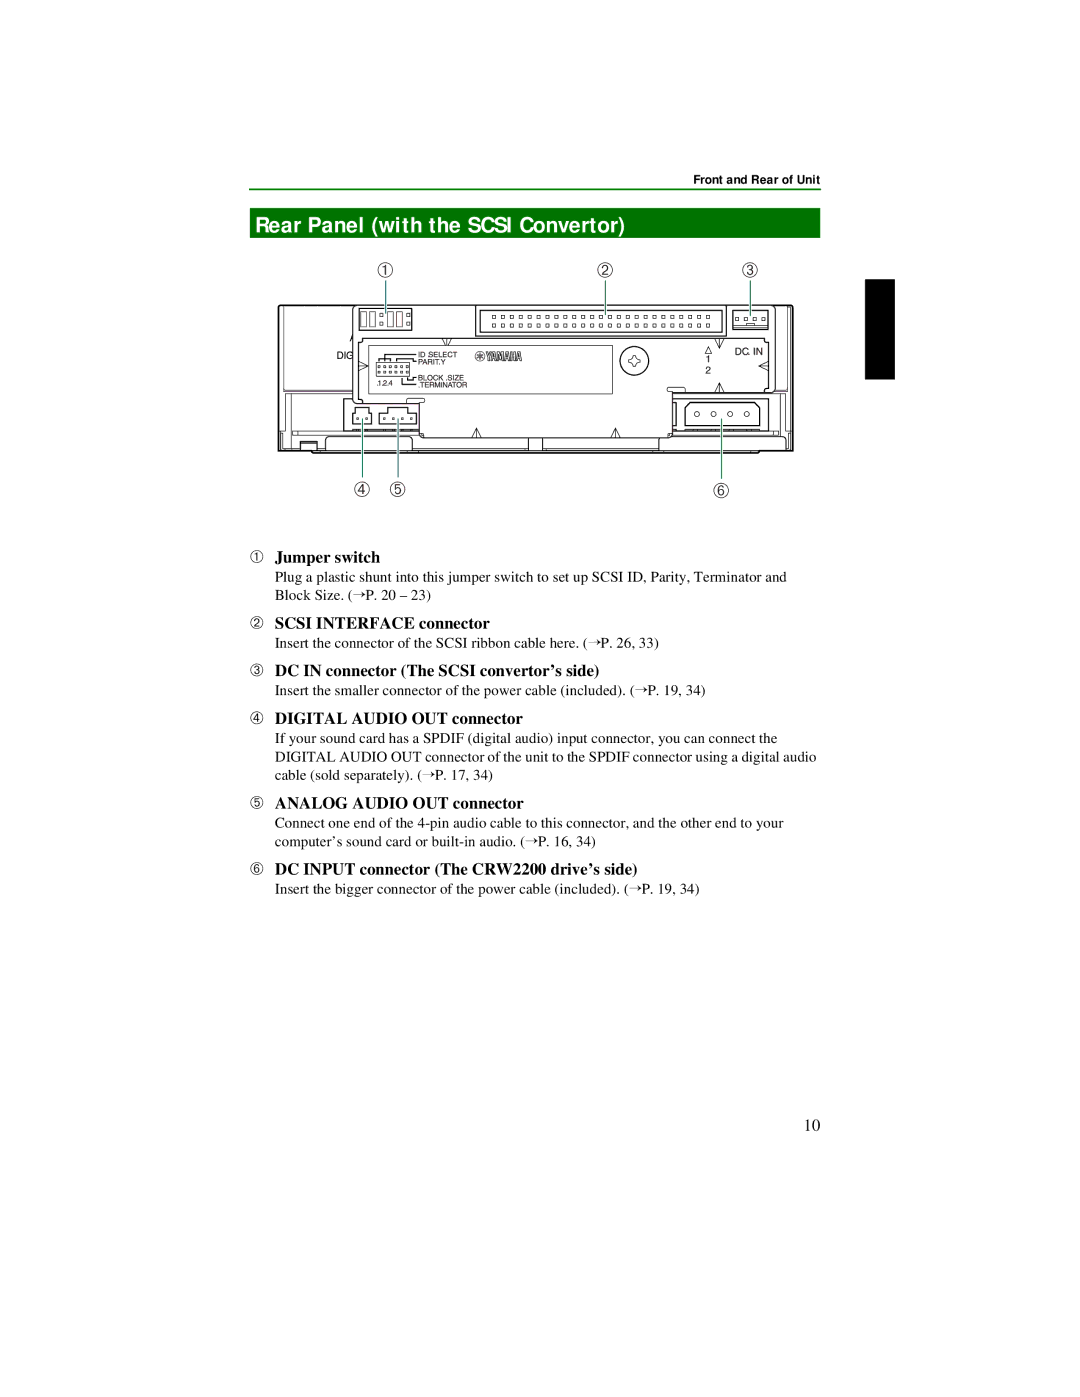
➀Jumper switch
Plug a plastic shunt into this jumper switch to set up SCSI ID, Parity, Terminator and Block Size. (→P. 20 – 23)
➁SCSI INTERFACE connector
Insert the connector of the SCSI ribbon cable here. (→P. 26, 33)
➂DC IN connector (The SCSI convertor’s side)
Insert the smaller connector of the power cable (included). (→P. 19, 34)
➃DIGITAL AUDIO OUT connector
If your sound card has a SPDIF (digital audio) input connector, you can connect the
DIGITAL AUDIO OUT connector of the unit to the SPDIF connector using a digital audio cable (sold separately). (→P. 17, 34)
➄ANALOG AUDIO OUT connector
Connect one end of the
➅DC INPUT connector (The CRW2200 drive’s side)
Insert the bigger connector of the power cable (included). (→P. 19, 34)
10