E-IDE (ATAPI) Connection Set Up
Setting the Jumper Switches
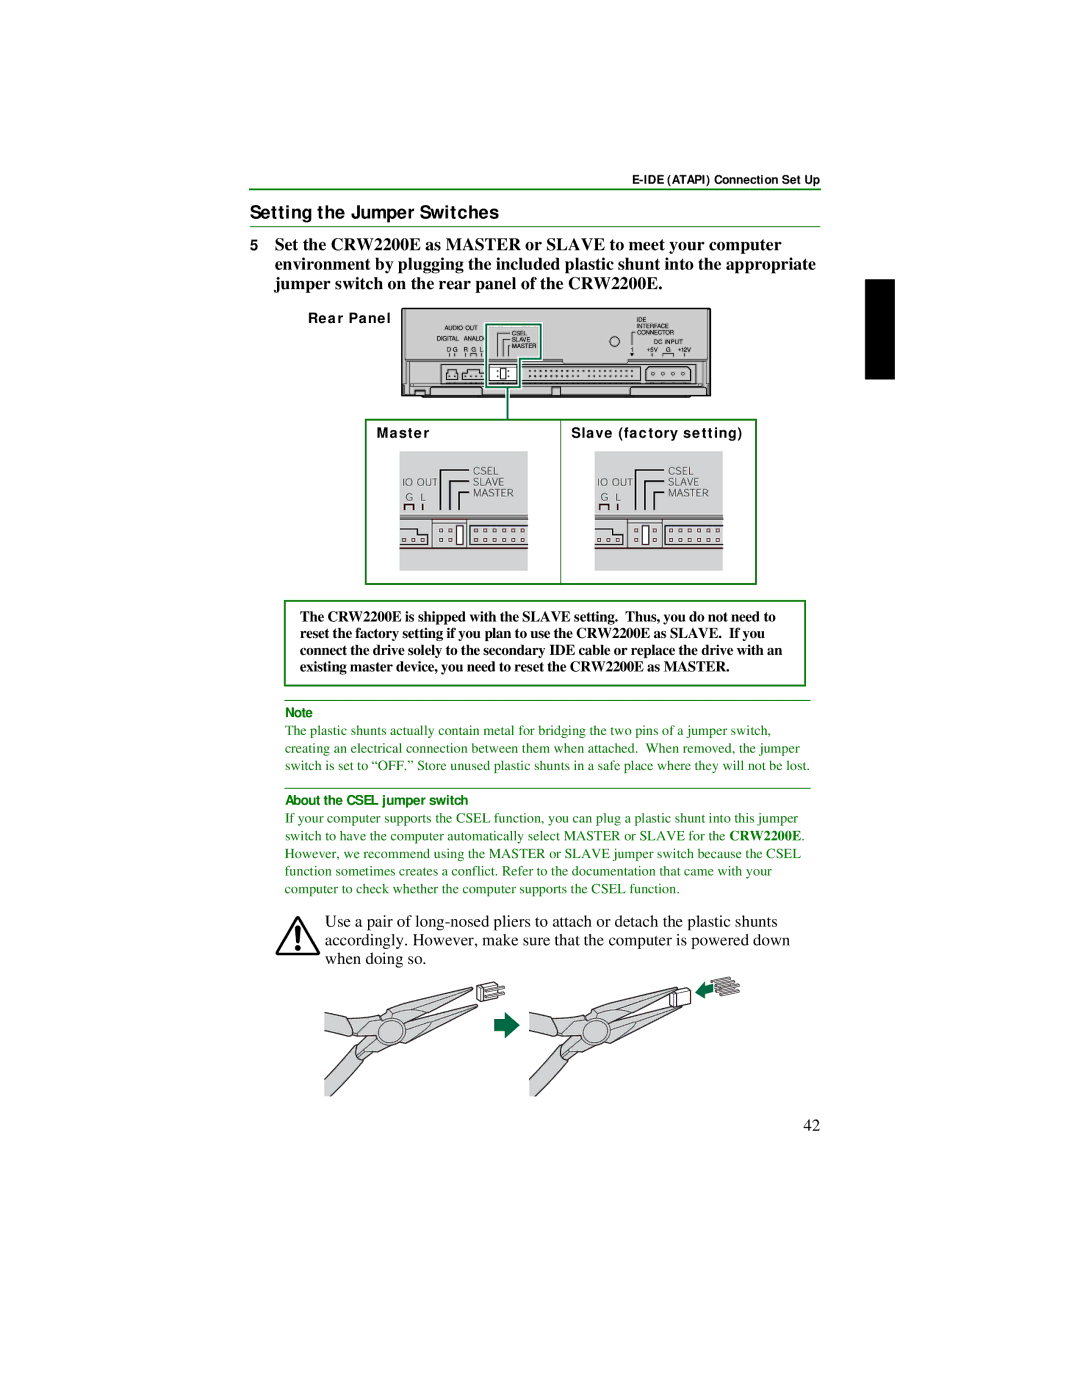
5Set the CRW2200E as MASTER or SLAVE to meet your computer environment by plugging the included plastic shunt into the appropriate jumper switch on the rear panel of the CRW2200E.
Rear Panel
Master
Slave (factory setting)
The CRW2200E is shipped with the SLAVE setting. Thus, you do not need to reset the factory setting if you plan to use the CRW2200E as SLAVE. If you connect the drive solely to the secondary IDE cable or replace the drive with an existing master device, you need to reset the CRW2200E as MASTER.
Note
The plastic shunts actually contain metal for bridging the two pins of a jumper switch, creating an electrical connection between them when attached. When removed, the jumper switch is set to “OFF.” Store unused plastic shunts in a safe place where they will not be lost.
About the CSEL jumper switch
If your computer supports the CSEL function, you can plug a plastic shunt into this jumper switch to have the computer automatically select MASTER or SLAVE for the CRW2200E. However, we recommend using the MASTER or SLAVE jumper switch because the CSEL function sometimes creates a conflict. Refer to the documentation that came with your computer to check whether the computer supports the CSEL function.
Use a pair of
42