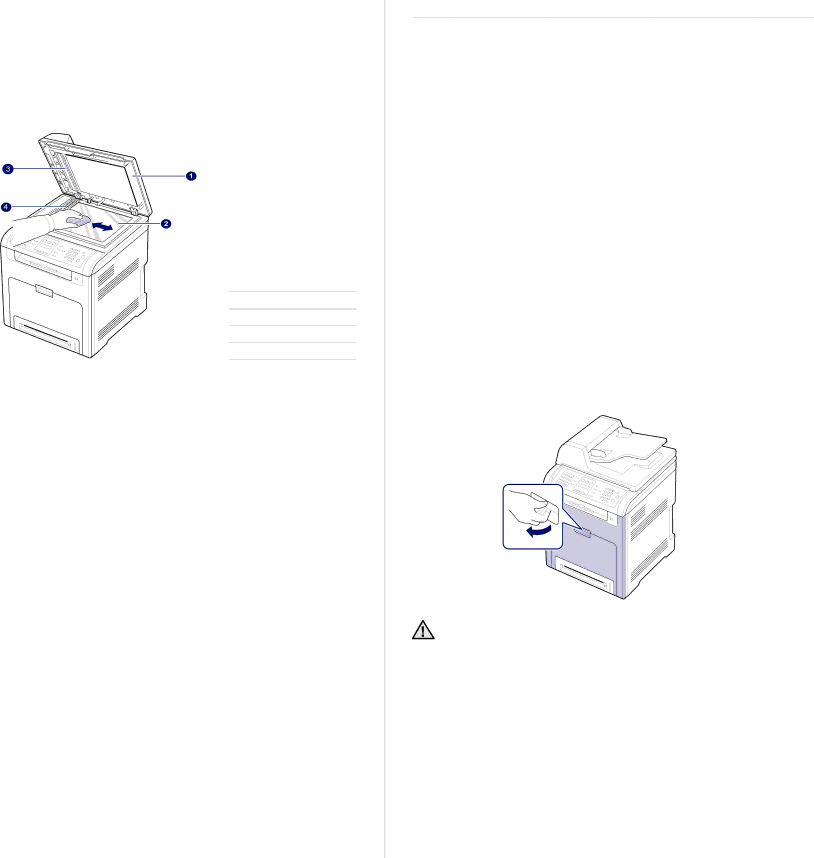
Cleaning the scan unit
Keeping the scan unit clean helps ensure the best possible copies. We suggest that you clean the scan unit at the start of each day and during the day, as needed.
1.Slightly dampen a soft
2.Open the scanner lid.
3.Wipe the surface of the scanner glass and DADF glass until it is clean and dry.
1 Scanner lid
2 Scanner glass
3 White sheet
4 DADF glass
4.Wipe the underside of the scanner lid and white sheet until it is clean and dry.
5.Close the scanner lid.
MAINTAINING THE CARTRIDGE
Toner cartridge storage
To get the most from the toner cartridge, keep the following guidelines in mind:
•Do not remove the toner cartridge from its package until ready for use.
•Do not refill the toner cartridge. The printer warranty does not cover damage caused by using a refilled cartridge.
•Store toner cartridges in the same environment as your printer.
•To prevent damage to the toner cartridge, do not expose it to light for more than a few minutes.
Expected cartridge life
The life of the toner cartridge yield depends on the amount of toner that print jobs require. The actual number may also be different depending on the print density of the pages you print on, and the number of pages may be affected by operating environment, printing interval, media type, and media size. If you print a lot of graphics, you may need to change the cartridge more often.
Redistributing toner
When a toner is low, faded or light areas may appear. It is possible that colored images may be printed with incorrect colors due to flawed mixing of toner colors when one of the colored toner cartridges is low on toner. You can temporarily improve print quality by redistributing the toner.
•The
1.Using the handle, completely open the front cover.
• Do not touch the green surface, the OPC drum or the front of the toner cartridge, with your hands or any other material. Use the handle on each cartridge in order to avoid touching this area.
•Be careful not to scratch the surface of the paper transfer belt.
•If you leave the front cover open for more than a few minutes, the OPC drum can be exposed to light. This will cause damage to the OPC drum. Close the front cover should the installation need to be halted for any reason.
58 Maintenance