Belkin 8000I installation manual

Page 35

Before you cut a hole in a panel, make sure that there are no hidden electrical wires or other

parts behind the panel.

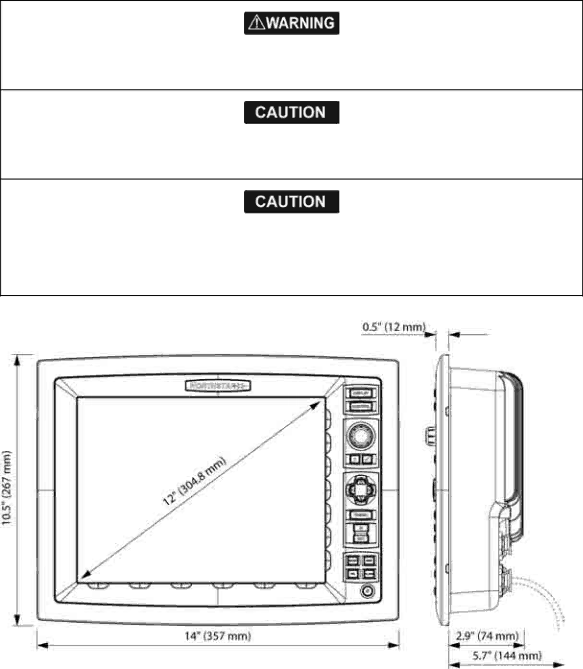
When flush mounting, be sure to mount the 8000i component on a flat surface.

Mounting on a curved surface can result in water leaks around the cutout.

To prolong life of this product, use the supplied sun cover when not in use and during

washdown.

After washdown or use in a wet environment remove excess water from screen

Use the supplied mounting template as a guide to cut a hole in the panel. OBSERVE the instructions on the template for drill bit and corner hole sizes.

Hold the gasket in place on the back of the unit; the gasket can fit any way round. Hold the unit in place in the mounting hole and use the supplied screws to secure the unit.

Clip the bezel to the front of the unit; it can fit either way round. The bezel is a tight fit and is not easy to remove. It is however quite strong and if removal is necessary, gently pull upward on the bezel by holding the inside edge just above the Northstar logo

Northstar 8000i System - 12" Display Processor Installation Manual

35

Image 35
Contents Northstar Please read carefully before use Important Safety InformationPreface Ft 0.5 m Disclaimer WarrantyContents Example System Layouts Maintenance Check the 12 inch Display Processor parts Introducing the Northstar 8000i SystemChart License Key NS004820 Page PPI Find your way around the 12 inch Display ProcessorRGB Network Master Unit Installation Sequence Summary Guidelines 8000i System InstallationOptional Parts Northstar 8000i 12 inch Display ProcessorDescription Place in 8000i SystemMounting Power requirementsNorthstar 8000i Black Box Processor Location GuideNorthstar 8000i 15 inch Monitor Other parts required Functions Power requirements Voltage Fuse DrawNorthstar 8000i Network Radar Northstar 8000i 8 Port Network Linker Northstar 8000i 4 Port USB Hub Functionality Northstar 8000i 1 kW Network SounderNorthstar 8000i DVD-CD Player Northstar 8000i Remote Keypad Northstar 8000i Video Interface Northstar 8000i C-MAP Chart License KeyNorthstar GPS Antenna NS004743 Autopilot Other ComponentsMounting and Calibration Heading SensorAudio GLL NMEA-0183 DataGSA Mass Storage Devices Other Functions Location Guide Human Interface DevicesNetwork Camera Description Place in 8000i SystemChoosing the best mounting location Mounting the 8000i 12 inch Display ProcessorViewing Angle Page Page Wiring Guidelines Power Northstar 8000i Black Box 8000i System Power requirementsGPS Port Utility Port External Wake Up and Remote Power OnConnect this to the Light Green wire on Page Nmea Multiplexer Noland NM42 NmeaWiring Connect the following External AlarmPage USB Auxiliary port Network RGB portPage Field Terminated Network Cable Brown White/Brown Blue White/Green White/Blue Terminating a Northstar 8000i RJ45 Field Kit Before crimp After crimp Example System Layouts 8000i Chart Plotter8000i Plotter Sounder NS004743 Northstar GPS Antenna Entertainment Northstar 8000i Processor Full System Northstar Black Box Processor NS004730 Turn on the 12 inch Display Processor Northstar 8000i Initial SetupAdjust the brightness on a 12 inch Display Processor To adjust the backlight brightnessTo set the master Set the network master unitTo install all collections Install the chart dataInstall Charts interface To install chart collectionsTurn off the 12 inch Display Processor To turn the beeps on or off Set the system preferencesTo select the time format To select your time zoneTurn the keypad backlight on or off To change the transducer depthTo turn the backlight on or off Change the transducer depthSet the location of the media library To show or hide the top control barSpecify your vessel statistics To specify your vessel statisticsTo select Nmea Output sentences Set Nmea OutputSet the device processor name Set Nmea Baud RateCalibrate the touch screen To calibrate the touch screenSet the units Set the screen resolutionTo select the small scale distance units To select the volume units for liquidsTo select the large scale distance units Set up the radar before using it for the first time To select the temperature unitsTo set up the radar before using it Select the temperature unitsChange the radar range offset trigger delay To change the radar startup modeChange the radar startup mode Change the radar bearing alignment To change the radar range offsetTo change the radar bearing alignment To change the parking angleTo change the speed offset To change the offset for the water temperatureTo change the water temperature averaging time SounderCreate an instrument panel InstrumentsTo create an instrument panel Change the sounders speed filterResize an instrument To add a new instrumentTo resize an instrument To rename an instrument panelDelete an instrument panel To delete an instrument panelTechnical support, service and repairs MaintenanceTo restore the system processor RestoreRestore settings and information Restore processor softwareUpgrading the 8000i system There two types of upgrade for a 8000i processorSoftware patch multi-processor system Master Install a software patch to multi processor systemInstall a system image upgrade System image upgradeThirty minutes System will then restart automatically Display SpecificationsUnited States Europe Northstar