Removing the Hard Disk Drive
Table 3. Hard Disk Drive Replacement Part Numbers
Description
Drive, hard disk (20,GB, 9.5mm, Toshiba FDB ATA100)
Drive, hard disk (20 GB, 9.5mm, Hitachi ATA100)
Drive, hard disk (20,GB, 9.5mm, IBM FDB ATA100)
Drive, hard disk (30 GB, 9.5mm, Hitachi FDB ATA100)
Drive, hard disk (30 GB, 9.5mm, IBM [Cascade] FDB ATA100)
Drive, hard disk (30 GB, 9.5mm, Hitachi (Titan) ATA100)
Drive, hard disk (40 GB, 9.5mm, Toshiba ATA100)
Drive, hard disk (40 GB, 9.5mm, Hitachi ATA100)
Drive, hard disk (40 GB, 9.5mm, IBM FDB ATA100)
Part Number
Exchange Part Number
Required Equipment
•#0 Phillips screwdriver.
Removal Procedure
1.Unplug the AC adapter, if present, and remove the battery.
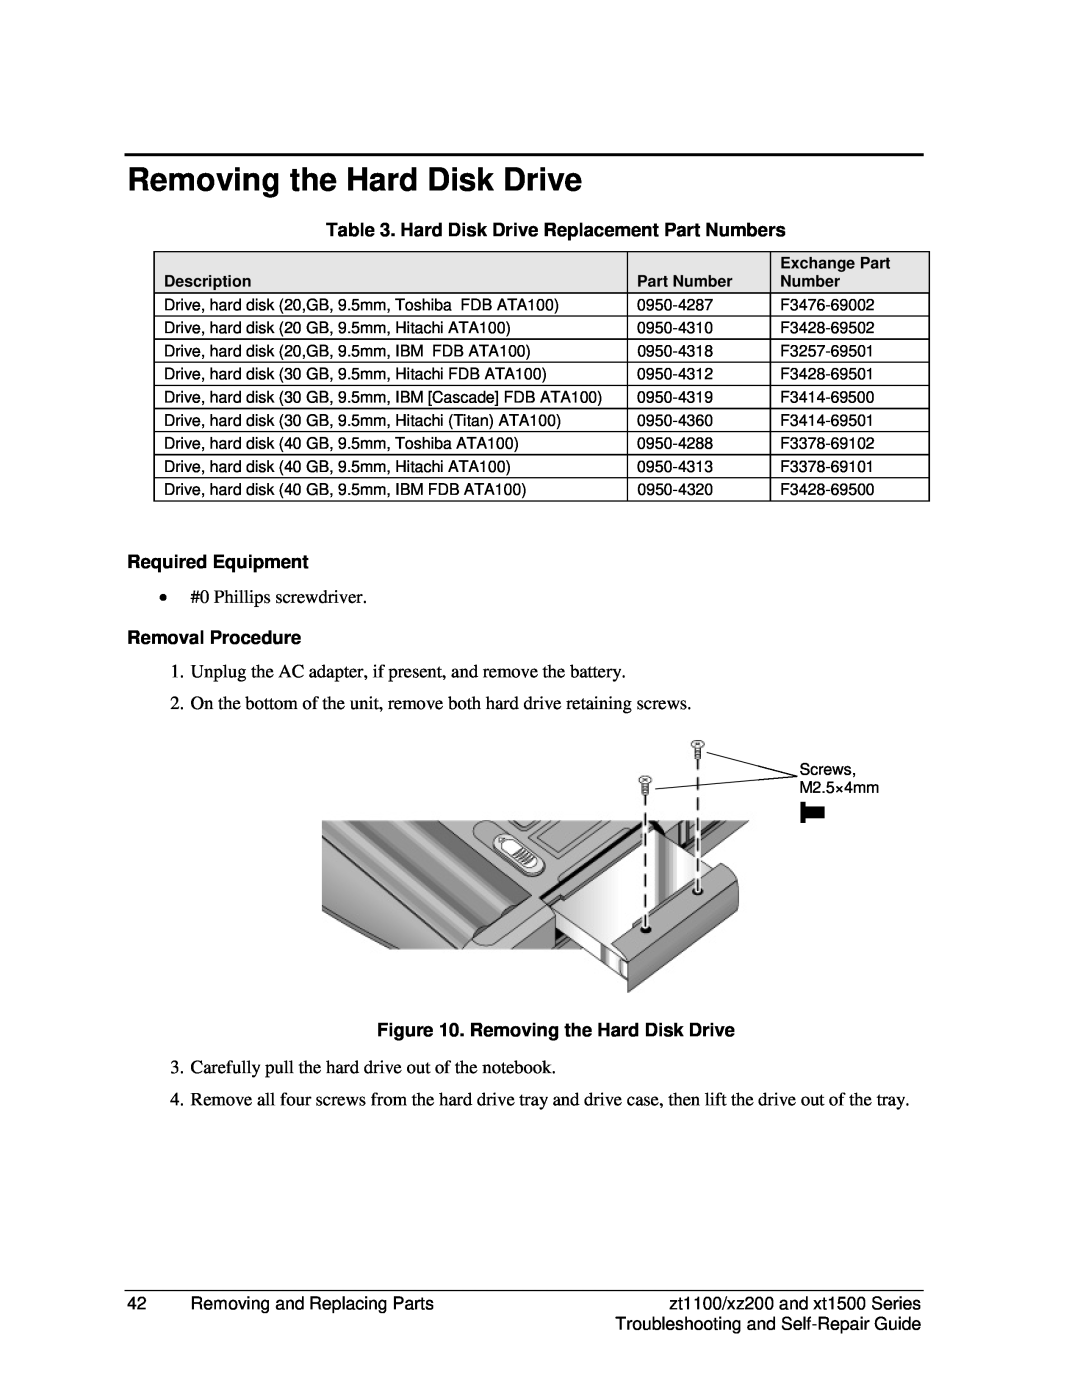
2.On the bottom of the unit, remove both hard drive retaining screws.
Screws,
M2.5×4mm
Figure 10. Removing the Hard Disk Drive
3.Carefully pull the hard drive out of the notebook.
4.Remove all four screws from the hard drive tray and drive case, then lift the drive out of the tray.
42 | Removing and Replacing Parts | zt1100/xz200 and xt1500 Series |
|
| Troubleshooting and |
