Reassembly Notes
•Carefully press the SDRAM module into the connector at an angle of about 30°, until it is fully inserted. Then press down on both sides of the module until the latches snap closed.
Figure 18. Installing an Expansion SDRAM Module
Removing the System SDRAM Module
Removal Procedure
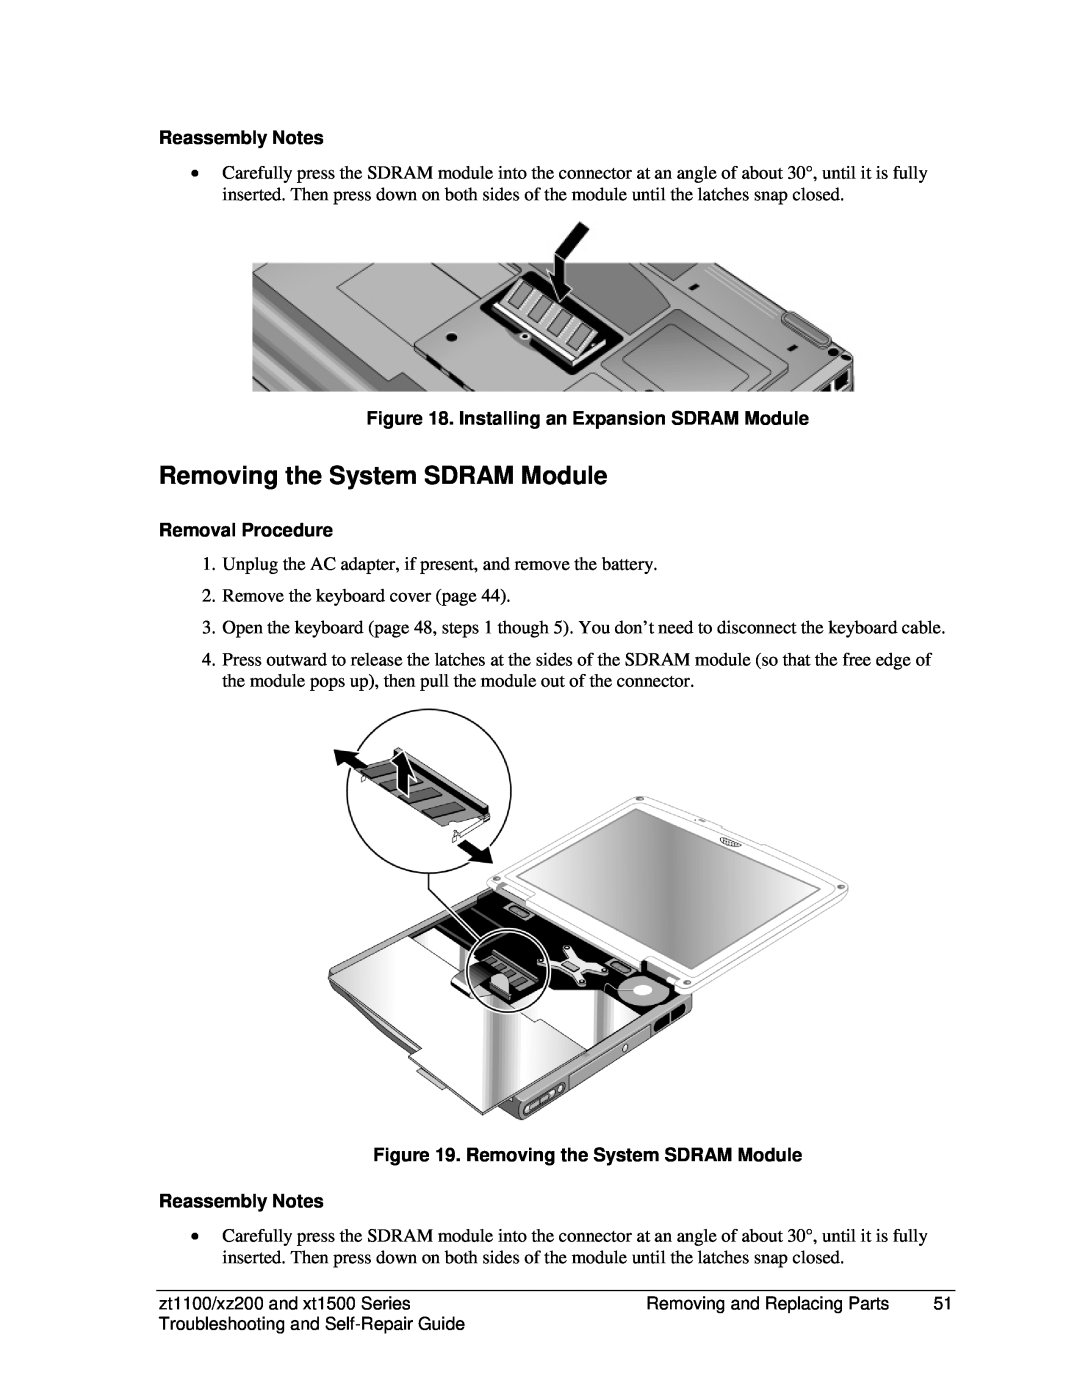
1.Unplug the AC adapter, if present, and remove the battery.
2.Remove the keyboard cover (page 44).
3.Open the keyboard (page 48, steps 1 though 5). You don’t need to disconnect the keyboard cable.
4.Press outward to release the latches at the sides of the SDRAM module (so that the free edge of the module pops up), then pull the module out of the connector.
Figure 19. Removing the System SDRAM Module
Reassembly Notes
•Carefully press the SDRAM module into the connector at an angle of about 30°, until it is fully inserted. Then press down on both sides of the module until the latches snap closed.
zt1100/xz200 and xt1500 Series | Removing and Replacing Parts | 51 |
Troubleshooting and |
|
|