Replacing Small Parts and Accessories
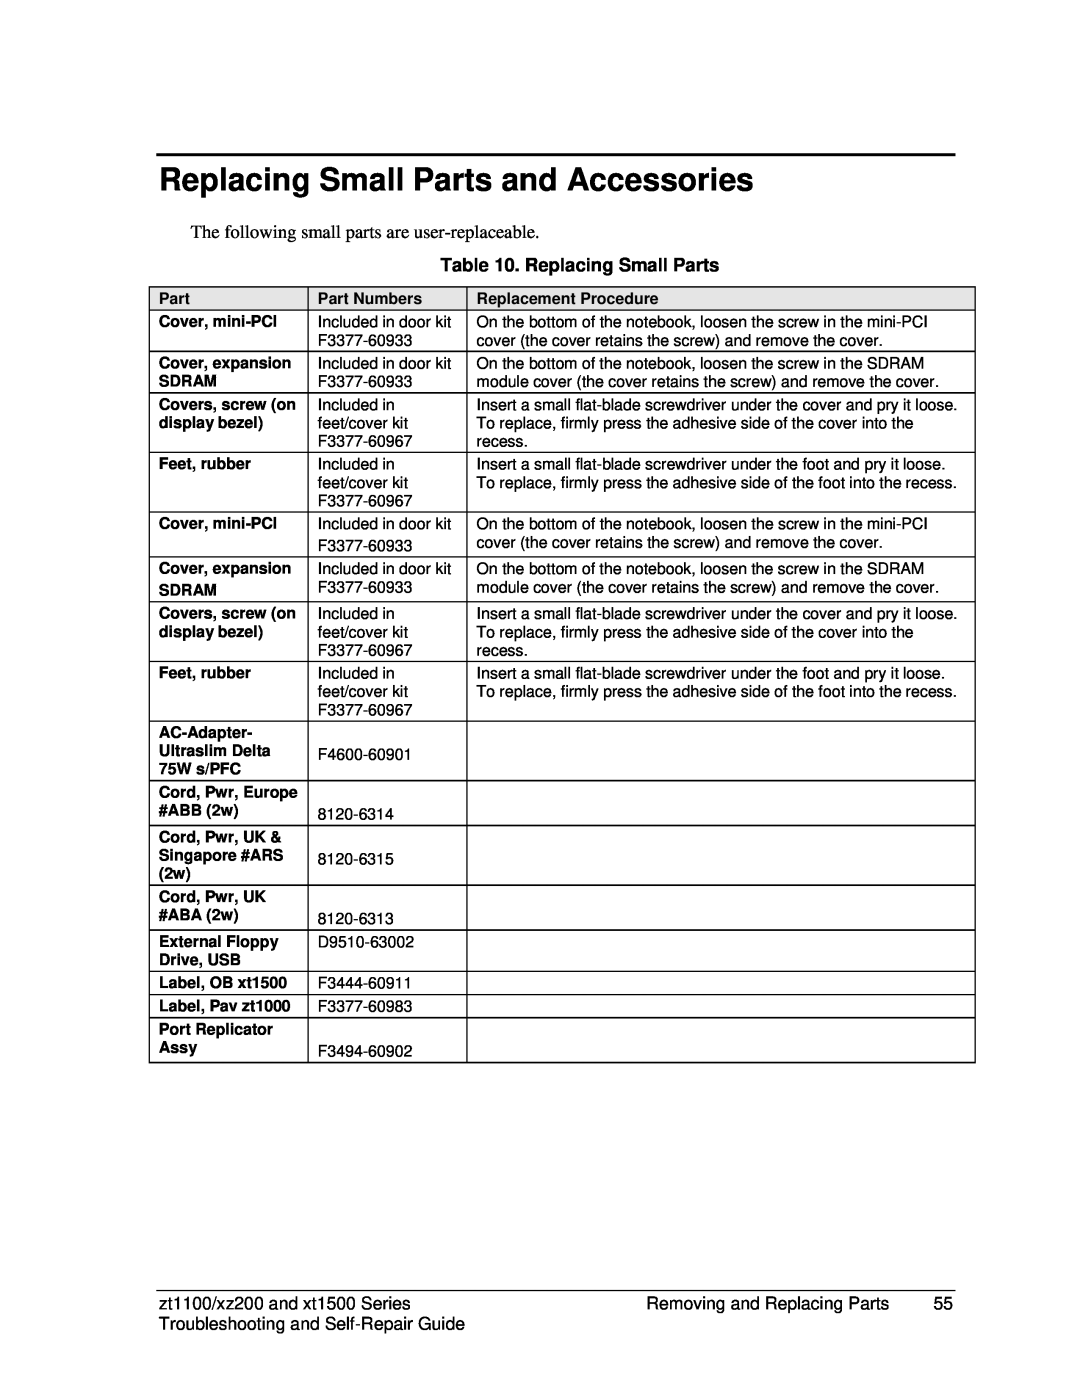
The following small parts are
Table 10. Replacing Small Parts
Part
Cover,
Cover, expansion
SDRAM
Covers, screw (on display bezel)
Feet, rubber
Cover, mini-PCI
Cover, expansion
SDRAM
Covers, screw (on display bezel)
Feet, rubber
AC-Adapter- Ultraslim Delta 75W s/PFC
Cord, Pwr, Europe #ABB (2w)
Cord, Pwr, UK & Singapore #ARS (2w)
Cord, Pwr, UK #ABA (2w)
External Floppy Drive, USB
Label, OB xt1500
Label, Pav zt1000
Port Replicator Assy
Part Numbers
Included in door kit
Included in door kit
Included in feet/cover kit
Included in feet/cover kit
Included in door kit
Included in door kit
Included in feet/cover kit
Included in feet/cover kit
Replacement Procedure
On the bottom of the notebook, loosen the screw in the
On the bottom of the notebook, loosen the screw in the SDRAM module cover (the cover retains the screw) and remove the cover.
Insert a small
Insert a small
On the bottom of the notebook, loosen the screw in the
On the bottom of the notebook, loosen the screw in the SDRAM module cover (the cover retains the screw) and remove the cover.
Insert a small
Insert a small
zt1100/xz200 and xt1500 Series | Removing and Replacing Parts | 55 |
Troubleshooting and |
|
|
