Operating procedures
Printing RFID tags
Print RFID tags using one of the two following procedures (regular volume printer, high volume printer).
Printing — regular volume printer
This procedure describes the regular volume printer’s default
Note: The printer Feed button is located on the upper right front cover of the unit. Visual indicators on the Feed button are described in the table following this procedure.
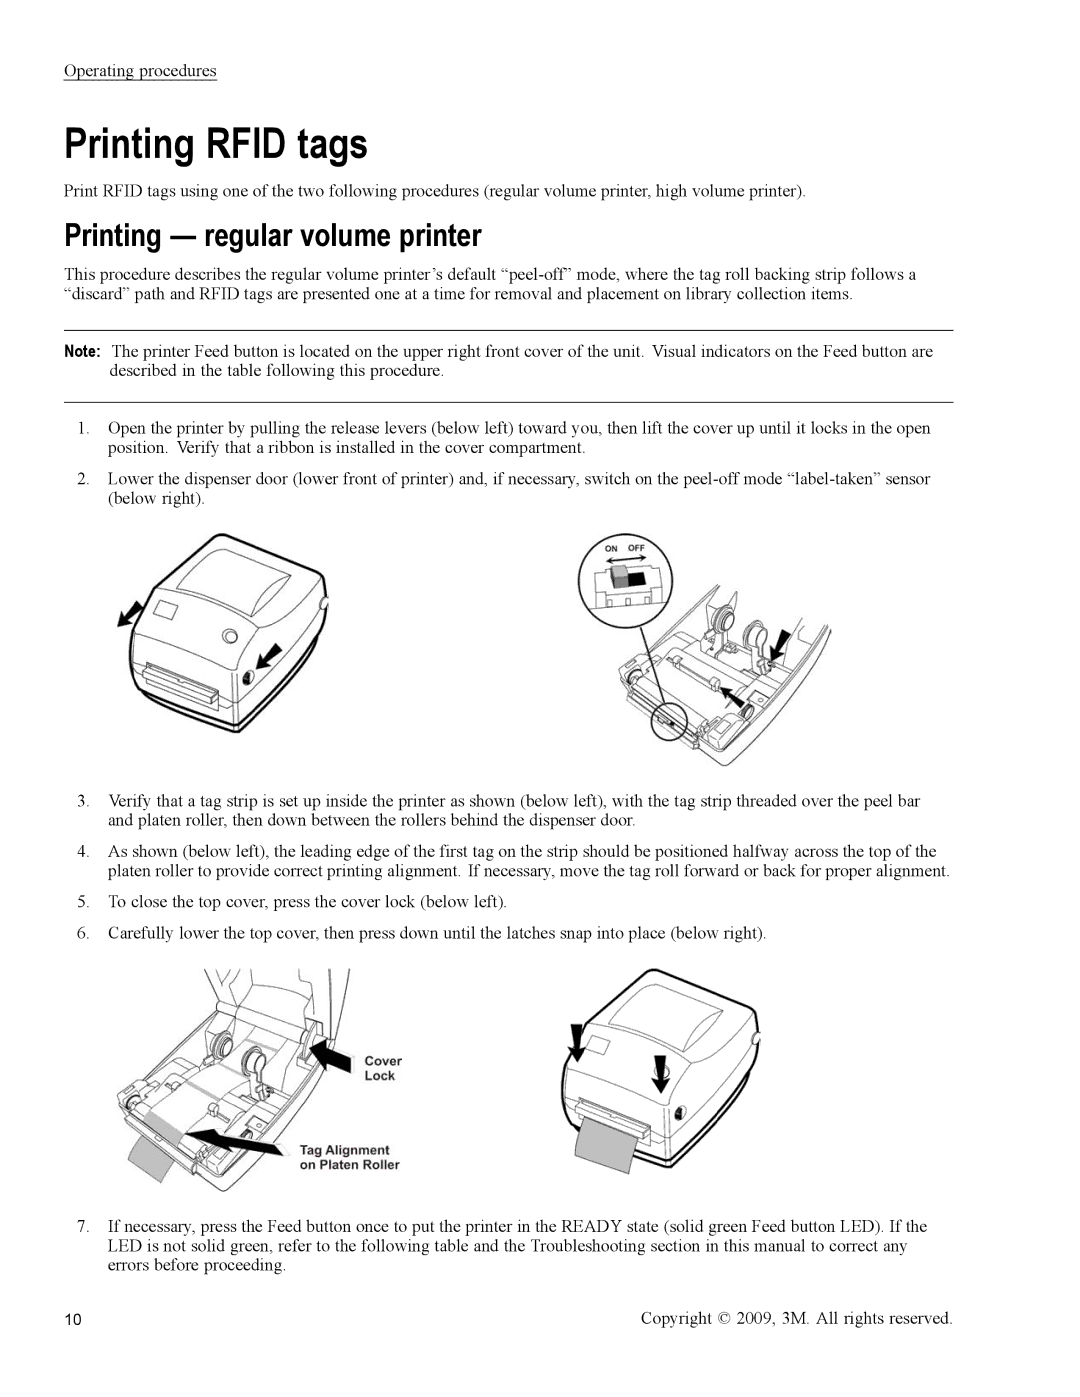
1.Open the printer by pulling the release levers (below left) toward you, then lift the cover up until it locks in the open position. Verify that a ribbon is installed in the cover compartment.
2.Lower the dispenser door (lower front of printer) and, if necessary, switch on the
3.Verify that a tag strip is set up inside the printer as shown (below left), with the tag strip threaded over the peel bar and platen roller, then down between the rollers behind the dispenser door.
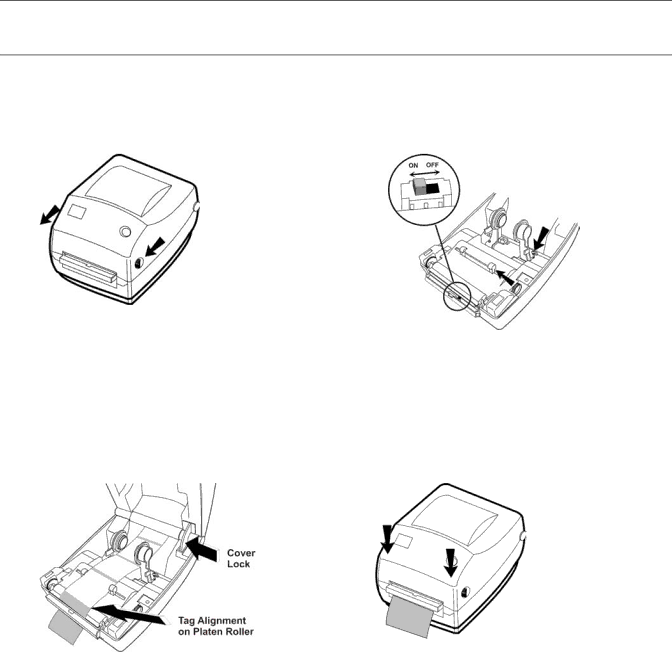
4.As shown (below left), the leading edge of the first tag on the strip should be positioned halfway across the top of the platen roller to provide correct printing alignment. If necessary, move the tag roll forward or back for proper alignment.
5.To close the top cover, press the cover lock (below left).
6.Carefully lower the top cover, then press down until the latches snap into place (below right).
7.If necessary, press the Feed button once to put the printer in the READY state (solid green Feed button LED). If the LED is not solid green, refer to the following table and the Troubleshooting section in this manual to correct any errors before proceeding.
10 | Copyright © 2009, 3M. All rights reserved. |