Operating procedures
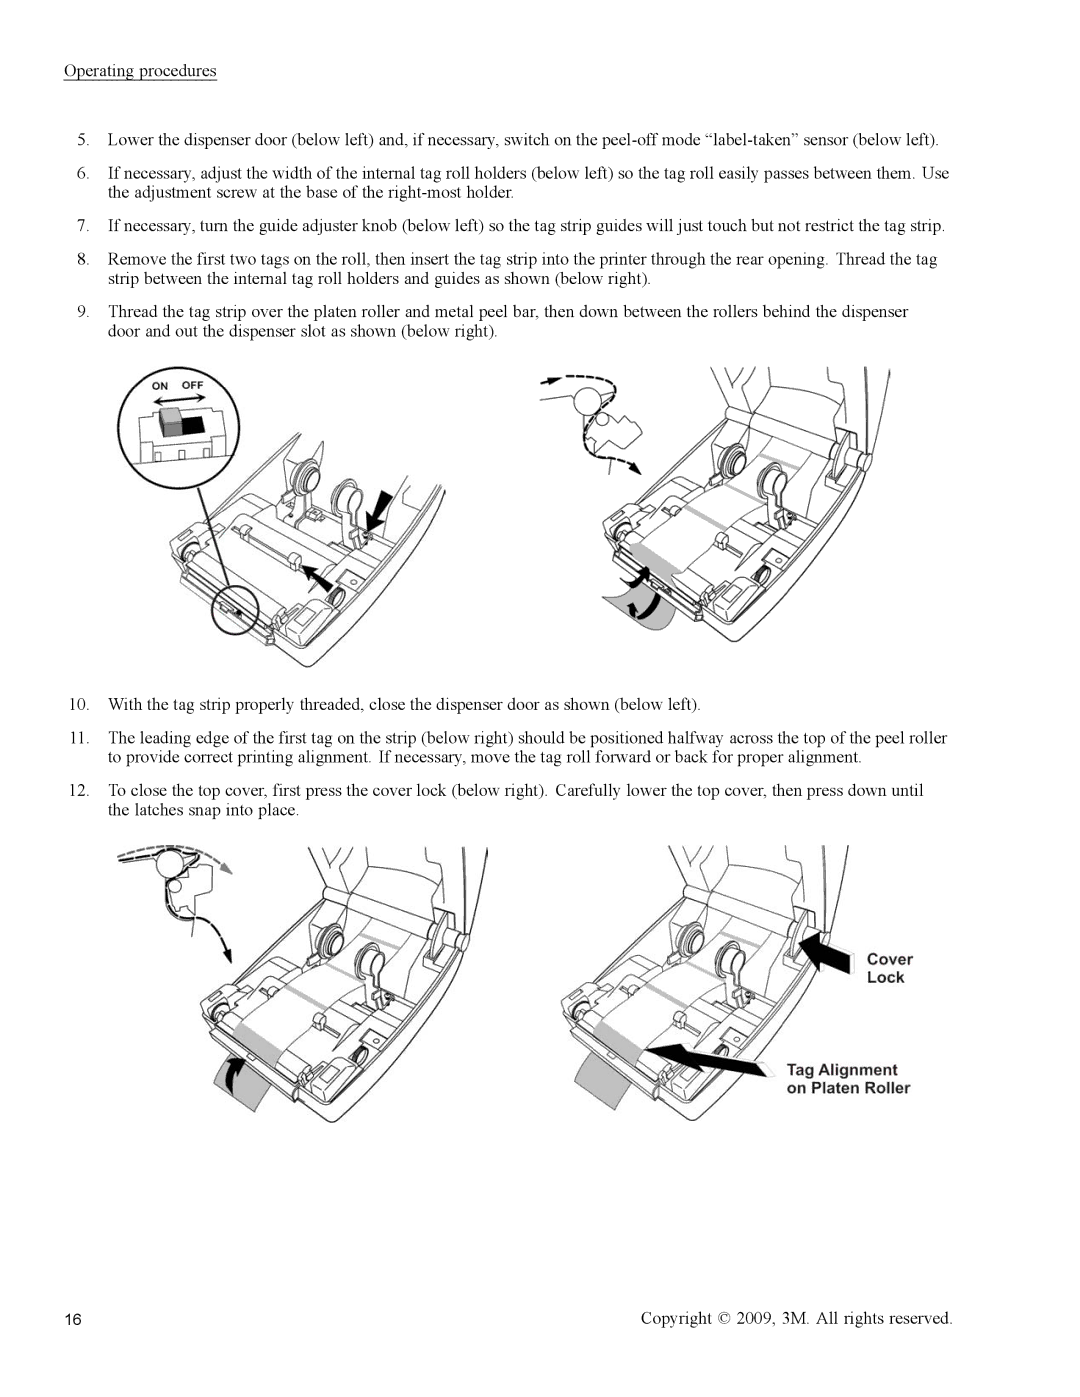
5.Lower the dispenser door (below left) and, if necessary, switch on the
6.If necessary, adjust the width of the internal tag roll holders (below left) so the tag roll easily passes between them. Use the adjustment screw at the base of the
7.If necessary, turn the guide adjuster knob (below left) so the tag strip guides will just touch but not restrict the tag strip.
8.Remove the first two tags on the roll, then insert the tag strip into the printer through the rear opening. Thread the tag strip between the internal tag roll holders and guides as shown (below right).
9.Thread the tag strip over the platen roller and metal peel bar, then down between the rollers behind the dispenser door and out the dispenser slot as shown (below right).
10.With the tag strip properly threaded, close the dispenser door as shown (below left).
11.The leading edge of the first tag on the strip (below right) should be positioned halfway across the top of the peel roller to provide correct printing alignment. If necessary, move the tag roll forward or back for proper alignment.
12.To close the top cover, first press the cover lock (below right). Carefully lower the top cover, then press down until the latches snap into place.
16 | Copyright © 2009, 3M. All rights reserved. |