Operating procedures
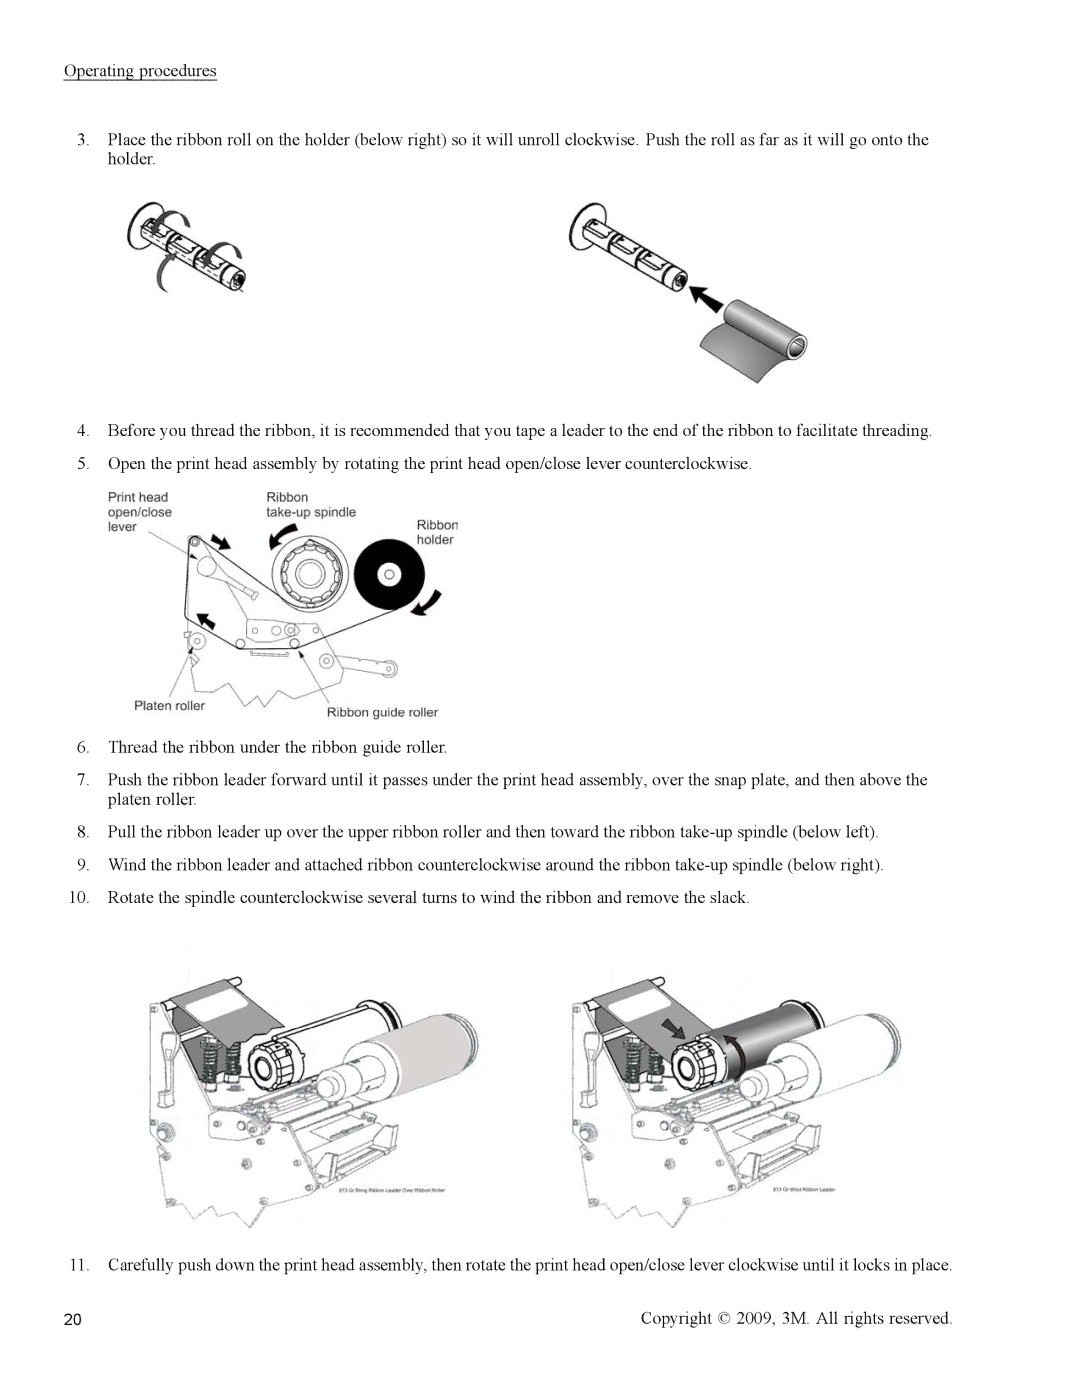
3.Place the ribbon roll on the holder (below right) so it will unroll clockwise. Push the roll as far as it will go onto the holder.
4.Before you thread the ribbon, it is recommended that you tape a leader to the end of the ribbon to facilitate threading.
5.Open the print head assembly by rotating the print head open/close lever counterclockwise.
6.Thread the ribbon under the ribbon guide roller.
7.Push the ribbon leader forward until it passes under the print head assembly, over the snap plate, and then above the platen roller.
8.Pull the ribbon leader up over the upper ribbon roller and then toward the ribbon
9.Wind the ribbon leader and attached ribbon counterclockwise around the ribbon
10.Rotate the spindle counterclockwise several turns to wind the ribbon and remove the slack.
11. Carefully push down the print head assembly, then rotate the print head open/close lever clockwise until it locks in place.
20 | Copyright © 2009, 3M. All rights reserved. |
