Reference — Hardware installation
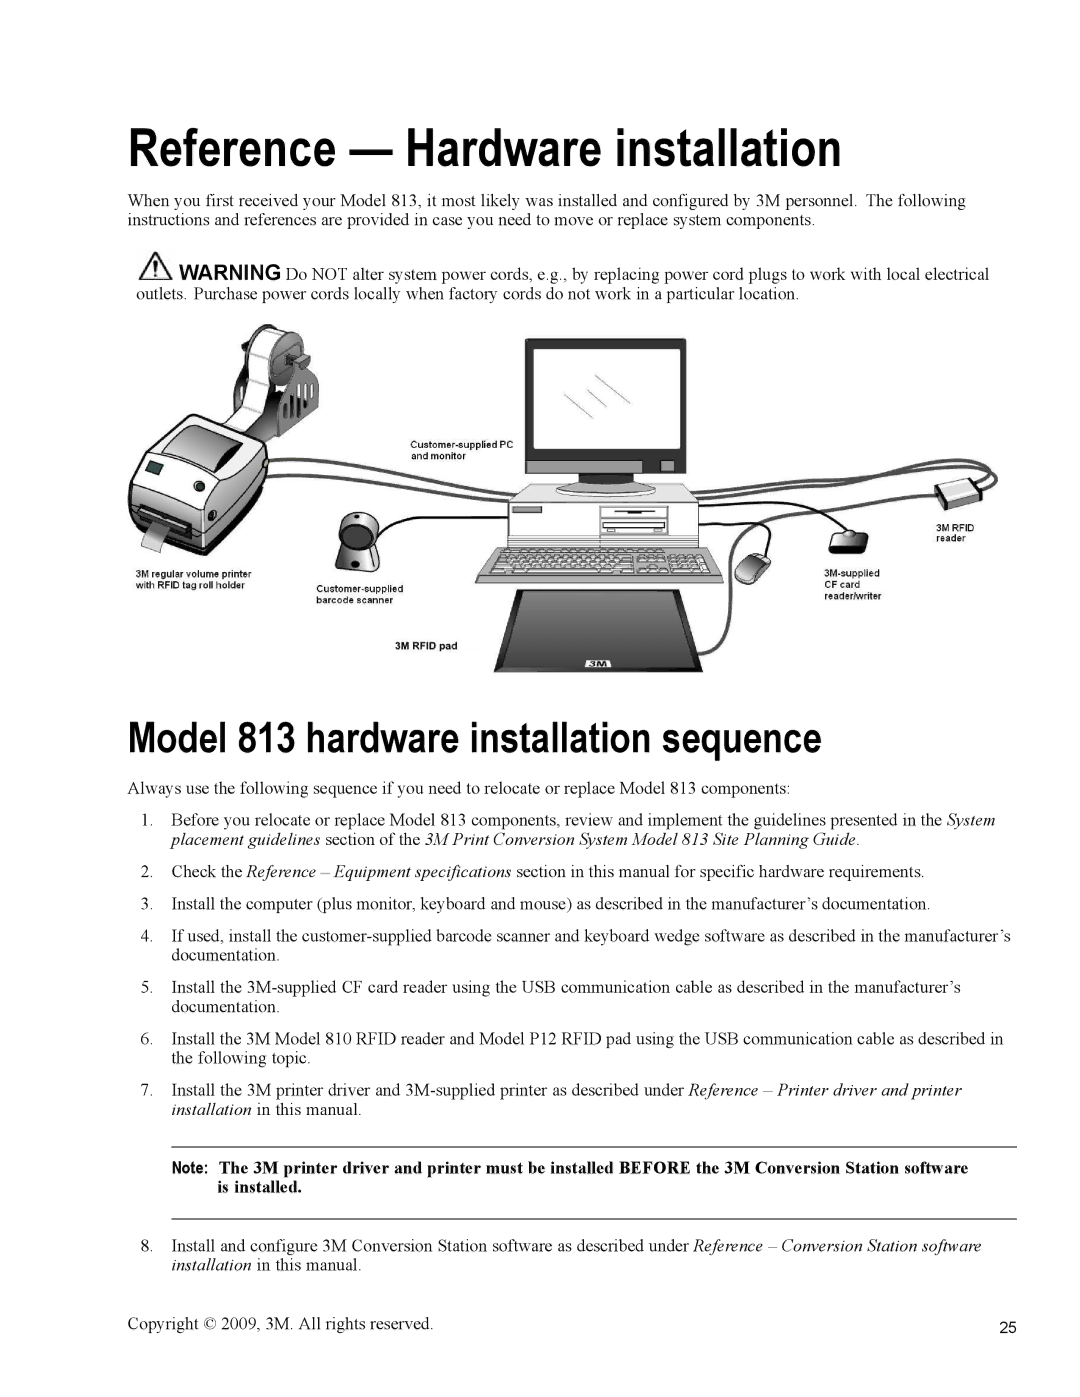
When you first received your Model 813, it most likely was installed and configured by 3M personnel. The following instructions and references are provided in case you need to move or replace system components.
![]() WARNING Do NOT alter system power cords, e.g., by replacing power cord plugs to work with local electrical outlets. Purchase power cords locally when factory cords do not work in a particular location.
WARNING Do NOT alter system power cords, e.g., by replacing power cord plugs to work with local electrical outlets. Purchase power cords locally when factory cords do not work in a particular location.
Model 813 hardware installation sequence
Always use the following sequence if you need to relocate or replace Model 813 components:
1.Before you relocate or replace Model 813 components, review and implement the guidelines presented in the System placement guidelines section of the 3M Print Conversion System Model 813 Site Planning Guide.
2.Check the Reference – Equipment specifications section in this manual for specific hardware requirements.
3.Install the computer (plus monitor, keyboard and mouse) as described in the manufacturer’s documentation.
4.If used, install the
5.Install the
6.Install the 3M Model 810 RFID reader and Model P12 RFID pad using the USB communication cable as described in the following topic.
7.Install the 3M printer driver and
Note: The 3M printer driver and printer must be installed BEFORE the 3M Conversion Station software is installed.
8.Install and configure 3M Conversion Station software as described under Reference – Conversion Station software installation in this manual.
Copyright © 2009, 3M. All rights reserved. | 25 |
