Straight Stitching |
| Point droit |
STITCH LENGTH | |
|
|
STITCH WIDTH | 0 |
|
|
NEEDLE POSITION | M, L, R (For twin needle sewing, always set |
| at M.) |
|
|
PRESSER FOOT | Zigzag |
|
|
NEEDLE | Single or Twin |
|
|
Starting Sewing
1.Raise the needle to its highest position and lift the presser foot le- ver.
2.Pull up the bobbin thread by turning the balance wheel toward you (counterclockwise) and place both the upper and lower threads toward the back behind the presser foot.
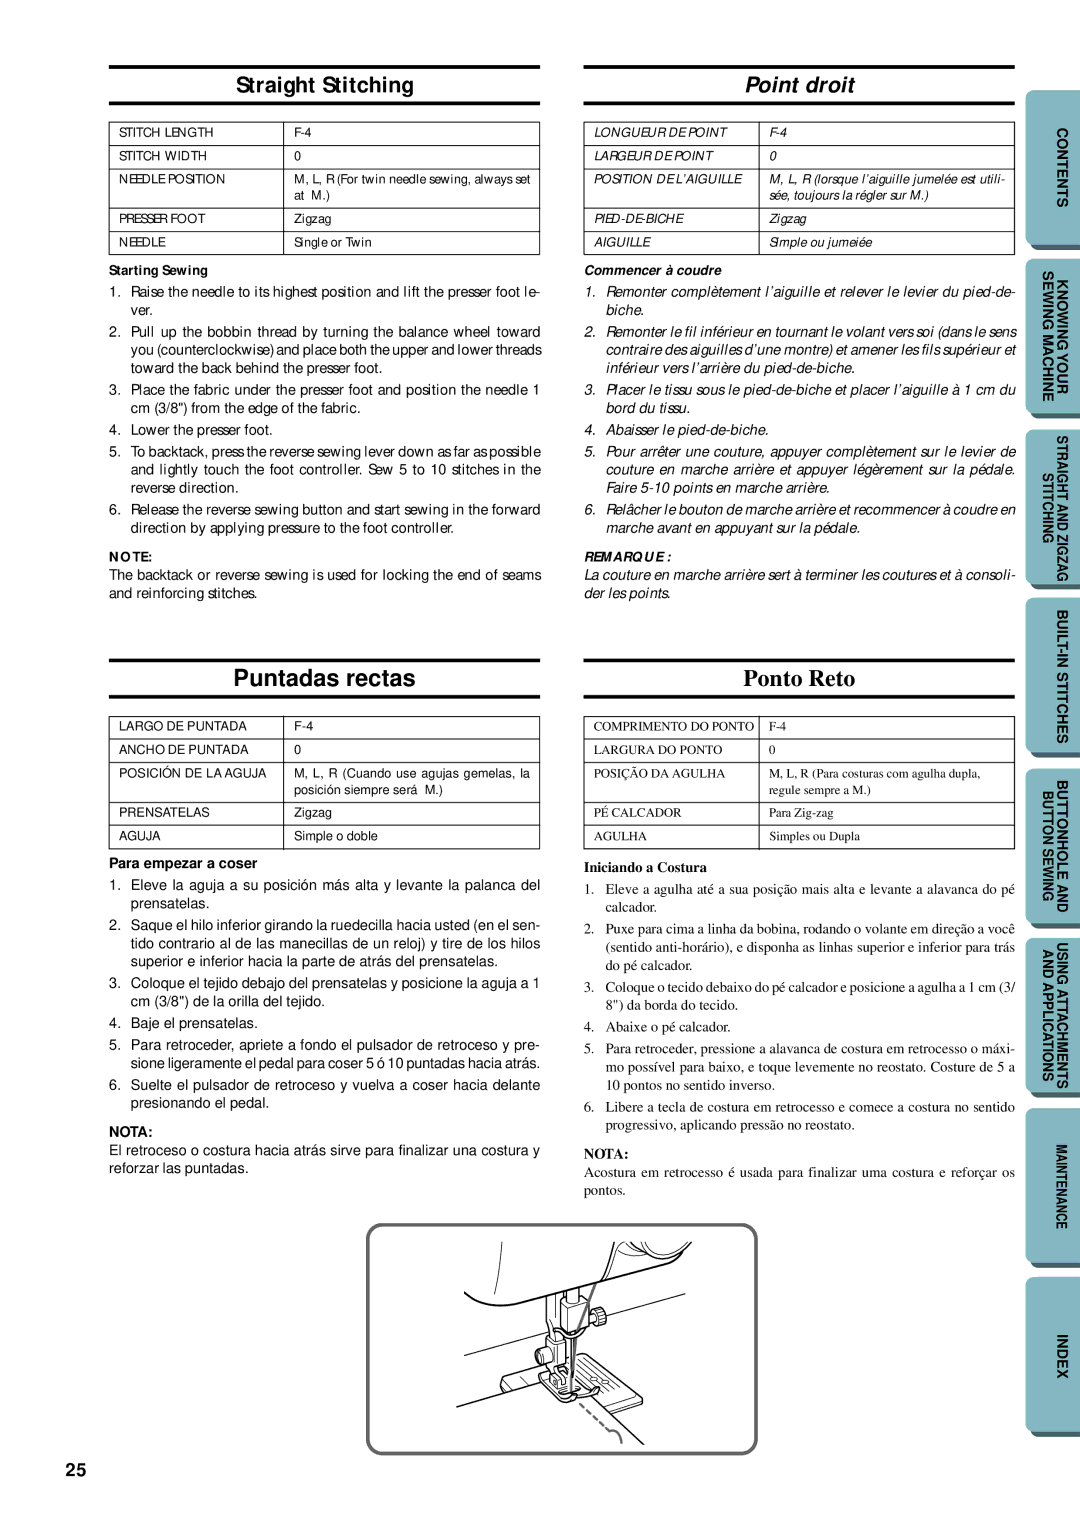
3.Place the fabric under the presser foot and position the needle 1 cm (3/8") from the edge of the fabric.
4.Lower the presser foot.
5.To backtack, press the reverse sewing lever down as far as possible and lightly touch the foot controller. Sew 5 to 10 stitches in the reverse direction.
6.Release the reverse sewing button and start sewing in the forward direction by applying pressure to the foot controller.
NOTE:
The backtack or reverse sewing is used for locking the end of seams and reinforcing stitches.
Puntadas rectas
LARGO DE PUNTADA | |
|
|
ANCHO DE PUNTADA | 0 |
|
|
POSICIÓN DE LA AGUJA | M, L, R (Cuando use agujas gemelas, la |
| posición siempre será M.) |
|
|
PRENSATELAS | Zigzag |
|
|
AGUJA | Simple o doble |
|
|
Para empezar a coser
1.Eleve la aguja a su posición más alta y levante la palanca del prensatelas.
2.Saque el hilo inferior girando la ruedecilla hacia usted (en el sen- tido contrario al de las manecillas de un reloj) y tire de los hilos superior e inferior hacia la parte de atrás del prensatelas.
3.Coloque el tejido debajo del prensatelas y posicione la aguja a 1 cm (3/8") de la orilla del tejido.
4.Baje el prensatelas.
5.Para retroceder, apriete a fondo el pulsador de retroceso y pre- sione ligeramente el pedal para coser 5 ó 10 puntadas hacia atrás.
6.Suelte el pulsador de retroceso y vuelva a coser hacia delante presionando el pedal.
NOTA:
El retroceso o costura hacia atrás sirve para finalizar una costura y reforzar las puntadas.
LONGUEUR DE POINT | |
|
|
LARGEUR DE POINT | 0 |
|
|
POSITION DE L’AIGUILLE | M, L, R (lorsque l’aiguille jumelée est utili- |
| sée, toujours la régler sur M.) |
|
|
Zigzag | |
|
|
AIGUILLE | Simple ou jumeiée |
|
|
Commencer à coudre
1.Remonter complètement l’aiguille et relever le levier du
2.Remonter le fil inférieur en tournant le volant vers soi (dans le sens contraire des aiguilles d’une montre) et amener les fils supérieur et inférieur vers l’arrière du
3.Placer le tissu sous le
4.Abaisser le
5.Pour arrêter une couture, appuyer complètement sur le levier de couture en marche arrière et appuyer légèrement sur la pédale. Faire
6.Relâcher le bouton de marche arrière et recommencer à coudre en marche avant en appuyant sur la pédale.
REMARQUE :
La couture en marche arrière sert à terminer les coutures et à consoli- der les points.
Ponto Reto
COMPRIMENTO DO PONTO | |
|
|
LARGURA DO PONTO | 0 |
|
|
POSIÇÃO DA AGULHA | M, L, R (Para costuras com agulha dupla, |
| regule sempre a M.) |
|
|
PÉ CALCADOR | Para |
|
|
AGULHA | Simples ou Dupla |
|
|
Iniciando a Costura
1.Eleve a agulha até a sua posição mais alta e levante a alavanca do pé calcador.
2.Puxe para cima a linha da bobina, rodando o volante em direção a você (sentido
3.Coloque o tecido debaixo do pé calcador e posicione a agulha a 1 cm (3/ 8") da borda do tecido.
4.Abaixe o pé calcador.
5.Para retroceder, pressione a alavanca de costura em retrocesso o máxi- mo possível para baixo, e toque levemente no reostato. Costure de 5 a 10 pontos no sentido inverso.
6.Libere a tecla de costura em retrocesso e comece a costura no sentido progressivo, aplicando pressão no reostato.
NOTA:
Acostura em retrocesso é usada para finalizar uma costura e reforçar os pontos.
| CONTENTS |
SEWING MACHINE | KNOWING YOUR |
STITCHING | STRAIGHT AND ZIGZAG |
| |
BUTTON SEWING | BUTTONHOLE AND |
AND APPLICATIONS | USING ATTACHMENTS |
| MAINTENANCE |
INDEX
25