INSTALLATION
3.2.3Rack Mounting the SEHI
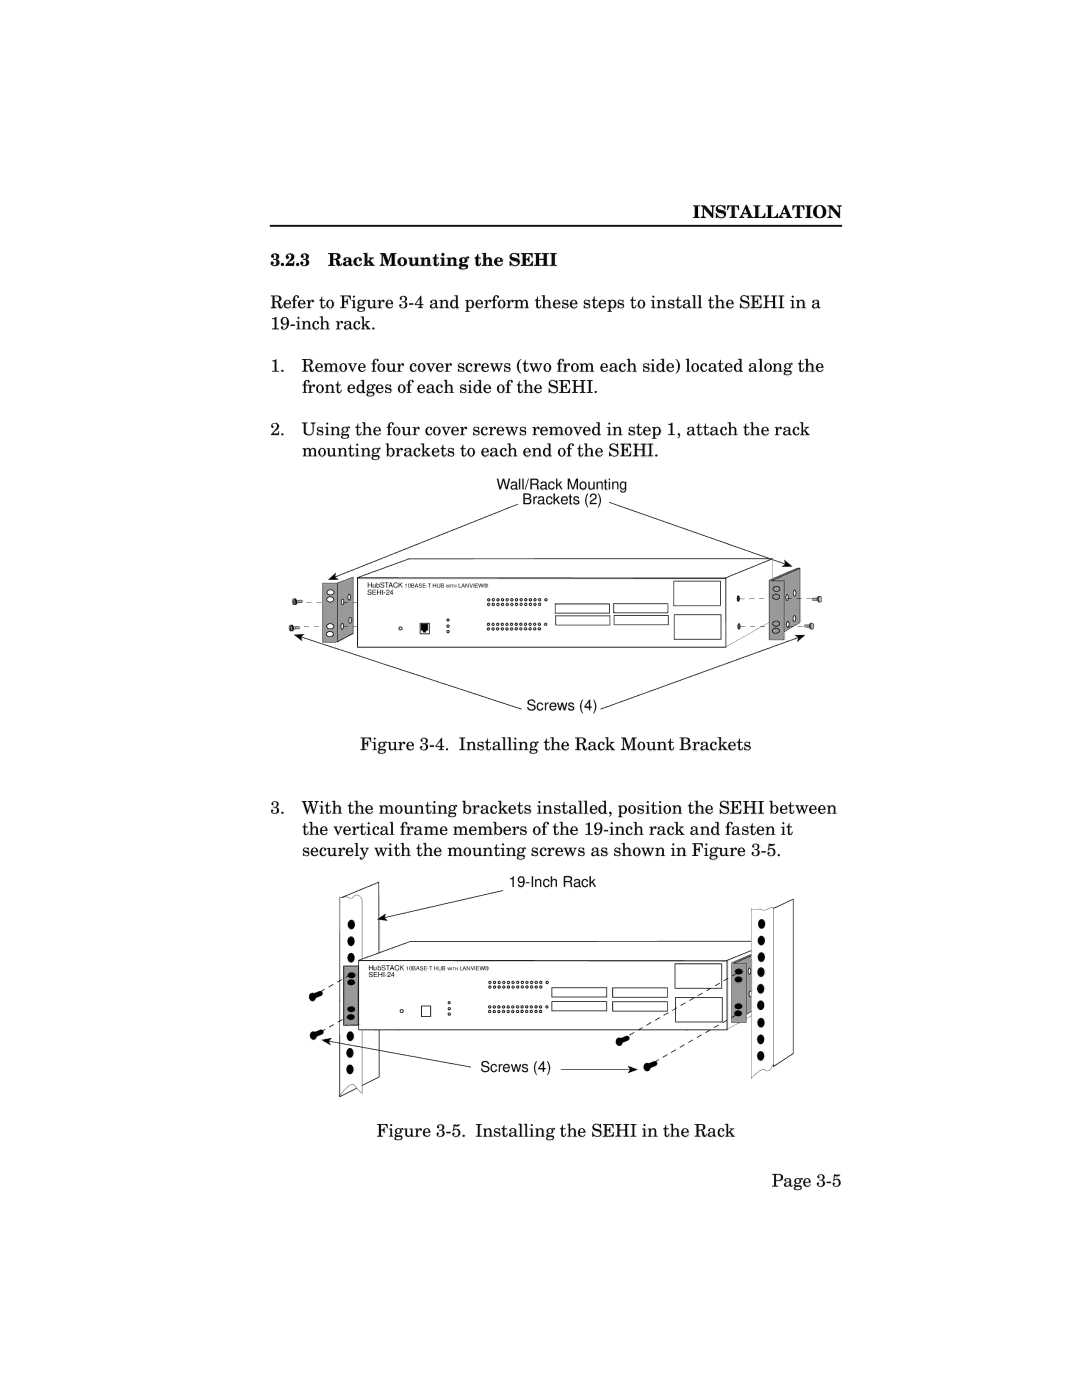
Refer to Figure
1.Remove four cover screws (two from each side) located along the front edges of each side of the SEHI.
2.Using the four cover screws removed in step 1, attach the rack mounting brackets to each end of the SEHI.
Wall/Rack Mounting
Brackets (2)
HubSTACK
Screws (4)
Figure 3-4. Installing the Rack Mount Brackets
3.With the mounting brackets installed, position the SEHI between the vertical frame members of the 19-inch rack and fasten it securely with the mounting screws as shown in Figure 3-5.
HubSTACK
Screws (4)
Figure 3-5. Installing the SEHI in the Rack
Page