INSTALLATION
3.You will need a pencil for this step. With the wall mounting brackets attached to the SEHI, position the SEHI against the wall where it will be permanently mounted with the network port facing down. Use the pencil to mark the wall location for the four pilot holes.
4.Set the SEHI aside and carefully drill four 1/4" pilot holes, one for each of the Molly screw anchors and insert the four Molly screw anchors into the holes just drilled.
5.Tighten each of the anchor screws until the anchor expands holding the anchor firmly in the wall, then remove the screws completely.
6.Position the SEHI on the wall over the anchors and reinstall the four anchor screws to attach the SEHI to the wall, as shown in Figure
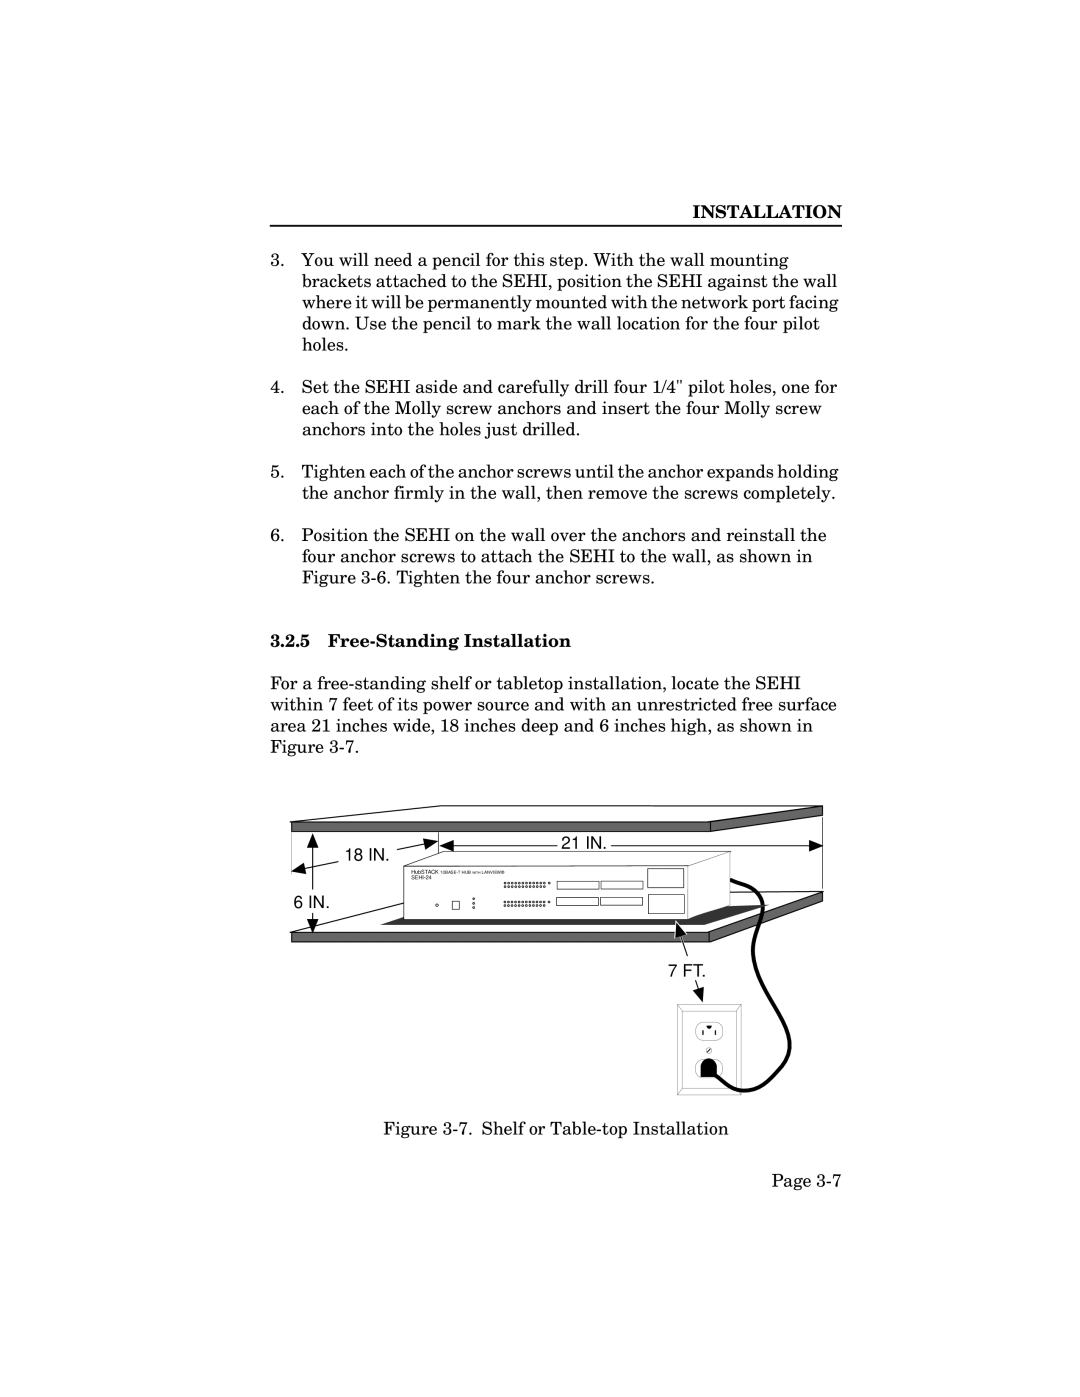
3.2.5Free-Standing Installation
For a
18 IN.
HubSTACK
6 IN.
21 IN.
7 FT.
Figure 3-7. Shelf or Table-top Installation
Page