Instruction Manual
DIGITAL VIDEO CAMCORDER
Information
Additional
Important Usage Instructions
Contents
~ When Making Manual Adjustments ...~
~ Preparations ~
~ Basic Recording ~
Thank you for Choosing a Canon
Getting started
Introducing the MV4/MV4i/MV4i MC
Finding Your Way Around the Camera
SCAN
Mastering the Basics
MOVIE
Mastering the Basics
Powering Your Camcorder
2. Connect the power cable to the adapter
3. Plug the power cable into a mains outlet
4. Connect the DC coupler to the adapter
2. Attach the battery pack to the power adapter
3. Take the battery pack off the adapter and attach it to the camera
4. Remove the battery pack after use
Charging and attaching the battery packs
Specifications
Power supply
Power consumption
Operating temperature range
1. Make sure that you have attached a power source
Loading a Cassette
3. Load or unload the cassette
5. Click the cover back into place
Protecting tapes from accidental erasure
Handling cassettes
Cassette memory
REC SAVE REC SAVE
Basic Recording
2. Load a cassette
Before you start recording
To record
3. Slide the program selector to
4. Press and release the start/stop button once to begin recording
5. Press and release the start/stop button again to pause recording
When you have finished recording
About all 3 extended recording modes
Recording times this example uses an 80-minute tape
Changing the recording mode
169 Widescreen TV recording
About SP and LP modes
About the POWER dial lock lever
Confirmation/Warning beeps
40⋅ digital zoom
Zooming
10⋅ optical zoom
Changing the angle of the LCD screen
Using the LCD Screen
Open the LCD screen
Adjusting the LCD screen
About the LCD Screen
Allowing the subject to monitor recording
Playing Back a Cassette
2. Load the cassette 3. Press the e play button to start playback
Other playback modes
Playback pause
Fast forward playback
Rewind playback
Frame Advance
Frame Reverse
Slow Forward Playback
Slow Reverse Playback
Built-in speaker
1. Make sure that the camera is switched off
Connections for Playback on a TV Screen
2. Align the terminals of the docking unit and the camera
Attaching the DU-300 Docking Unit
Specifications
Dimensions
Weight
S-video terminal output
If your TV or VCR has an S S1 -video input terminal
S-150 S-video Cable STV-250N Stereo Video Cable
If your TV or VCR has audio/video input terminals
VIDEO
Tips for Making Better Videos
Using a tripod
Holding the camera
Composition
Picture angle
Camera moves
Long shot Medium shot Close-up
Pan Tilt
Turning the Image Stabilizer Off
Using the Menus
2 C.REC MENU CARD
MV4i MC only
2 PLAY MENU PLAY VCR MV4i and MV4i MC VCR
POWER
POWER
MV4i
MV4i MC
1. Turn the POWER dial to the appropriate setting
7. Turn the SELECT dial and move the arrow to the desired setting
2. Press the MENU button to open the menu
3. Turn the SELECT dial and move the arrow to the desired submenu
e Camera set up submenu
List of Menus
2 CAM. MENU
q Digital effects submenu
r VCR set up submenu
t Display set up submenu
2 PLAY MV4i and MV4i MC VCR MENU
y System submenu
w VCR set up submenu
e Card set up submenu MV4i MC only
t Display set up submenu
q Digital effects submenu
w Camera set up submenu
e Card set up submenu
2 C. REC MENU MV4i MC only
y System submenu
r Display set up submenu
6Mirror mode
@0Wireless controller
q-1 Card operations submenu when playing back a single image
q-2 Card operations submenu when displaying an index screen
w VCR set up submenu
o Record mode
e Display set up submenu
Using the Wireless Controller/Tally Lamp
Inserting batteries
Press and hold the REMOTE SET button on the wireless controller
When Operating 2 Canon DV Camcorders Remote Sensor Mode
If your wireless controller isn’t working
Turning off the tally lamp
Setting the Date and Time
1. Open the menu and select SYSTEM 2. Select T.ZONE/DST
4. Close the menu
Setting the time zone/daylight saving time
Page
5. Press the MENU button when finished, and to start the clock
1. Open the menu and select SYSTEM 2. Select D/TIME SET
4. Set the month, day, hours, and minutes in the same way
Setting the clock
Recording in Progressive Scan Mode
1. Set the POWER dial lock lever to the 22 position
2. Turn the POWER dial to P.SCAN
3. Press the start/stop button to begin recording
Taking Still Pictures to a Cassette
1. Press the PHOTO button halfway down and hold it
2. Press the PHOTO button fully down to take the still picture
Record review
Searching and Reviewing While Recording
Record search
Using the Various Recording Programs
Availability of functions in each recording program
1. Slide the program selector to Q program AE mode
2. Press the SELECT dial in to display the program menu
3. Turn the SELECT dial to move the arrow up or down the display
4. Press the SELECT dial in to select the desired program
Easy Recording
Auto
Sports
Portrait
Low Light
Spotlight
Sand & Snow
Using Digital Effects
Availability of digital effects by mode
You cannot operate digital effects while photo/date searching
Faders
Fade Trigger FADE-T
Wipe WIPE
Scroll SCROLL
Effects
Art ART
Black and White BLK & WHT
Sepia SEPIA
5. Select the desired setting
1. Open the menu and select D.EFFECTS 2. Select D.E.SELECT
3. Select FADER
6. Close the menu
8. If you’re in MOVIE or
If you’re in PLAY MV4i
3. Select EFFECT
8. Press the D.EFFECTS ON/OFF button
Using the Multi-Image Screen
5. Select the desired setting 6. Select M.S. SPLIT
3. Select MULTI-S
4. Select M.S. SPEED
7. Select the desired setting 8. Close the menu
9. Push the D.EFFECTS ON/OFF button
Audio Recording
Selecting the audio mode
External microphone and headphones
MV4i/MV4i MC only
1. Attach the microphone to the adapter bracket
2. Attach the adapter bracket to the docking unit
3. Connect the microphone
Wind screen
Setting the Self-Timer
1. Press the self-timer button on the body of the camera or
the SELF TIMER button on the wireless controller
2. Press the start/stop button
2. Press a PHOTO button on the camera body or the wireless controller
Exposure lock
Adjusting Exposure Manually
Exposure adjustment
1. Make sure the camera is set the Q program AE mode
3. Open the menu and select CAM.SET UP 4. Select SHUTTER
2. Press the SELECT dial in and choose AUTO from the program menu
5. Press the SELECT dial in to select the desired shutter speed
Guidelines for shooting using high shutter speeds
Recommended shutter speeds when shooting
Manual focus
Adjusting Focus Manually
Focus lock
Setting the White Balance
1. Make sure the camera is set to the Q program AE mode
2. Open the menu and select CAM.SET UP 3. Select WHITE BAL
5. Close the menu
Subjects with one dominant colour, such as sky, sea or forest
Displaying Date, Time and Camera Data Data Code
Selecting date/time
Setting the data code
Six-second auto date
Searching the Tape Photo Search/Date Search
1. Press the SEARCH SELECT button to choose between photo/date search
Returning to a Pre-Marked Position
Editing to a VCR
1. Connect the camera to the VCR
2. Prepare the TV and VCR
2. Start to play it back while you monitor the picture on the TV
3. Turn the camera’s POWER dial to PLAY and load a recorded cassette
Dubbing with Digital Video Equipment
1. Connect the camera and the other digital device
2. Prepare the other device
3. Turn the camera’s POWER dial to VCR and load a blank cassette
MV4i and MV4i MC
1. Connect the camera and the other digital device
2. Prepare the other device
6. Stop playback on the other device
2. Press the camera’s REC PAUSE button
4. Press the pause button
1. Connect the camcorder to the VCR 2. Prepare the device
3. Turn the camera’s POWER dial to VCR and load a blank cassette
OUTPUT
SS1-VIDEO
2. Press the REC PAUSE button
Dubbing
4. Press the pause button
6. Stop playback on the other device
The playback tape
Before inserting The tape in the camera After inserting
The tape in the camera
Insert end point
1. Connect the camcorder to the VCR 2. Prepare the VCR and TV
The tape in the MV4i/MV4i MC
The playback tape
3. Press the A/V INSERT button
4. Play back the cassette in the VCR
5. To start inserting, press the PAUSE button of the MV4i/MV4i MC
6. To stop inserting, press the STOP button of the MV4i/MV4i MC
To connect an external microphone
Audio Dubbing
For MV4 For MV4i/MV4i MC
2. Press AUDIO DUB
3. Press the PAUSE button
AUDIO
STOP +
You can not use the DV terminal while adding sound
For MV4i/MV4i MC For MV4
To connect other audio equipment
To connect an external microphone
i. e. CD player
1. Open the menu and select VCR SET UP 2. Select AUDIO DUB
3. Select AUDIO IN or MIC. IN and close the menu
5. Press AUDIO DUB
Setting the Audio Mix
1. Choose the output
1. Load a tape recorded with multiple-channel audio
Selecting audio output channels
Connecting to a PC
Memory Card Introduction -MV4i MC only
You can do the following with a memory
card
SD Memory Card SDC-8M
1. Turn the POWER dial to OFF
3. Insert straight or remove the memory card
4. Close the cover
Inserting and removing the memory card
The number of pixels is 640 ⋅ 480 VGA in both FINE and STANDARD modes
1 CONTINUOUS
2 RESET
File numbers
Using
Turning the shutter sound off
a Memory Card
MV4i MC only
Recording Still Images to a Memory Card
3. Press the PHOTO button halfway and hold it
4. Press the PHOTO button fully down to record the still picture
1. Set the POWER dial lock lever to the 22 position
Backup battery 129
Remaining battery power 127
Image quality
50 Number of images that can
Recording an Image from a Cassette as a Still Image
1. Play back the cassette
Recording from Another DV Device as a Still Image
1. Connect the camera to the other digital device
1. Start playback on the other device
2. Prepare the other device
Viewing Still Images
Single Image
MV4i MC only
There are 3 ways to view still images
With an image in the display, press and hold the CARD +/- button
With an image in the display, press the SLIDE SHOW button
To stop the slide show, press the SLIDE SHOW button
1. With an image in the display, press the INDEX SCREEN button
Settings of the Still Image recorded to memory card
MV4i MC only
Preventing accidental erasure Protect
Marking a still image for printing Print Mark
2. Select PROTECT and press the SELECT dial in
2. Select IMAGE ERASE and press the SELECT dial in
3. Select YES and press the SELECT dial in
CARD PHOTO REVIEW
2. Select PRINT MARK and press the SELECT dial in
File Operation FILE OPER
2. Select PROTECT and press the SELECT dial in
2. Select IMAGE ERASE and press the SELECT dial in
Preventing Accidental Erasure Protect
2. Open the menu and select CARD OPER 3. Select \PROTECT
4. Press the SELECT dial in
1. With an image in the display, press the INDEX SCREEN button
Marking a Still Image for Printing Print Mark
2. Open the menu and select CARD OPER 3. Select \PRINT MARK
1. With an image in the display, press the INDEX SCREEN button
4. Press the SELECT dial in
1. With an image in the display, open the menu and select CARD OPER
2. Select PRINT MARKS ALL ERASE
Using
3. Select YES and press the SELECT dial in
Erasing Still Images
1. Select the image you want to erase
2. Open the menu and select CARD OPER 3. Select IMAGE ERASE
4. Select SINGLE
5. Select YES and press the SELECT dial in
1. Open the menu and select CARD OPER 2. Select IMAGE ERASE
3. Select ALL
4. Select YES and press the SELECT dial in
Combining Images and Recording Them to a Cassette Card Mix
Availability of Card Mix by mode
MV4i MC only
Select from 3 types of Card Mix effects
3. Select MIX TYPE
Mix level
1. Open the menu and select \CARD MIX
4. Select the desired setting
5. Select MIX LEVEL 6. Adjust the mix level
7. Close the menu
8. Press the MIX button
Copying Still Images from a Cassette
2. Open the menu and select CARD OPER 3. Select COPY
4. Select EXECUTE
MV4i MC only
Copying Memory Card Still Images to a Cassette
3. Open the menu and select CARD OPER 4. Select COPY
5. Select EXECUTE
6. Press the 3 button when your desired images have finished copying
Formatting a Memory Card
1. Open the menu and select CARD OPER 2. Select FORMAT
3. Select EXECUTE
4. Select YES
Other Information and Precautions
Memory card operating precautions
Memory Cards confirmed to operate with this camcorder as of September
2001 MultiMediaCard
Card chroma key
Sample images
Card luminance key
Camera chroma key
SD Memory Card Specifications
Operating temperature range
Preparing the Camera
Adjust the viewfinder
Prepare the lens cap
Fasten the grip belt
Charging and recording times
Notes on Using the Batteries
How much power is left?
When to recharge
Taking care of the battery pack
Keep the terminals clean
Storing the battery pack
DANGER
Installing the backup battery
Treat the battery pack with care
Cautions
Maintenance
Avoid high temperatures and high humidity
Avoid sudden changes in temperature
Do not point the lens or viewfinder at strong light sources
Maintenance
Storage
Viewfinder
Camera body and lens
Using the camera abroad
Power sources
Video heads
TV playback
What happens when condensation is detected
Condensation
Protecting the camera from condensation
What you should do
Troubleshooting
Problem ? Nothing happens when I press the buttons
? The camera turned itself off
? The start/stop button doesn’t work
Problem
Recording/Playback Contd
Problem ? The memory card will not insert
? Nothing happens when I press the buttons
? The playback picture is rough with mosaic-like noise
? There’s no picture on the TV screen, even though the tape is moving
Problem ? The wireless controller doesn’t work
? The power indicator is flashing ? The camera malfunctions
? The PHOTO button doesn’t work ? The image cannot be erased
? The camera becomes warm during use
Car Battery Adapter
CA-410 Compact
Digital Device
PC Card Adapter
Optional Accessories
BP-400 Series Battery Packs
Maximum recording time
BP-915
SA-1 Adapter Bracket
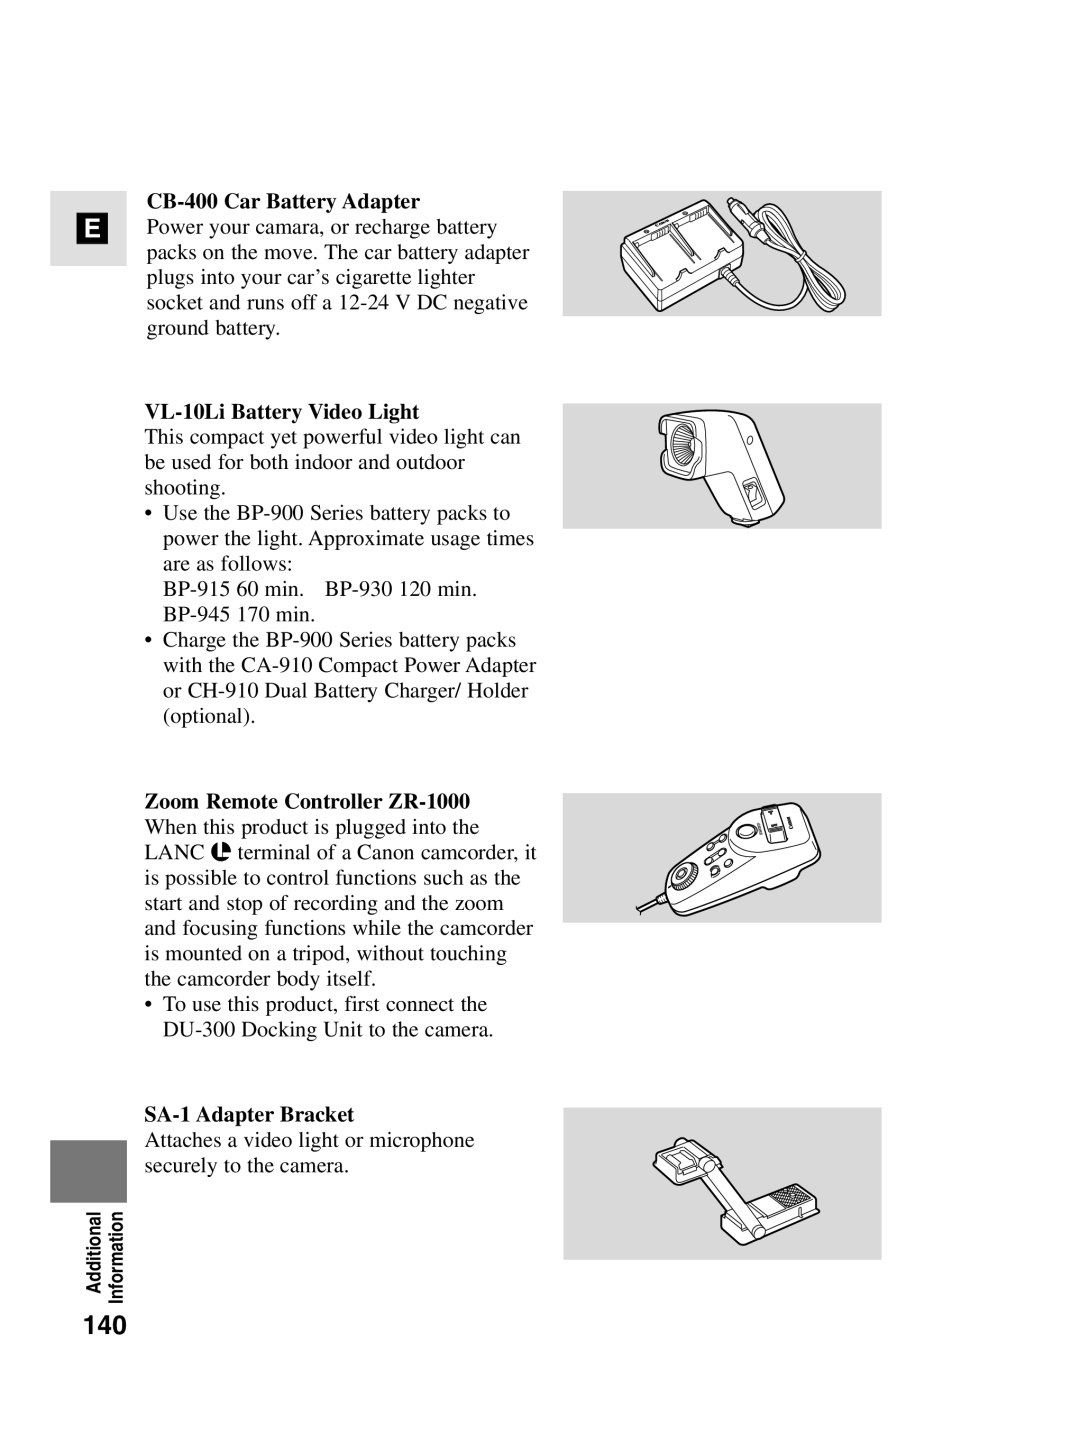
CB-400 Car Battery Adapter
VL-10Li Battery Video Light
SC-1000 Soft Carrying Case
CD-300 Digital Printer
Screen Displays
Turning off the LCD screen displays
MV4i and MV4i MC
Brighter than standard
exposure level
Darker than standard
exposure level
Memory Card Displays MV4i MC only
9/99
Time Code
Recording reminder
REC MODE
AUDIO MODE
Caution phrases
SET THE TIME ZONE DATE AND TIME
PRINT MARK ERROR
HEADS DIRTY
NO CARD NO IMAGES
CARD FULL
Specifications
Power Supply rated 7.4 V DC
Power Consumption while recording with the AF turned on
Minimum illumination 3.5 lx using the low light program
BP-406 Battery Pack
Operating temperature range
0-40C 32-104F Dimensions 48 ⋅ 106 ⋅ 86 mm
1 7/8 ⋅ 41/8 ⋅ 3 3/8 in Weight 390 g 13 3/4 oz
Index
Protect
Page
Menu at a Glance
First make sure the POWER dial
Function
Then select it from
POWER dial is set to
Function
First make sure the
Then select it from
Printed on 100% reused paper
CANON INC Canon Europa N.V
Canon Latin America, Inc