Chapter 2 Replacing Cards in the Cisco 3230 ISR Rugged Enclosure
Card Replacement Process
Replacing the FESMIC
To replace the FESMIC, follow these steps:
Step 1 If WMIC 3 is present, remove WMIC 3 and WMIC 2 as one unit. If only WMIC 2 is present, remove it. Step 2 Disconnect the LED cable from the back of the FESMIC.
Step 3 Remove the FESMIC.
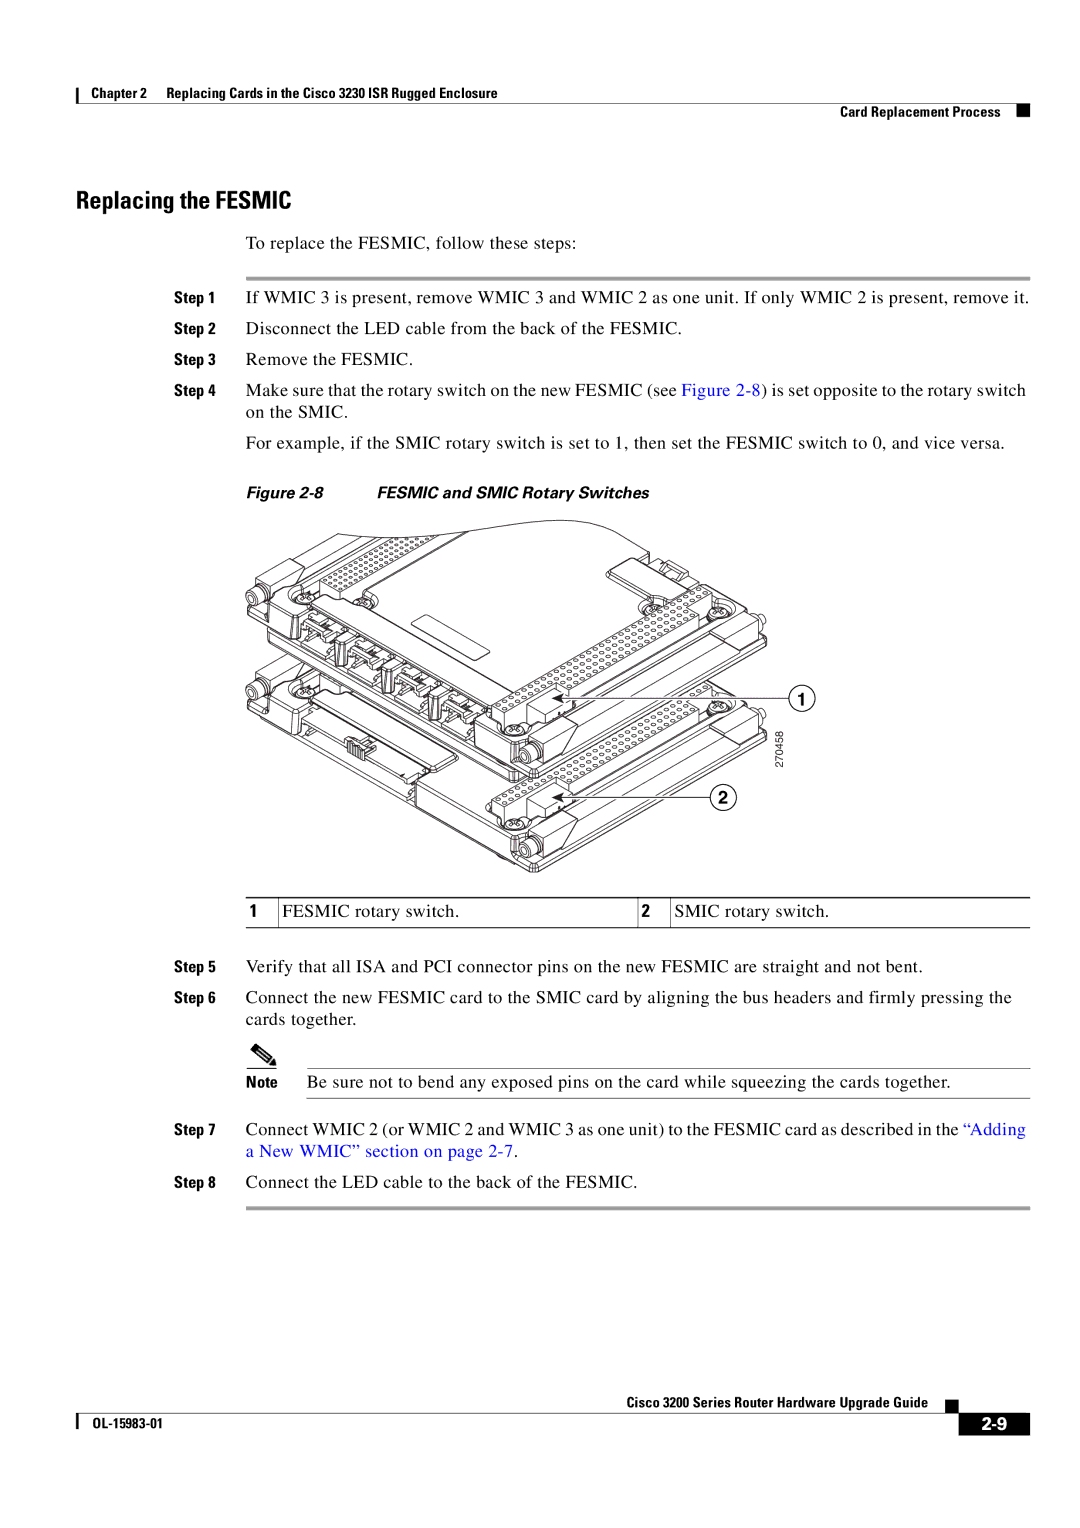
Step 4 Make sure that the rotary switch on the new FESMIC (see Figure
For example, if the SMIC rotary switch is set to 1, then set the FESMIC switch to 0, and vice versa.
Figure 2-8 FESMIC and SMIC Rotary Switches
1
270458
2
1
FESMIC rotary switch.
2
SMIC rotary switch.
Step 5 Verify that all ISA and PCI connector pins on the new FESMIC are straight and not bent.
Step 6 Connect the new FESMIC card to the SMIC card by aligning the bus headers and firmly pressing the cards together.
Note Be sure not to bend any exposed pins on the card while squeezing the cards together.
Step 7 Connect WMIC 2 (or WMIC 2 and WMIC 3 as one unit) to the FESMIC card as described in the “Adding a New WMIC” section on page
Step 8 Connect the LED cable to the back of the FESMIC.
Cisco 3200 Series Router Hardware Upgrade Guide
|
| ||
|
|
