Chapter 2 Replacing Cards in the Cisco 3230 ISR Rugged Enclosure
Card Replacement Process
Reattaching the I/O End Cap
To reattach the I/O end cap, follow these steps:
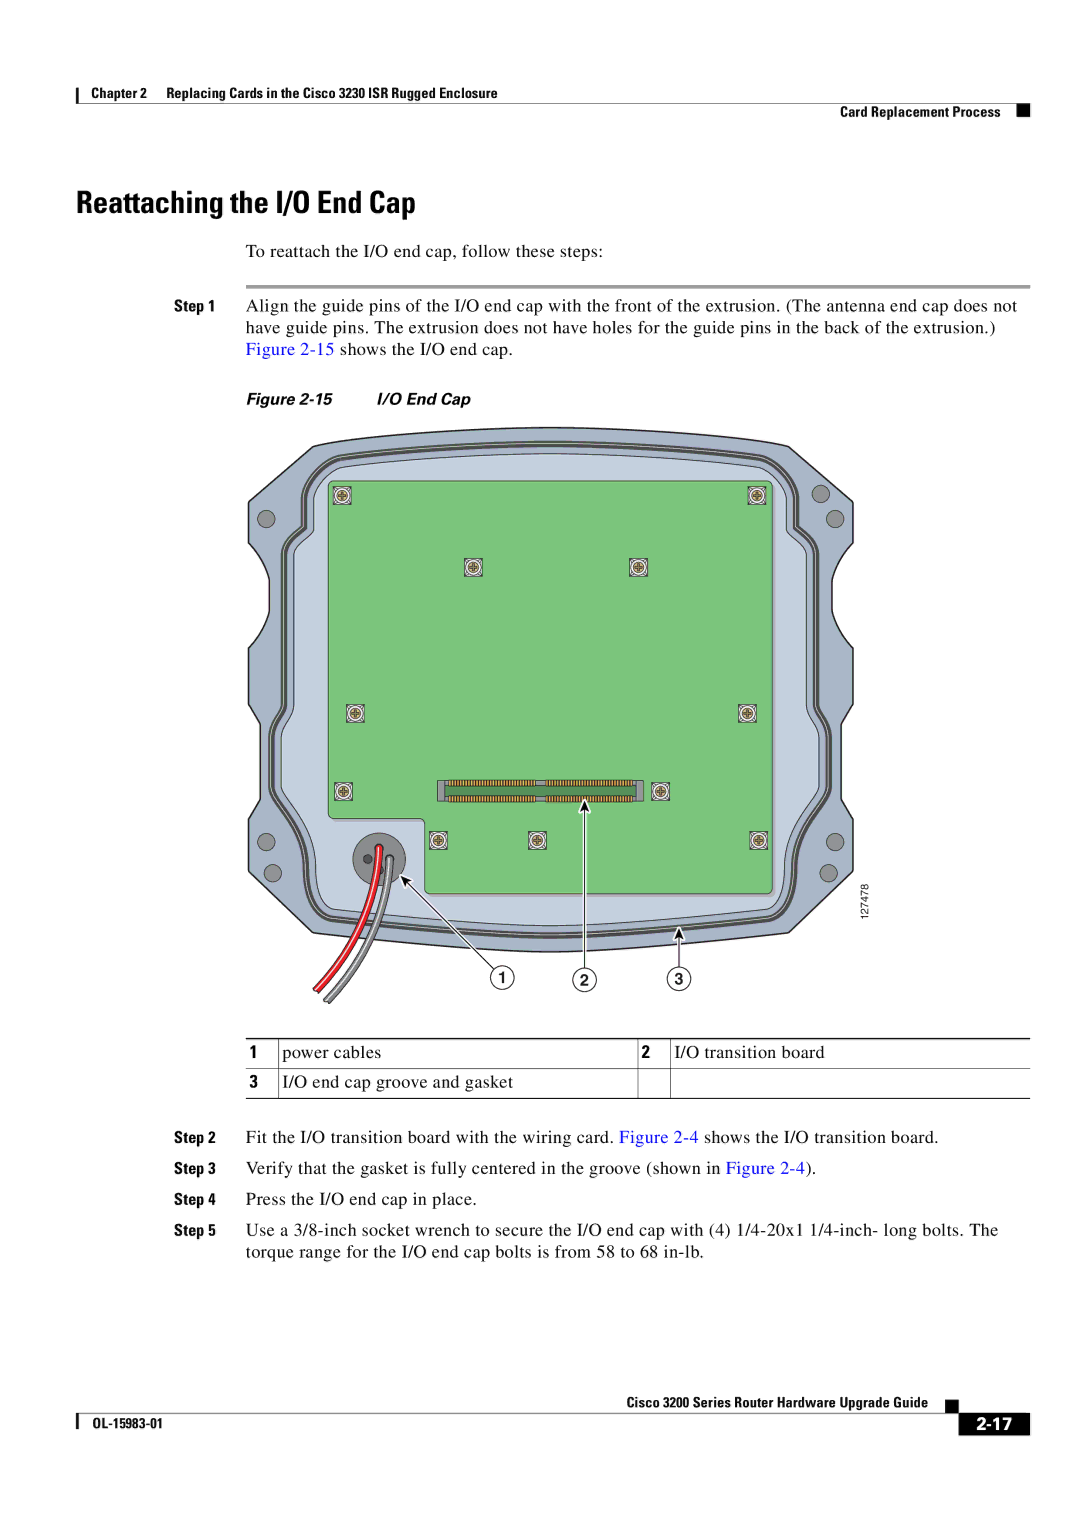
Step 1 Align the guide pins of the I/O end cap with the front of the extrusion. (The antenna end cap does not have guide pins. The extrusion does not have holes for the guide pins in the back of the extrusion.) Figure
Figure |
|
|
| I/O End Cap |
|
|
|
|
|
|
| |||||||
|
|
|
|
|
|
|
|
|
|
|
|
|
|
|
|
|
|
|
|
|
|
|
|
|
|
|
|
|
|
|
|
|
|
|
|
|
|
|
|
|
|
|
|
|
|
|
|
|
|
|
|
|
|
|
|
|
|
|
|
|
|
|
|
|
|
|
|
|
|
|
|
|
|
|
|
|
|
|
|
|
|
|
|
|
|
|
|
|
|
|
|
|
|
|
|
|
|
|
|
|
|
|
|
|
|
|
|
|
|
|
|
|
|
|
|
|
|
|
|
|
|
|
|
|
|
|
|
|
|
|
|
|
|
|
|
|
|
|
|
|
|
|
|
|
|
|
|
|
|
|
|
|
|
|
|
|
|
|
|
|
|
|
|
|
|
|
|
|
|
|
127478
1 2 3
1
3
power cables | 2 I/O transition board |
I/O end cap groove and gasket
Step 2 Fit the I/O transition board with the wiring card. Figure
Step 4 Press the I/O end cap in place.
Step 5 Use a
|
| Cisco 3200 Series Router Hardware Upgrade Guide |
|
| |
|
|
| |||
|
|
|
| ||
|
|
|
| ||