Chapter 2 Replacing Cards in the Cisco 3230 ISR Rugged Enclosure
Card Replacement Process
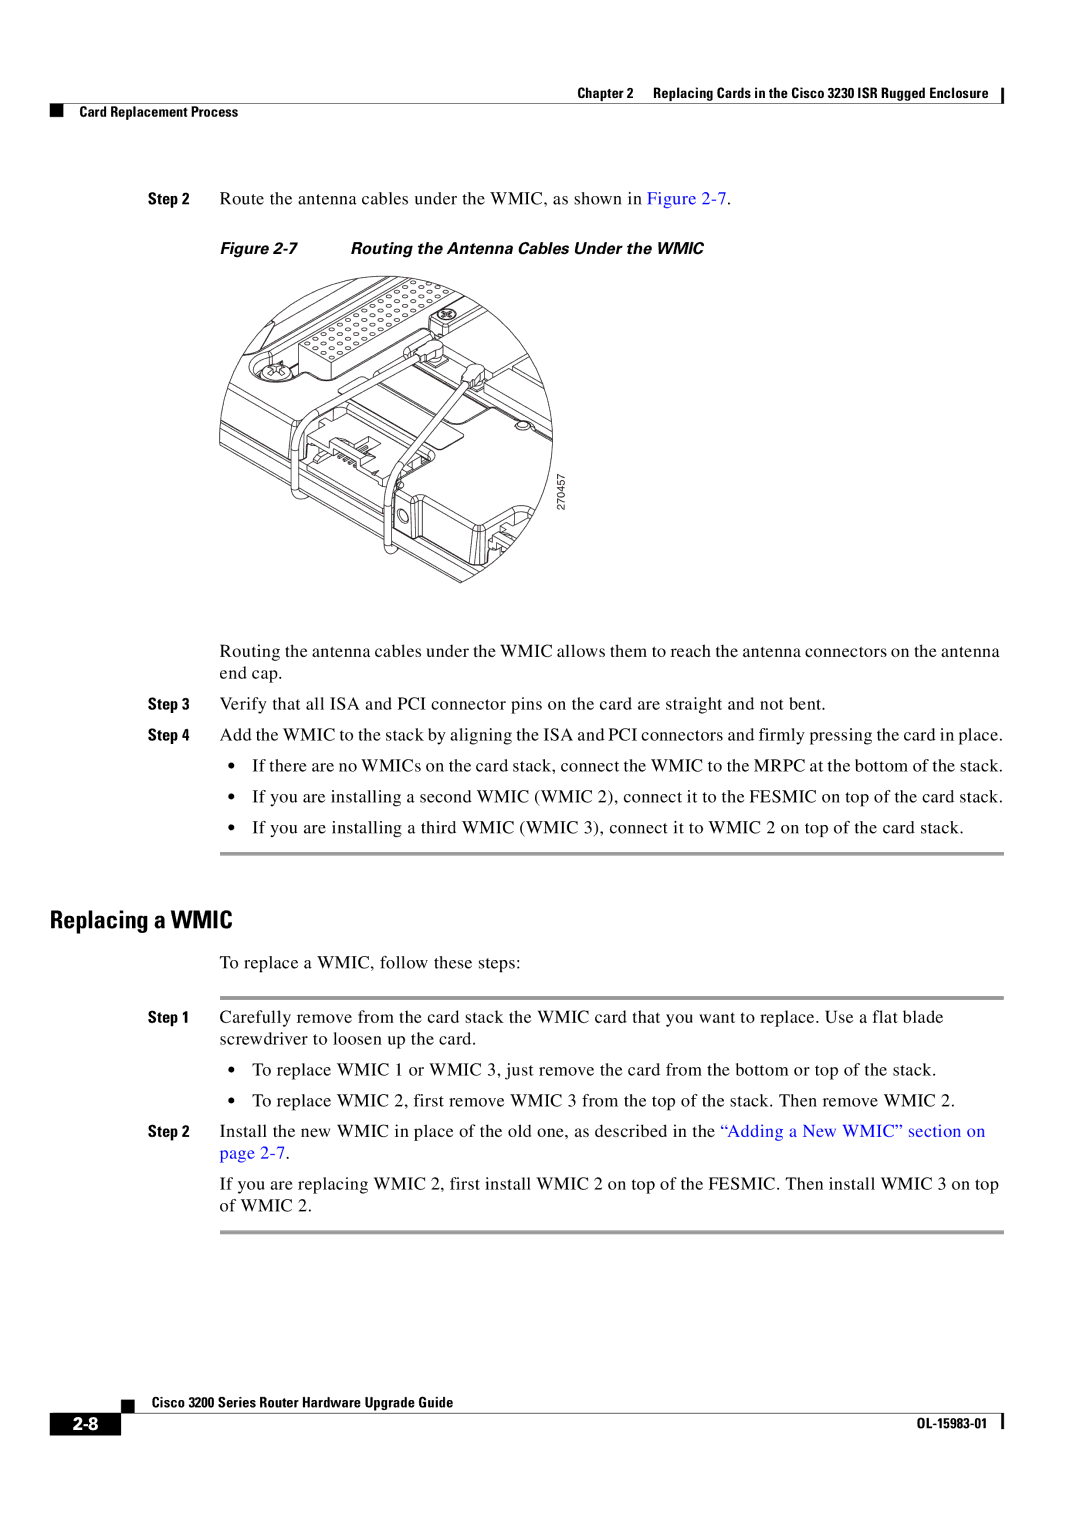
Step 2 Route the antenna cables under the WMIC, as shown in Figure
Figure 2-7 Routing the Antenna Cables Under the WMIC
270457
Routing the antenna cables under the WMIC allows them to reach the antenna connectors on the antenna end cap.
Step 3 Verify that all ISA and PCI connector pins on the card are straight and not bent.
Step 4 Add the WMIC to the stack by aligning the ISA and PCI connectors and firmly pressing the card in place.
•If there are no WMICs on the card stack, connect the WMIC to the MRPC at the bottom of the stack.
•If you are installing a second WMIC (WMIC 2), connect it to the FESMIC on top of the card stack.
•If you are installing a third WMIC (WMIC 3), connect it to WMIC 2 on top of the card stack.
Replacing a WMIC
To replace a WMIC, follow these steps:
Step 1 Carefully remove from the card stack the WMIC card that you want to replace. Use a flat blade screwdriver to loosen up the card.
•To replace WMIC 1 or WMIC 3, just remove the card from the bottom or top of the stack.
•To replace WMIC 2, first remove WMIC 3 from the top of the stack. Then remove WMIC 2.
Step 2 Install the new WMIC in place of the old one, as described in the “Adding a New WMIC” section on page
If you are replacing WMIC 2, first install WMIC 2 on top of the FESMIC. Then install WMIC 3 on top of WMIC 2.
Cisco 3200 Series Router Hardware Upgrade Guide
| ||
|
