Appendix C Installing and Upgrading Memory and Virtual Private Network Modules
Installing and Removing a DIMM
Step 2 Place the DIMM in an antistatic bag to protect it from ESD damage.
Installing a DIMM
Caution | Do not insert DIMMs into the same connector more than 25 times. Overuse can | ||||||||||||||||||
| damage the connector. | ||||||||||||||||||
|
|
|
|
|
|
|
|
|
|
|
|
|
|
|
|
|
|
|
|
| To install a DIMM, follow these steps: | ||||||||||||||||||
|
|
|
|
|
|
|
|
|
|
|
|
|
|
|
|
|
|
|
|
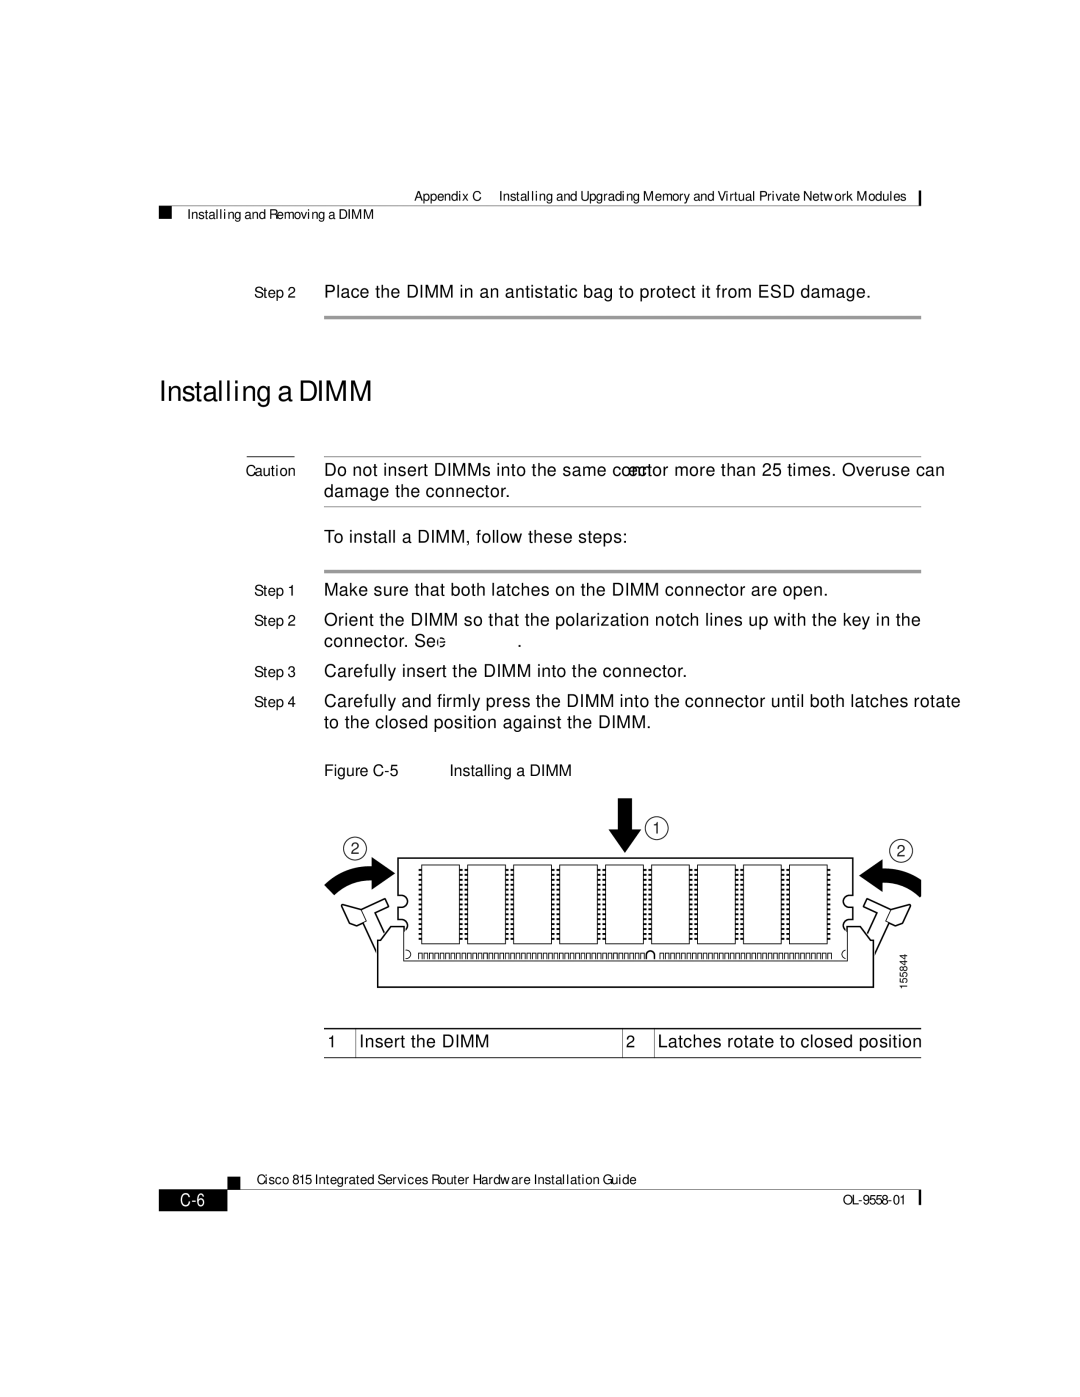
Step 1 | Make sure that both latches on the DIMM connector are open. | ||||||||||||||||||
Step 2 | Orient the DIMM so that the polarization notch lines up with the key in the | ||||||||||||||||||
| connector. See Figure | ||||||||||||||||||
Step 3 | Carefully insert the DIMM into the connector. | ||||||||||||||||||
Step 4 | Carefully and firmly press the DIMM into the connector until both latches rotate | ||||||||||||||||||
| to the closed position against the DIMM. | ||||||||||||||||||
| Figure | Installing a DIMM | |||||||||||||||||
|
| 1 |
|
|
|
|
|
|
| ||||||||||
| 2 | 2 | |||||||||||||||||
|
|
|
|
|
|
|
|
|
|
|
|
|
|
|
|
|
|
|
|
|
|
|
|
|
|
|
|
|
|
|
|
|
|
|
|
|
|
|
|
155844
1
Insert the DIMM
2
Latches rotate to closed position
| Cisco 815 Integrated Services Router Hardware Installation Guide |
|