Installing Voice Cards
Connecting a UVM to E1 Lines
Voice or data connections on an E1 line use the UVM front card and the BC-UVI-2E1EC back card. The procedure for connecting the E1 lines is as follows:
Step 1 Bring each cable through the opening at the bottom of the cabinet (if applicable) and up the back of the unit. You can use the cable management feature to help route the cables.
Step 2 If you use the 120-ohm, DB-15 connectors, you must remove the nuts on the BNC connectors for the port even though the BNC has no attached cable.
Step 3 If you use the 75-ohm BNC connectors in a balanced mode, you must remove the nuts from the BNC connector.
Step 4 Install optional Y-cables as needed.
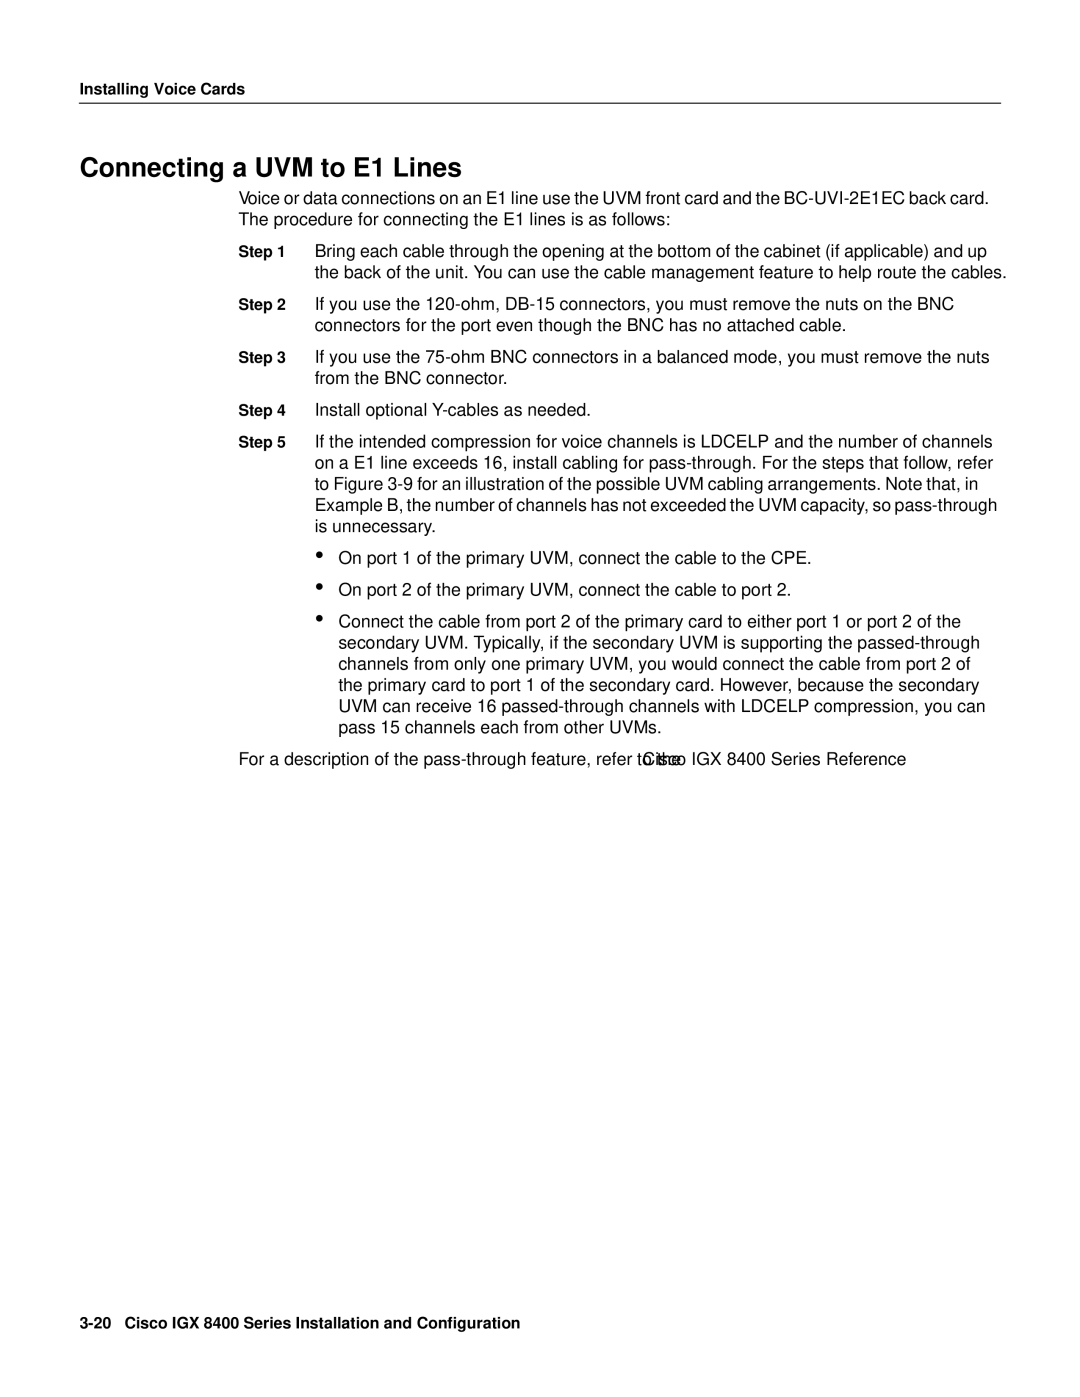
Step 5 If the intended compression for voice channels is LDCELP and the number of channels on a E1 line exceeds 16, install cabling for pass-through. For the steps that follow, refer to Figure 3-9for an illustration of the possible UVM cabling arrangements. Note that, in Example B, the number of channels has not exceeded the UVM capacity, so pass-through is unnecessary.
•On port 1 of the primary UVM, connect the cable to the CPE.
•On port 2 of the primary UVM, connect the cable to port 2.
•Connect the cable from port 2 of the primary card to either port 1 or port 2 of the secondary UVM. Typically, if the secondary UVM is supporting the passed-through channels from only one primary UVM, you would connect the cable from port 2 of the primary card to port 1 of the secondary card. However, because the secondary UVM can receive 16 passed-through channels with LDCELP compression, you can pass 15 channels each from other UVMs.
For a description of the pass-through feature, refer to the Cisco IGX 8400 Series Reference.