4.OPERATIONS
4.1Rack Mounting
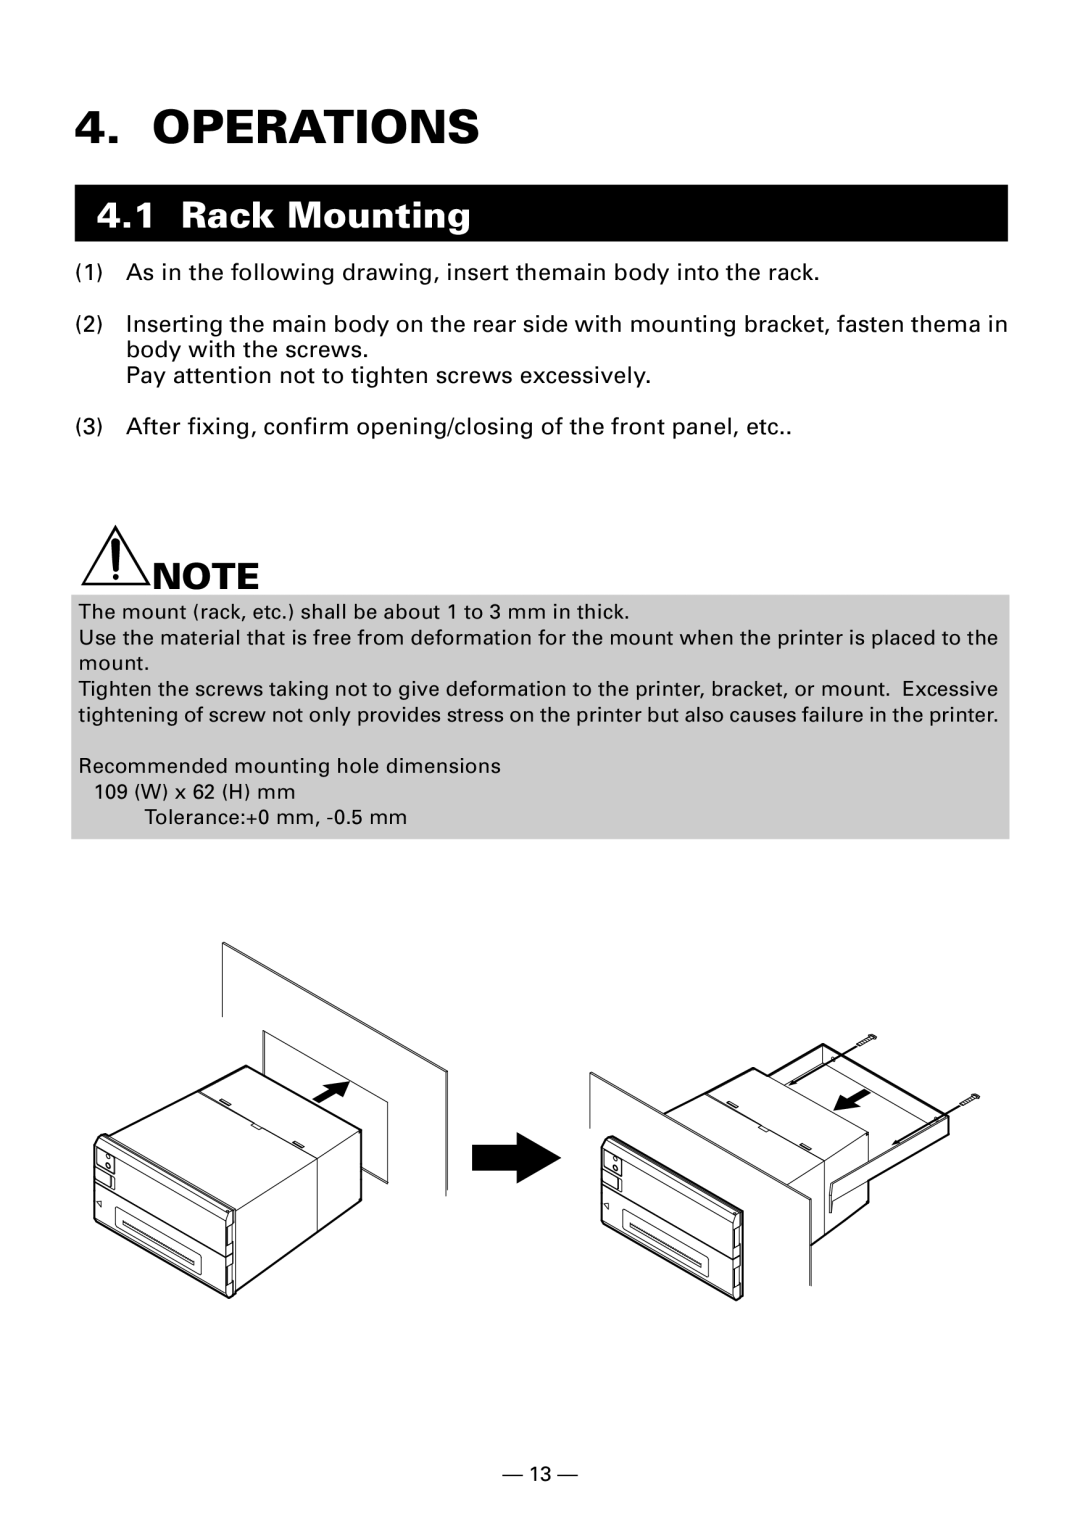
(1)As in the following drawing, insert themain body into the rack.
(2)Inserting the main body on the rear side with mounting bracket, fasten thema in body with the screws.
Pay attention not to tighten screws excessively.
(3)After fixing, confirm opening/closing of the front panel, etc..
![]() NOTE
NOTE
The mount (rack, etc.) shall be about 1 to 3 mm in thick.
Use the material that is free from deformation for the mount when the printer is placed to the mount.
Tighten the screws taking not to give deformation to the printer, bracket, or mount. Excessive tightening of screw not only provides stress on the printer but also causes failure in the printer.
Recommended mounting hole dimensions 109 (W) x 62 (H) mm
Tolerance:+0 mm,
— 13 —