Chapter 3. Quick Setup
9. Prepare Network
9. Prepare Network
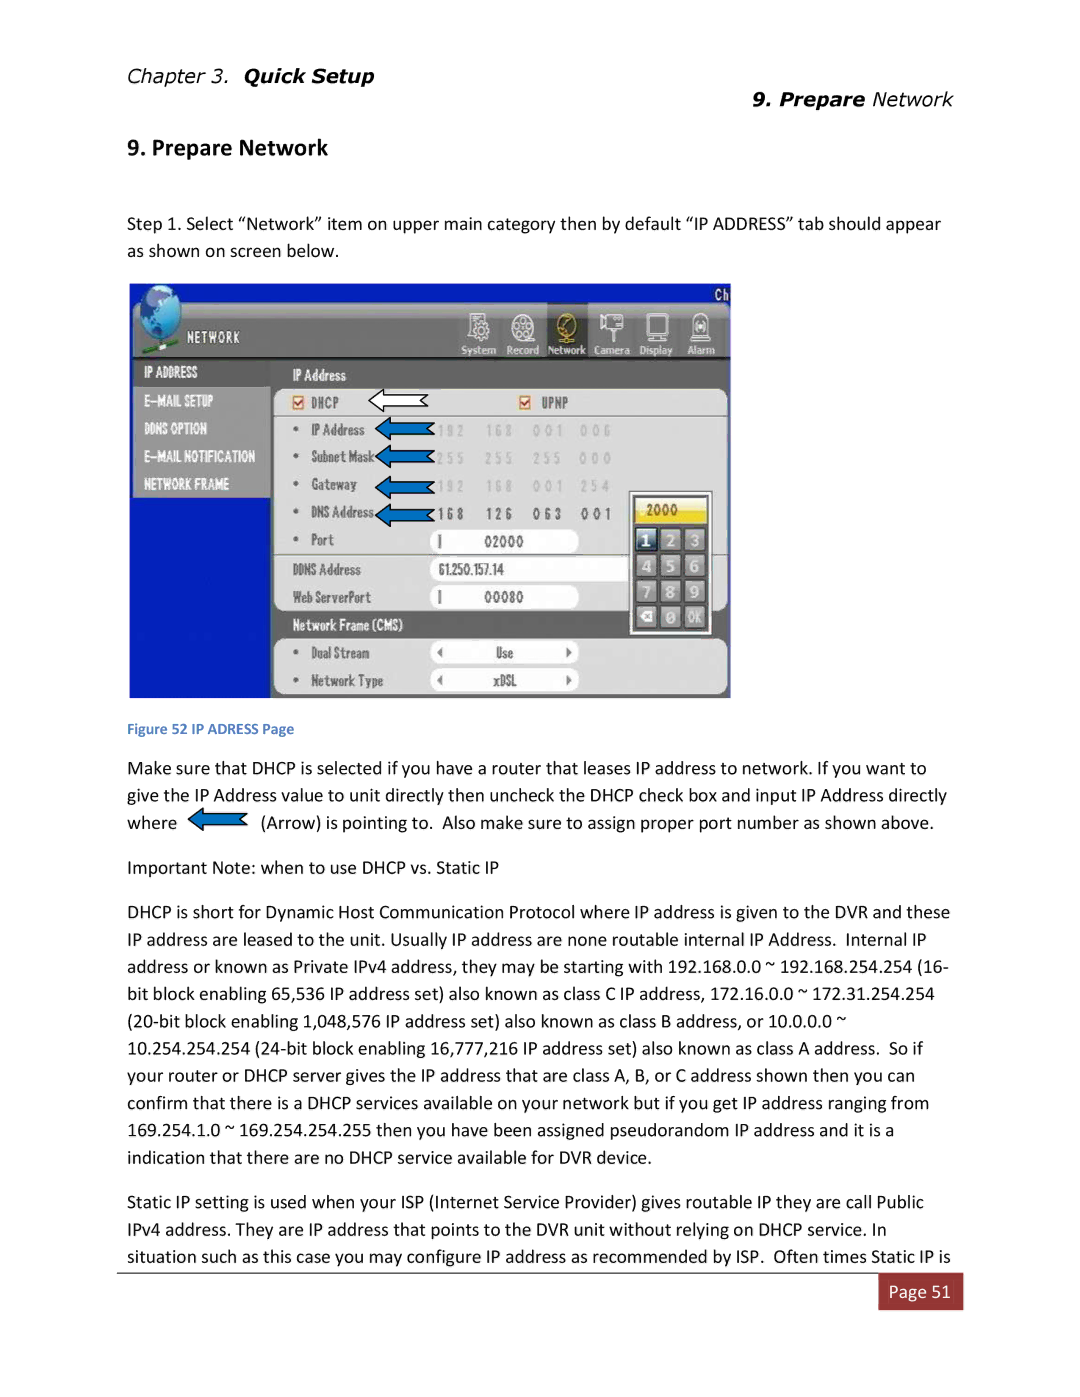
Step 1. Select “Network” item on upper main category then by default “IP ADDRESS” tab should appear as shown on screen below.
Figure 52 IP ADRESS Page
Make sure that DHCP is selected if you have a router that leases IP address to network. If you want to give the IP Address value to unit directly then uncheck the DHCP check box and input IP Address directly
where ![]() (Arrow) is pointing to. Also make sure to assign proper port number as shown above.
(Arrow) is pointing to. Also make sure to assign proper port number as shown above.
Important Note: when to use DHCP vs. Static IP
DHCP is short for Dynamic Host Communication Protocol where IP address is given to the DVR and these IP address are leased to the unit. Usually IP address are none routable internal IP Address. Internal IP address or known as Private IPv4 address, they may be starting with 192.168.0.0 ~ 192.168.254.254 (16- bit block enabling 65,536 IP address set) also known as class C IP address, 172.16.0.0 ~ 172.31.254.254
Static IP setting is used when your ISP (Internet Service Provider) gives routable IP they are call Public IPv4 address. They are IP address that points to the DVR unit without relying on DHCP service. In situation such as this case you may configure IP address as recommended by ISP. Often times Static IP is
![]() Page 51
Page 51![]()
