Chapter 3. Quick Setup
9. Prepare Network
still used with class A, B, or C address. In those cases, you must point to IP addresses that are not in lease range of the DHCP scope (IP address not issued by DHCP services but must be in same Subnet and Gateway IP). Users tend to use this method when certain IP address out of DHCP scope where particular IPs are configured to use NAT, IP forwarding, or DMZ (NAT, IP forwarding and DMZ are used in most router to enable incoming traffic to specific IP addresses).
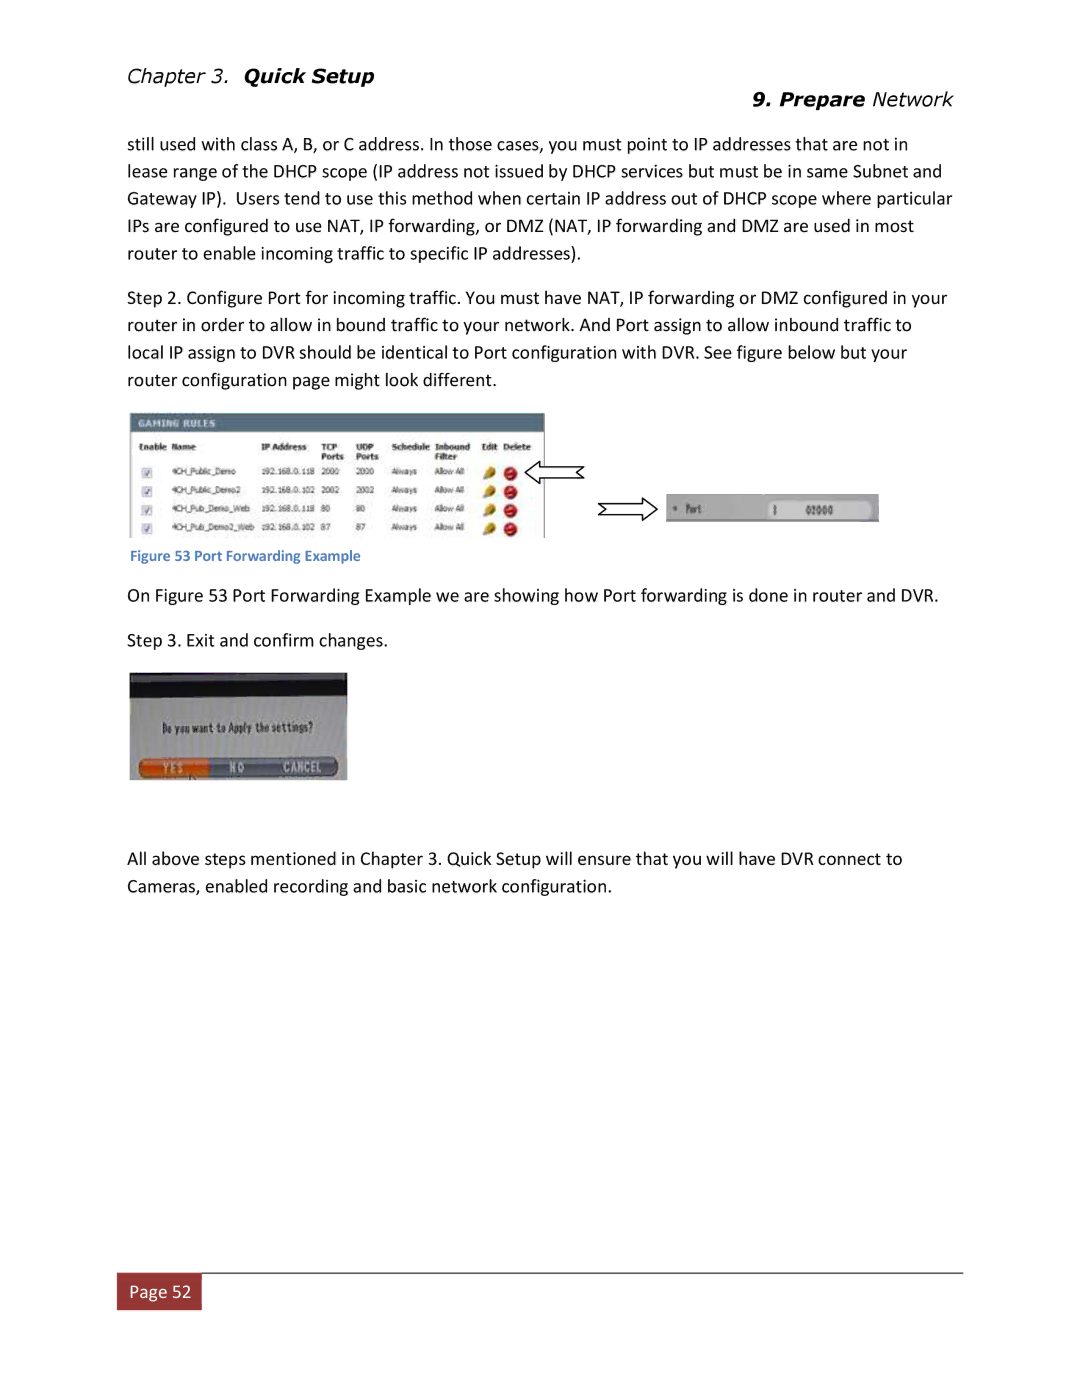
Step 2. Configure Port for incoming traffic. You must have NAT, IP forwarding or DMZ configured in your router in order to allow in bound traffic to your network. And Port assign to allow inbound traffic to local IP assign to DVR should be identical to Port configuration with DVR. See figure below but your router configuration page might look different.
Figure 53 Port Forwarding Example
On Figure 53 Port Forwarding Example we are showing how Port forwarding is done in router and DVR.
Step 3. Exit and confirm changes.
All above steps mentioned in Chapter 3. Quick Setup will ensure that you will have DVR connect to Cameras, enabled recording and basic network configuration.
![]() Page 52
Page 52![]()