Presario 1800 Series
Models: XL180, XL181, XL182, XL183, XL185,
and XL190, XL191, XL192
Removing the Diskette Drive
To remove the diskette drive, complete the following steps:
1.Prepare the Notebook for disassembly (pg 11).
2.Remove the Palmrest cover with TouchPad (pg 14).
3.Remove the keyboard (pg 17).
4.Remove the Heatspreader (pg 23).
5.Remove the CD/DVD drive (pg 30).
6.Remove the Internet Zone cover (pg 18).
7.Remove the Internet button board (pg 21).
8.Remove the display panel assembly (pg 32).
9.Remove the hard drive (pg 25).
10.Remove the upper CPU cover (pg 34).
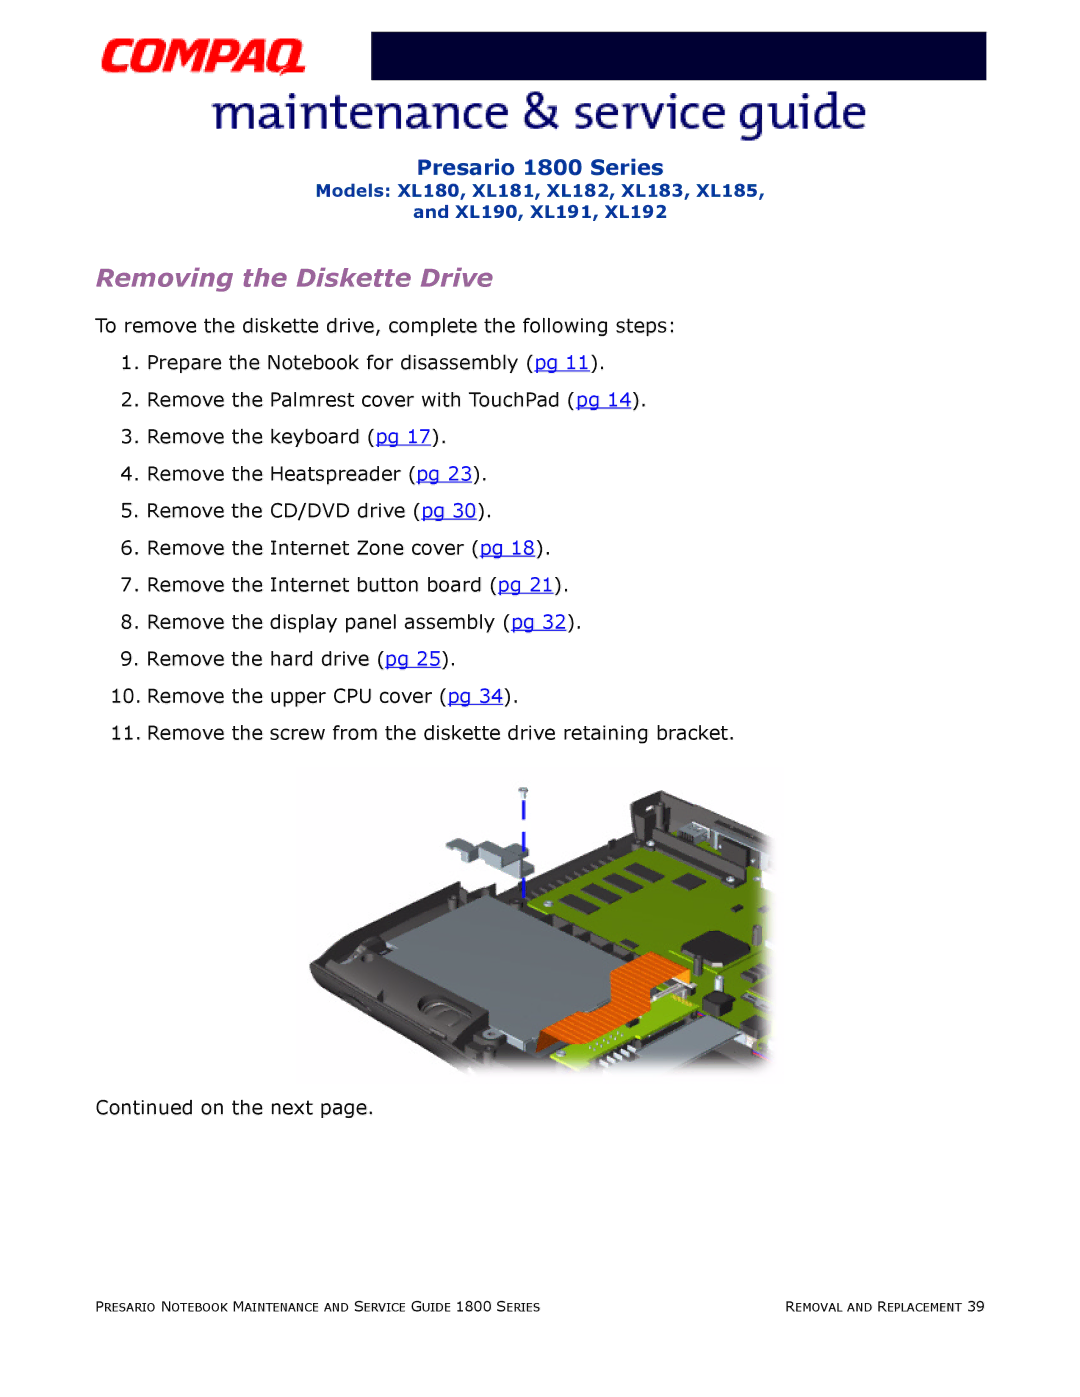
11.Remove the screw from the diskette drive retaining bracket.
Continued on the next page.
PRESARIO NOTEBOOK MAINTENANCE AND SERVICE GUIDE 1800 SERIES | REMOVAL AND REPLACEMENT 39 |