Presario 1800 Series
Models: XL180, XL181, XL182, XL183, XL185,
and XL190, XL191, XL192
Removing the Battery Charger Board
(Voltage Converter Board)
To remove the battery charger board, complete the following:
1.Prepare the Notebook for disassembly (pg 11).
2.Remove the Palmrest cover with TouchPad (pg 14).
3.Remove the keyboard (pg 17).
4.Remove the Heatspreader (pg 23).
5.Remove the Internet Zone cover (pg 18).
6.Remove the Internet button board (pg 21).
7.Remove the display panel assembly (pg 32).
8.Remove the hard drive (pg 25).
9.Remove the upper CPU cover (pg 34).
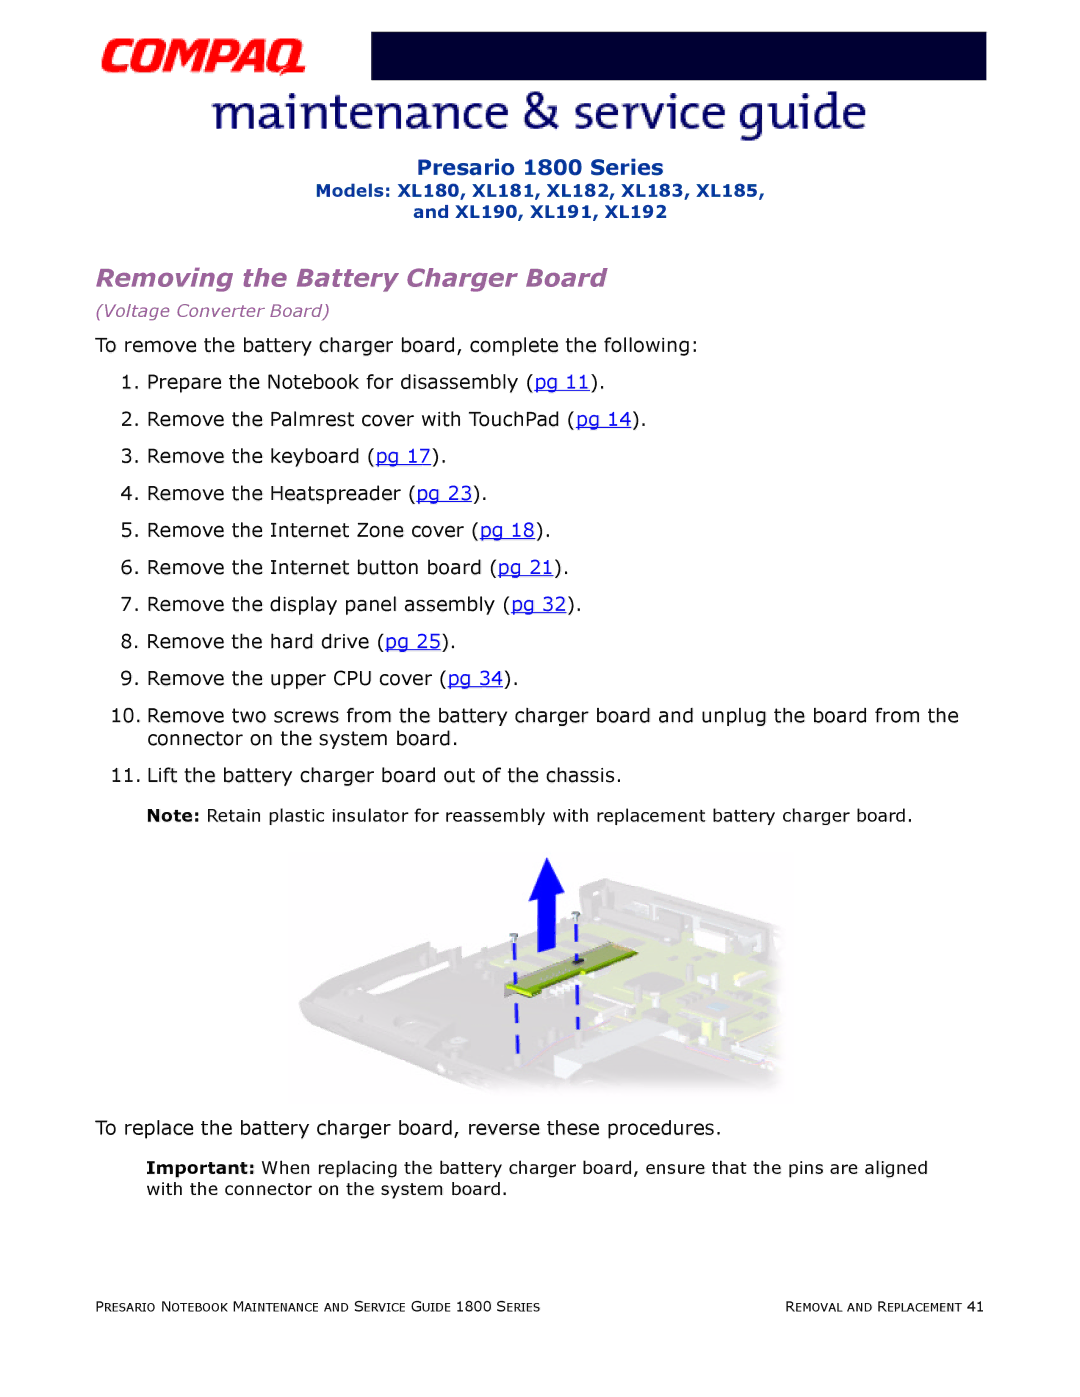
10.Remove two screws from the battery charger board and unplug the board from the connector on the system board.
11.Lift the battery charger board out of the chassis.
Note: Retain plastic insulator for reassembly with replacement battery charger board.
To replace the battery charger board, reverse these procedures.
Important: When replacing the battery charger board, ensure that the pins are aligned with the connector on the system board.
PRESARIO NOTEBOOK MAINTENANCE AND SERVICE GUIDE 1800 SERIES | REMOVAL AND REPLACEMENT 41 |