Presario 1800 Series
Models: XL180, XL181, XL182, XL183, XL185,
and XL190, XL191, XL192
Removing the Hard Drive
Note: Illustrations may show parts removed that are not part of this procedure. It is necessary to remove only the parts listed in the written procedure.
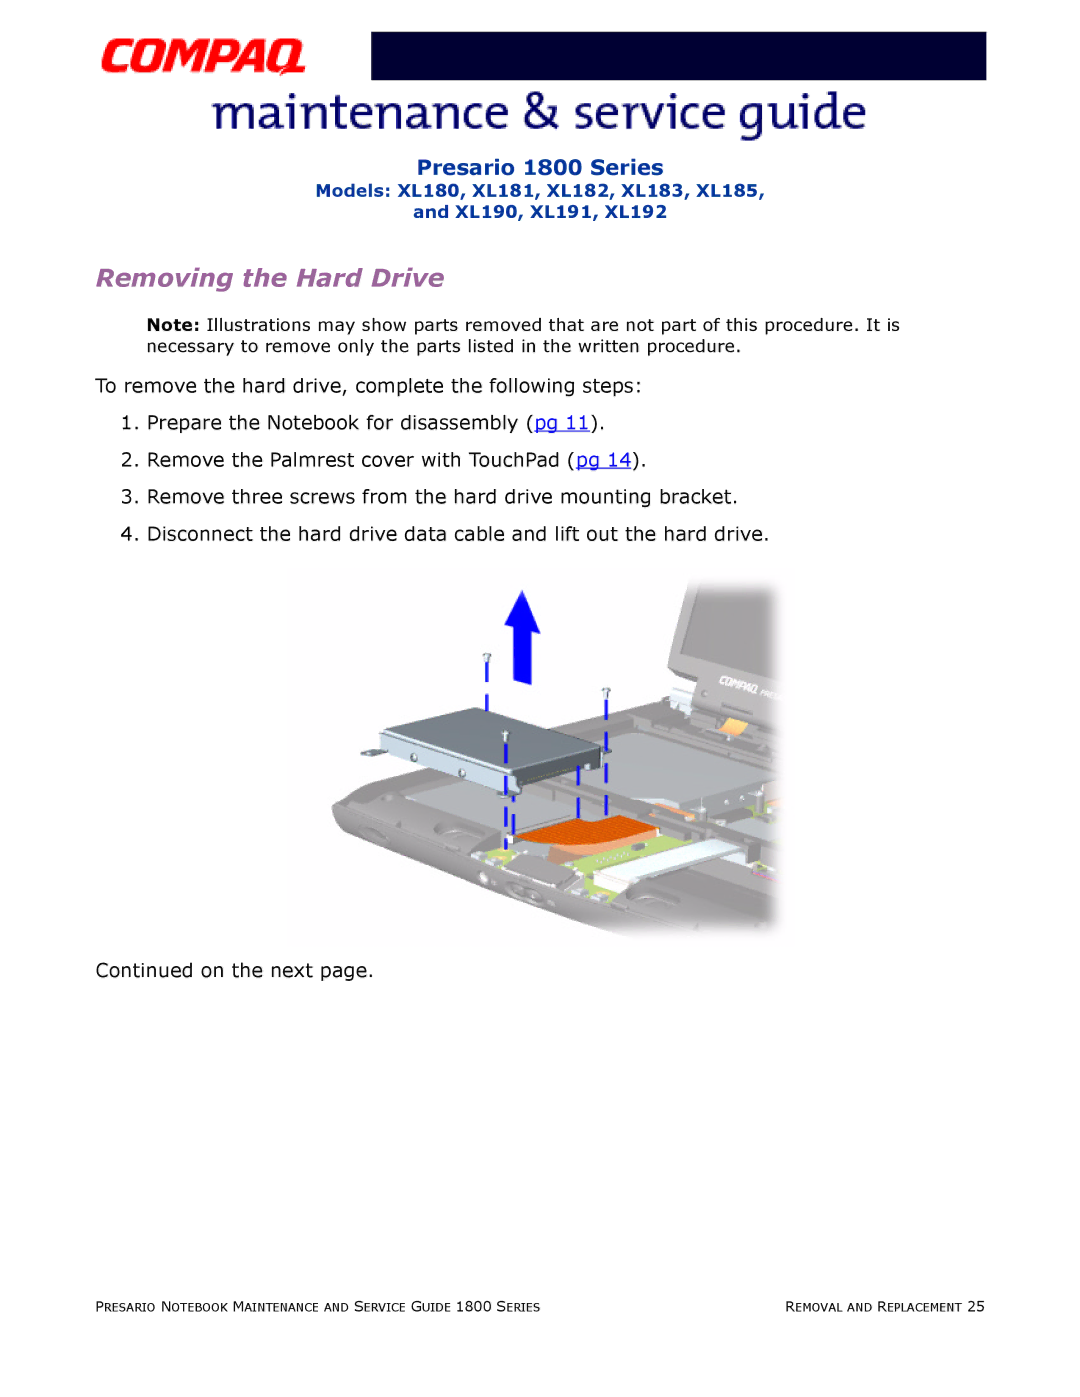
To remove the hard drive, complete the following steps:
1.Prepare the Notebook for disassembly (pg 11).
2.Remove the Palmrest cover with TouchPad (pg 14).
3.Remove three screws from the hard drive mounting bracket.
4.Disconnect the hard drive data cable and lift out the hard drive.
Continued on the next page.
PRESARIO NOTEBOOK MAINTENANCE AND SERVICE GUIDE 1800 SERIES | REMOVAL AND REPLACEMENT 25 |