ASSEMBLINGLEGSTAND(Continued)
•Align the two large holes on the brace and the legs.
Insert the cardage bolts. Add flat washers and hex nuts and hand tighten. Repeat for the other short upper brace. These are the front and back sets.
•For the sides, install a long upper brace on two legs. Add hardware and finger tighten. Repeat for the other long upper brace.
•Use the same steps to installthe lower braces. Tighten all hex nutswith a 12 mm wrench.
•Place a hex nut and flat washer on each leveling foot. install the levelingfeet from the bottomof each leg with the boltspointingup. Secure with a fiat washer and hex nut but do not tighten.
•Move the leg stand to desired location. Adjustthe leveling feet with a 12 mm wrench, then securely tighten the top hex nut.
_k WARNING: Do not lift the saw table without help. The table saw base weighs approximately
95Ibs. Hold it close to your body. Keep your knees bent and liftwith your legs, not your back. Ignoringthese precautionscan result in back injury.
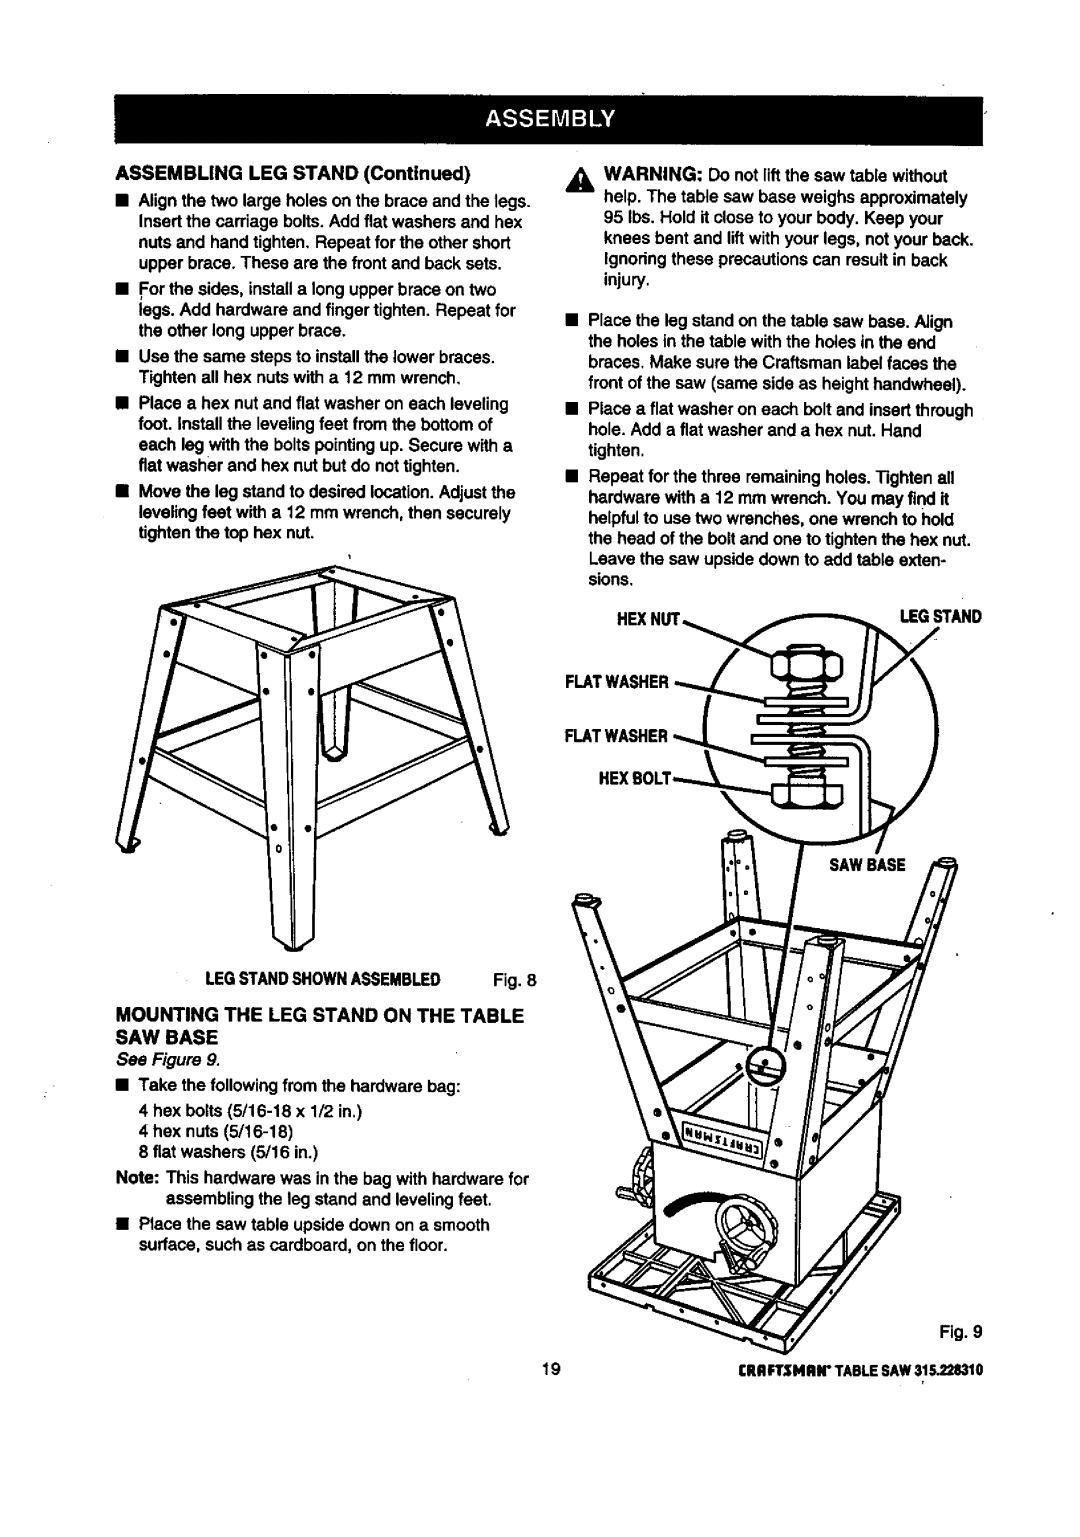
•Place the leg stand on the table saw base. Align the holes in the table with the holes in the end
braces. Make sure the Craftsman label faces the front of the saw (same side as height handwheel).
•Place a flat washer on each bolt and insertthrough hole. Add a flat washer and a hex nut. Hand
tighten.
•Repeat for the three remainingholes. Tighten all
hardware with a 12 mm wrench. You may find it helpfulto use two wrenches, one wrench to hold
the head of the boltand one to tightenthe hex nut.
Leave the saw upside downto add table exten- sions.
HEXI,LEGSTAND
LEGSTANDSHOWNASSEMBLED Fig. 8
MOUNTING THE LEG STAND ON THE TABLE
SAW BASE
See Figure 9.
•Take the followingfrom the hardware bag:
4 hex
4 hex nuts
8 flat washers (5/16 in.)
Note: This hardware was in the bag with hardware for assemblingthe leg stand and levelingfeet.
•Place the saw table upside down on a smooth surface, such as cardboard, on the floor.
Fig. 9
19CRAFTSMRN"TABLESAW315.228310