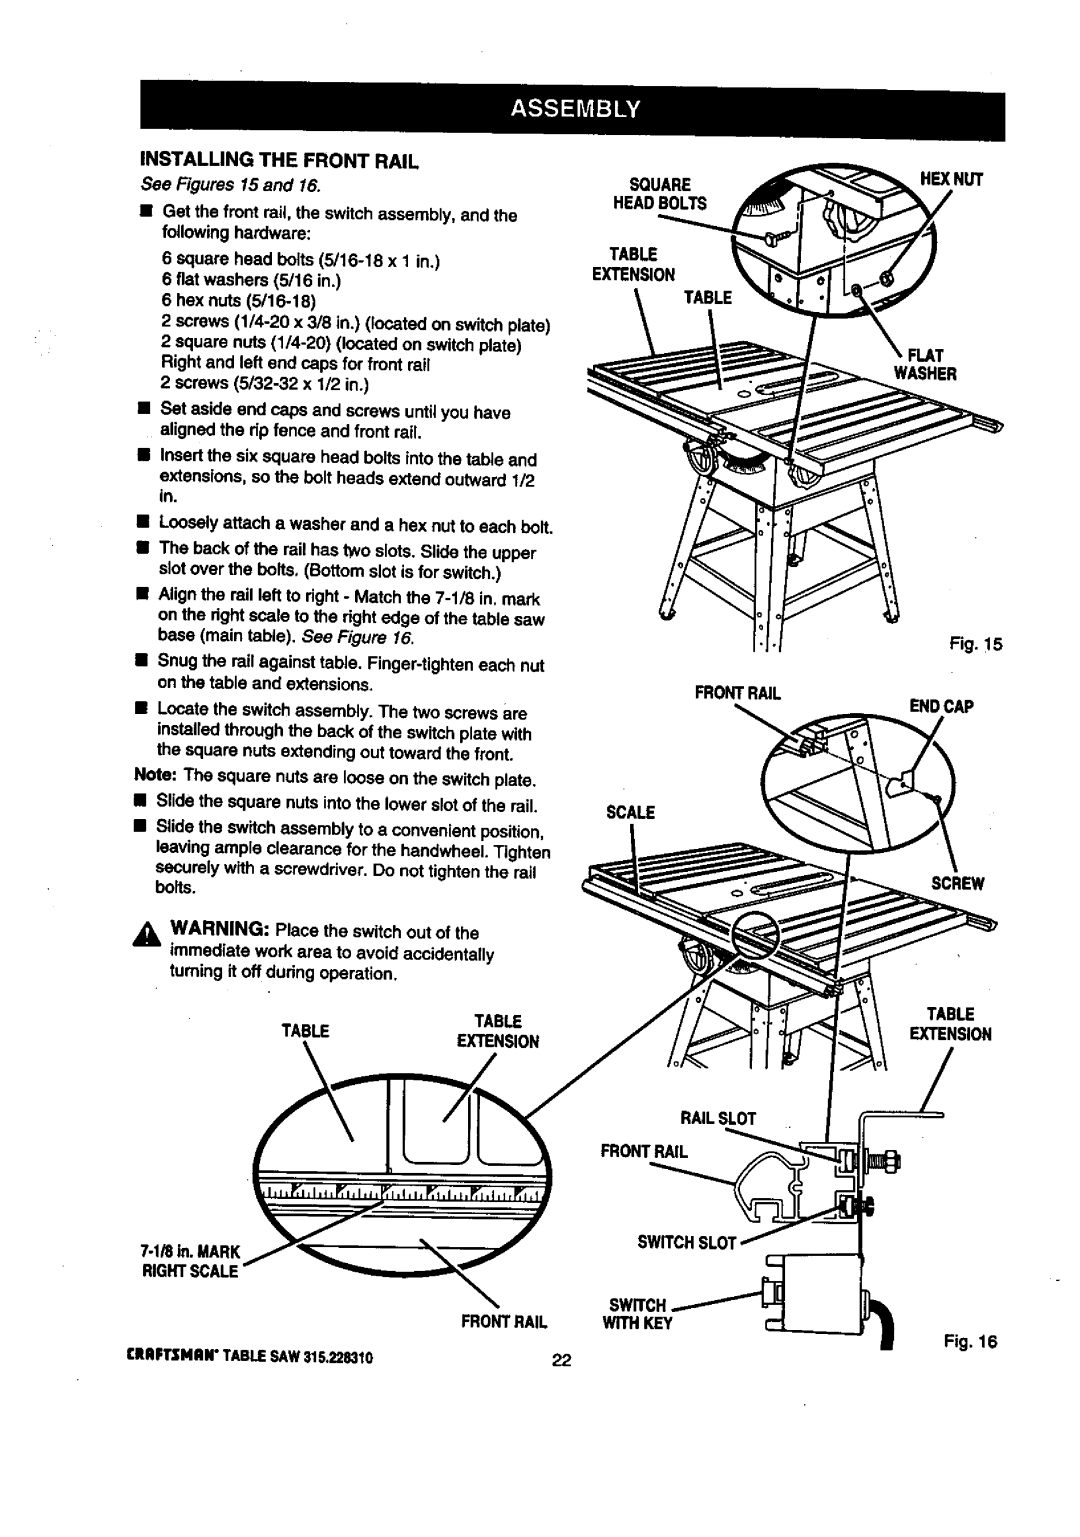
INSTALLING THE FRONT RAIL
See Figures 15 and 16.
•Get the front rail the switch assembly, and the followinghardware:
6 square head botts
6 fiat washers (5/16 in.)
6 hex nuts
2 screws
2 screws
•Set aside end caps and screws untilyou have alignedthe dp fence and front rail.
•Insertthe six square head boltsinto the table and extensions,so the bolt heads extend outward 112 in.
•Loosely attach a washer and a hex nut to each bolt.
•The back of the rail has two slots.Slide the upper slot over the bolts. (Bottom slot is for switch.)
•Alignthe rail left to fight - Match the
•Snug the rail against table.
•Locate the switchassembly. The two screws are installedthrough the back of the switchplate with the square nuts extendingout toward the front.
Note: The square nuts are loose on the switch plate.
•Slide the square nuts intothe lower slot of the rail.
•Slide the switch assembly to a convenient position, leaving ample clearance for the haedwheeL Tighten securelywith a screwdriver. Do not tighten the rail bolts.
SOUARE
HEADBOLTS
TABLE
EXTENSION
FRONTRAIL
SCALE
HEX NUT
FLAT
WASHER
Fig.!5
ENDCAP
SCREW
A_ WARNING: Place the switch out of the immediate work area to avoid accidentally
turning it off dudng operation.
TABLE
TABLEEXTENSION
_IRIn.MARK
R_HTBCALE
SWITCH.
WITHKEY
TABLE