DES-3226 NWay Standalone Fast Ethernet Switch User’s Guide
For a detailed list of Trap Types used for this Switch, see the Traps section of Chapter 5, “Switch Management and Operating Concepts.”
SNMP (V1/V2C) implements a rudimentary form of security by requiring that each request include a community name. A community name is an arbitrary string of characters used as a “password” to control access to the Switch. If the Switch receives a request with a community name it does not recognize, it will trigger an authentication trap.
The SNMP allows up to four different community names to be defined. The community name public is defined by default; you can change this name in addition to adding others. You will need to coordinate these names with the community name settings you use in your network management system.
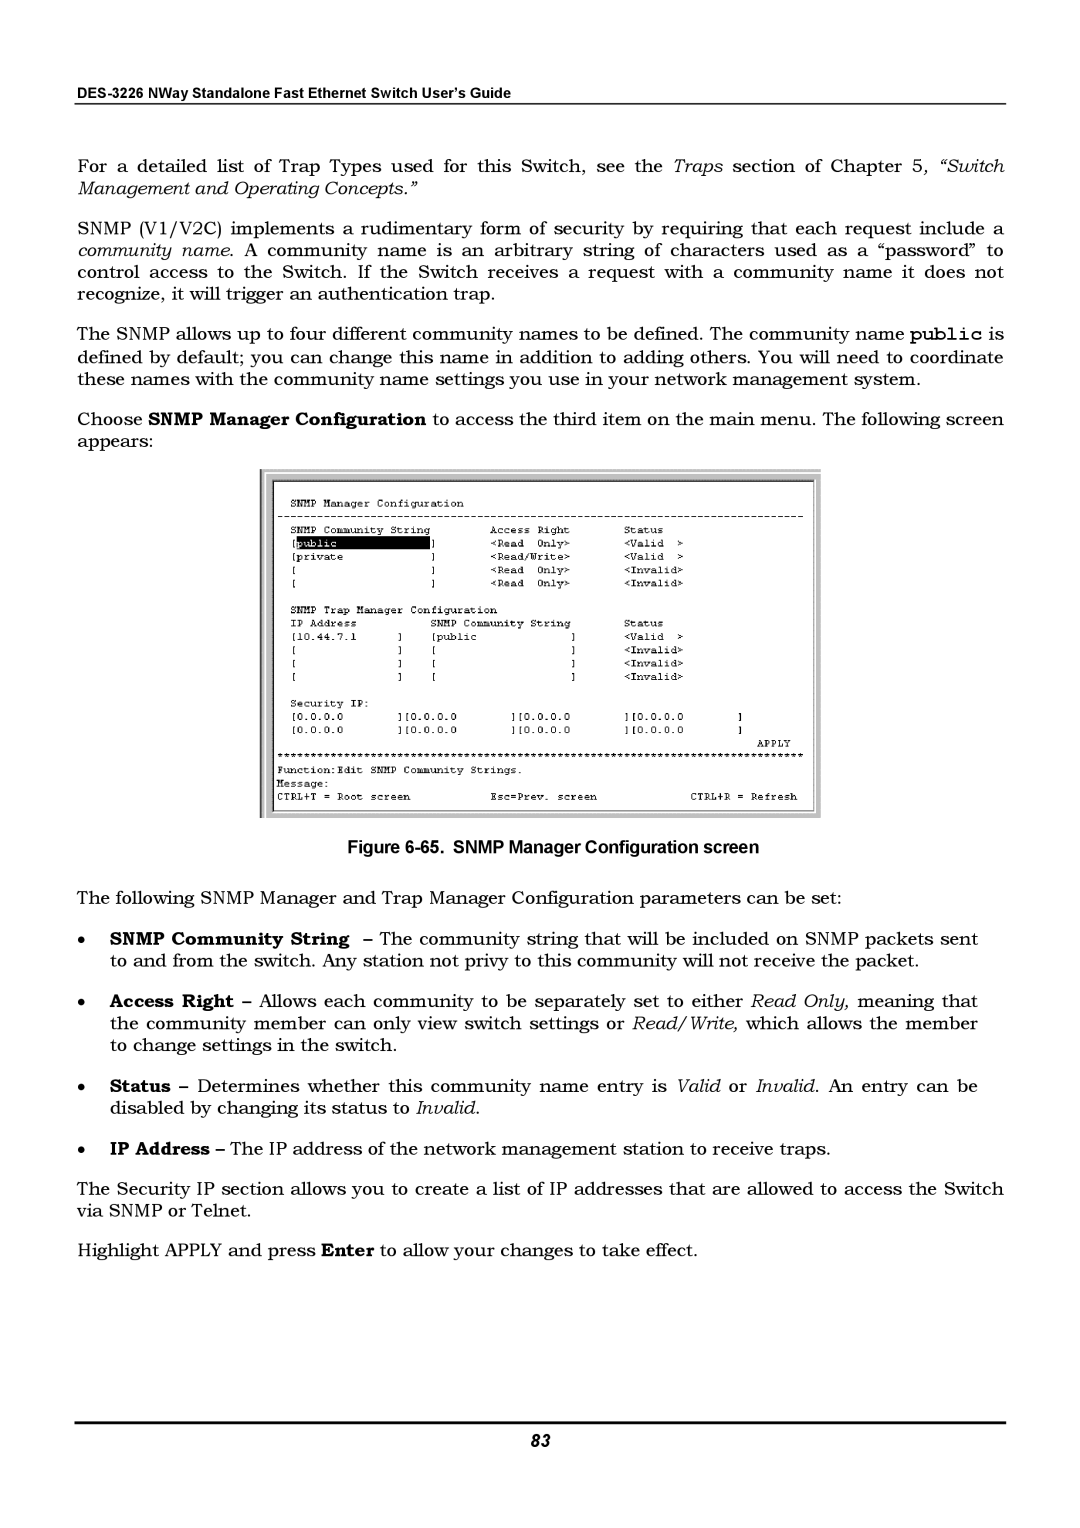
Choose SNMP Manager Configuration to access the third item on the main menu. The following screen appears:
Figure 6-65. SNMP Manager Configuration screen
The following SNMP Manager and Trap Manager Configuration parameters can be set:
•SNMP Community String – The community string that will be included on SNMP packets sent to and from the switch. Any station not privy to this community will not receive the packet.
•Access Right – Allows each community to be separately set to either Read Only, meaning that the community member can only view switch settings or Read/Write, which allows the member to change settings in the switch.
•Status – Determines whether this community name entry is Valid or Invalid. An entry can be disabled by changing its status to Invalid.
•IP Address – The IP address of the network management station to receive traps.
The Security IP section allows you to create a list of IP addresses that are allowed to access the Switch via SNMP or Telnet.
Highlight APPLY and press Enter to allow your changes to take effect.
83