To replace the hard drive in the hard drive bay:
1Make sure that the work surface is flat and clean to prevent scratching the computer cover.
2Save and close any open files, exit any open programs, and shut down the computer (see page 42).
3If the computer is docked, undock it.
4Disconnect the computer from the electrical outlet.
5Wait 10 to 20 seconds and then disconnect any attached devices.
6Remove any installed PC Cards, batteries, and devices.
Handle components and cards by their edges, and avoid touching pins and contacts.
7Ground yourself by touching a metal connector on the back of the computer, and continue to do so periodically during this procedure.
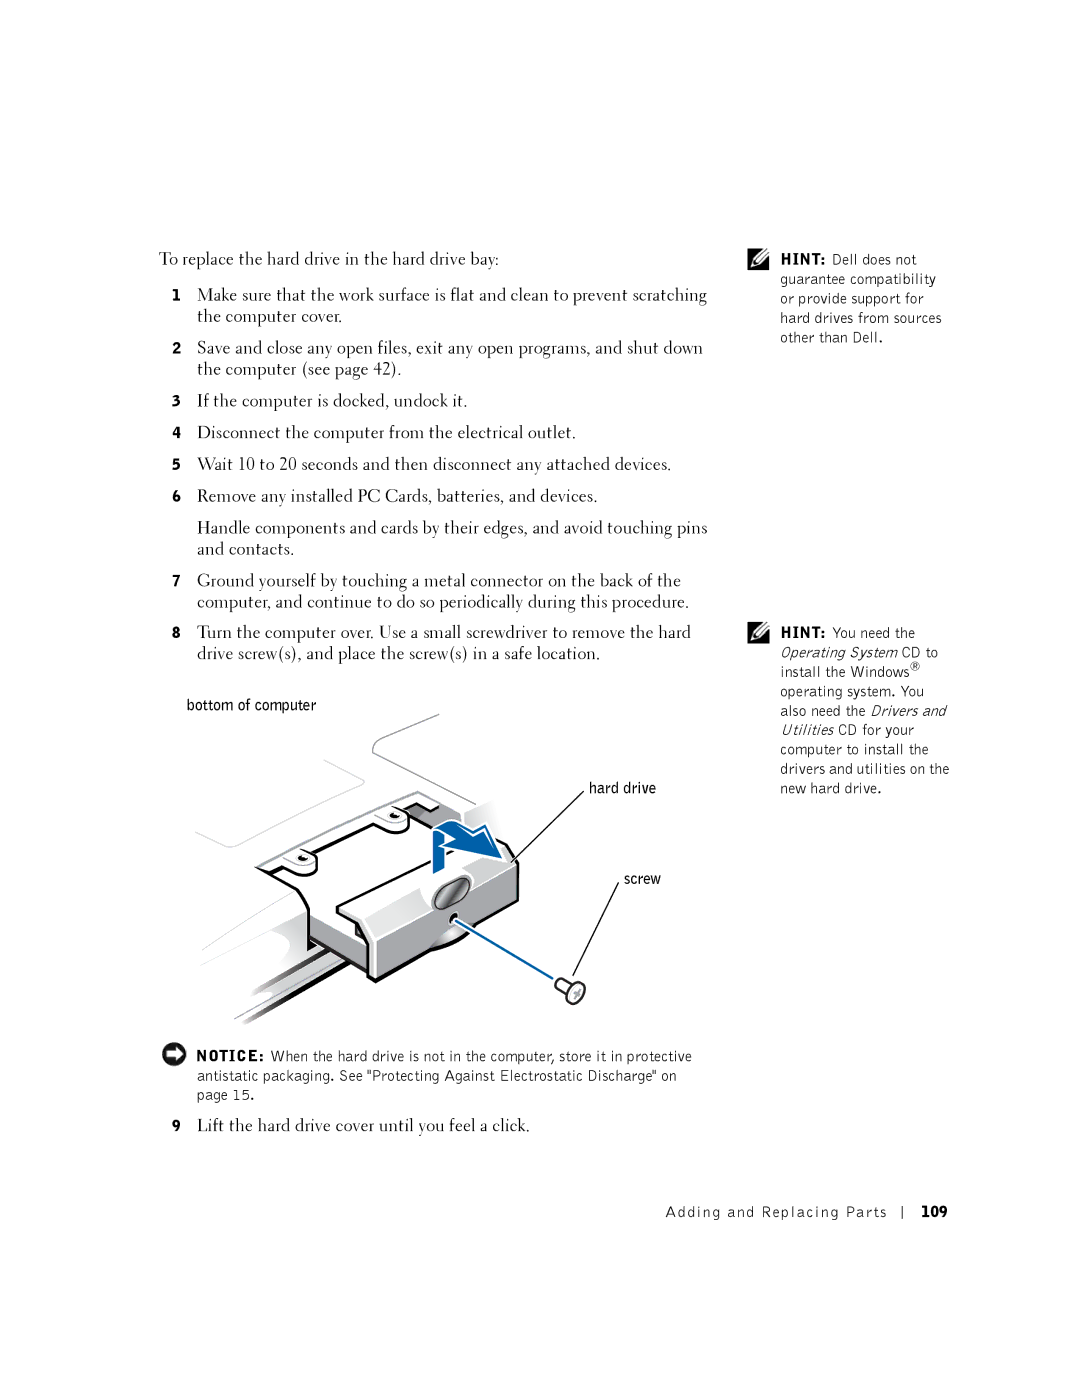
8Turn the computer over. Use a small screwdriver to remove the hard drive screw(s), and place the screw(s) in a safe location.
bottom of computer
hard drive
screw
NOTICE: When the hard drive is not in the computer, store it in protective antistatic packaging. See "Protecting Against Electrostatic Discharge" on page 15.
9Lift the hard drive cover until you feel a click.
HINT: Dell does not guarantee compatibility or provide support for hard drives from sources other than Dell.
HINT: You need the Operating System CD to install the Windows® operating system. You also need the Drivers and Utilities CD for your computer to install the drivers and utilities on the new hard drive.
Adding and Replacing Parts
109