Powering On the SummitPx1
WS_011
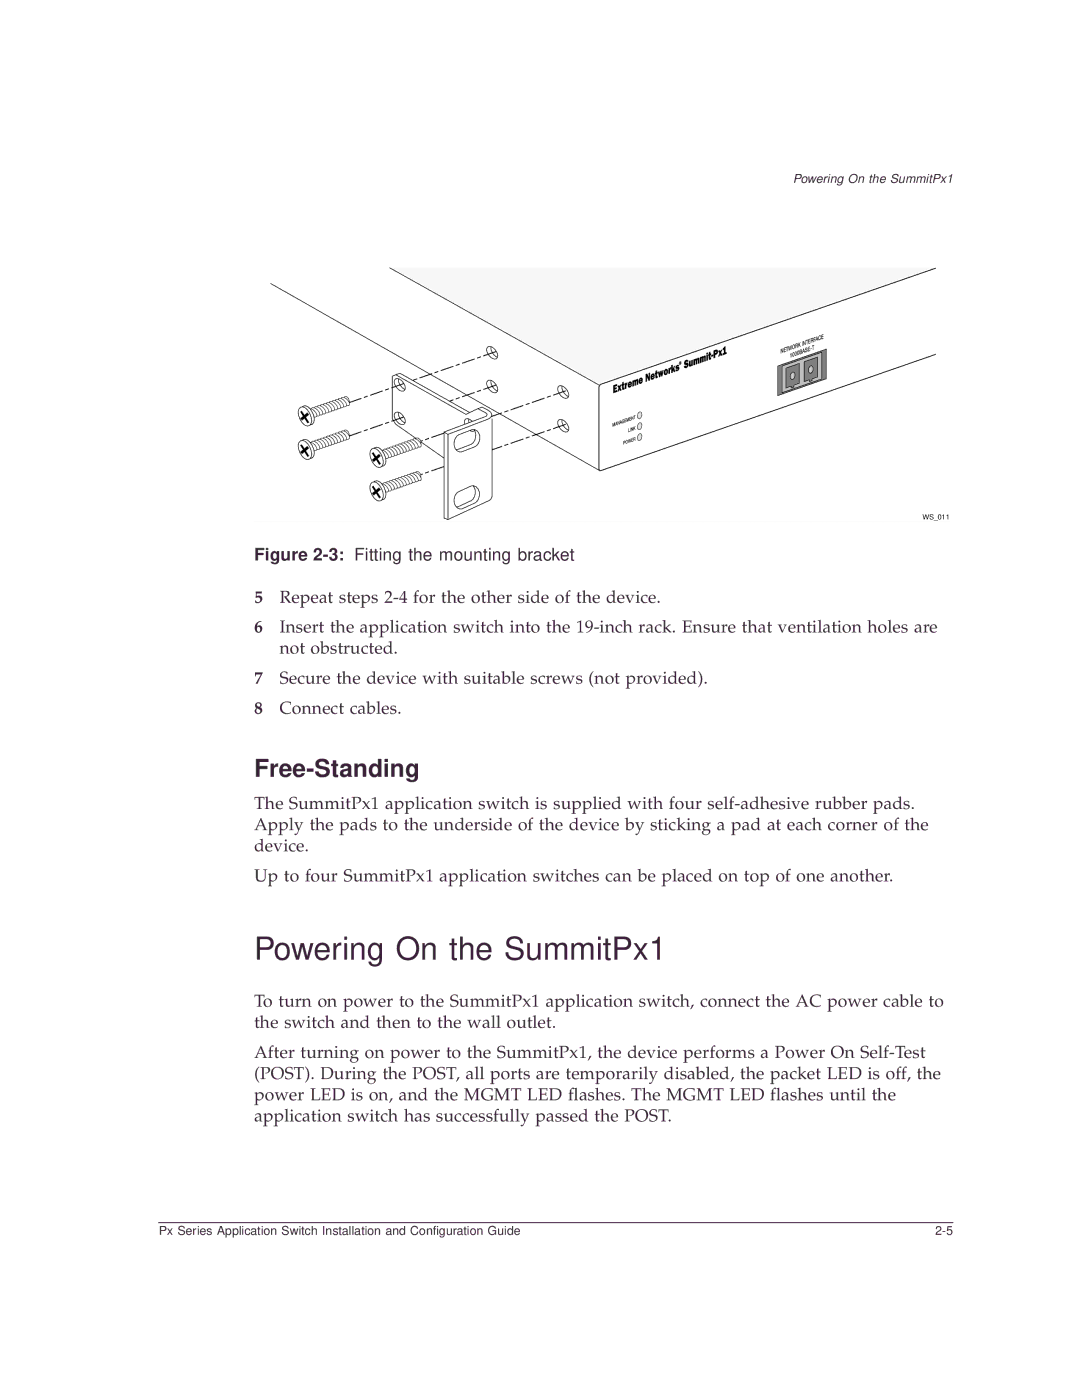
Figure 2-3: Fitting the mounting bracket
5Repeat steps
6Insert the application switch into the
7Secure the device with suitable screws (not provided).
8Connect cables.
Free-Standing
The SummitPx1 application switch is supplied with four
Up to four SummitPx1 application switches can be placed on top of one another.
Powering On the SummitPx1
To turn on power to the SummitPx1 application switch, connect the AC power cable to the switch and then to the wall outlet.
After turning on power to the SummitPx1, the device performs a Power On
Px Series Application Switch Installation and Configuration Guide |