•Two fan trays are installed.
To test the power supplies and fan trays:
Step Task
1.With the fan trays and power supplies installed, power on the system.
•Flip the On/Standby switch located next to plug
2.Power Supply Status LEDs should be green. If an LED is not lit or is blinking amber:
•check that the units are properly installed and are plugged into the correct slot.
•Verify the power source
•If the LED remains unlit or blinking amber at power up, replace the power supply.
3.Both fan tray LEDs should be green (online). A blinking green fan tray LED indicates booting. Verify that air is flowing through the chassis. If a fan tray is not operating properly or air is not flowing through the chassis:
•power off the chassis at the remote power source.
•Ensure that all fan trays are properly installed.
•Verify the remote power source.
•If a fan tray LED remains unlit, replace the fan tray.
4.After you have verified the power and fan operability, power off the chassis to continue the installation process.
5.
6.Verify that the LEDs are not lit.
Power Supply and Fan Tray LEDs
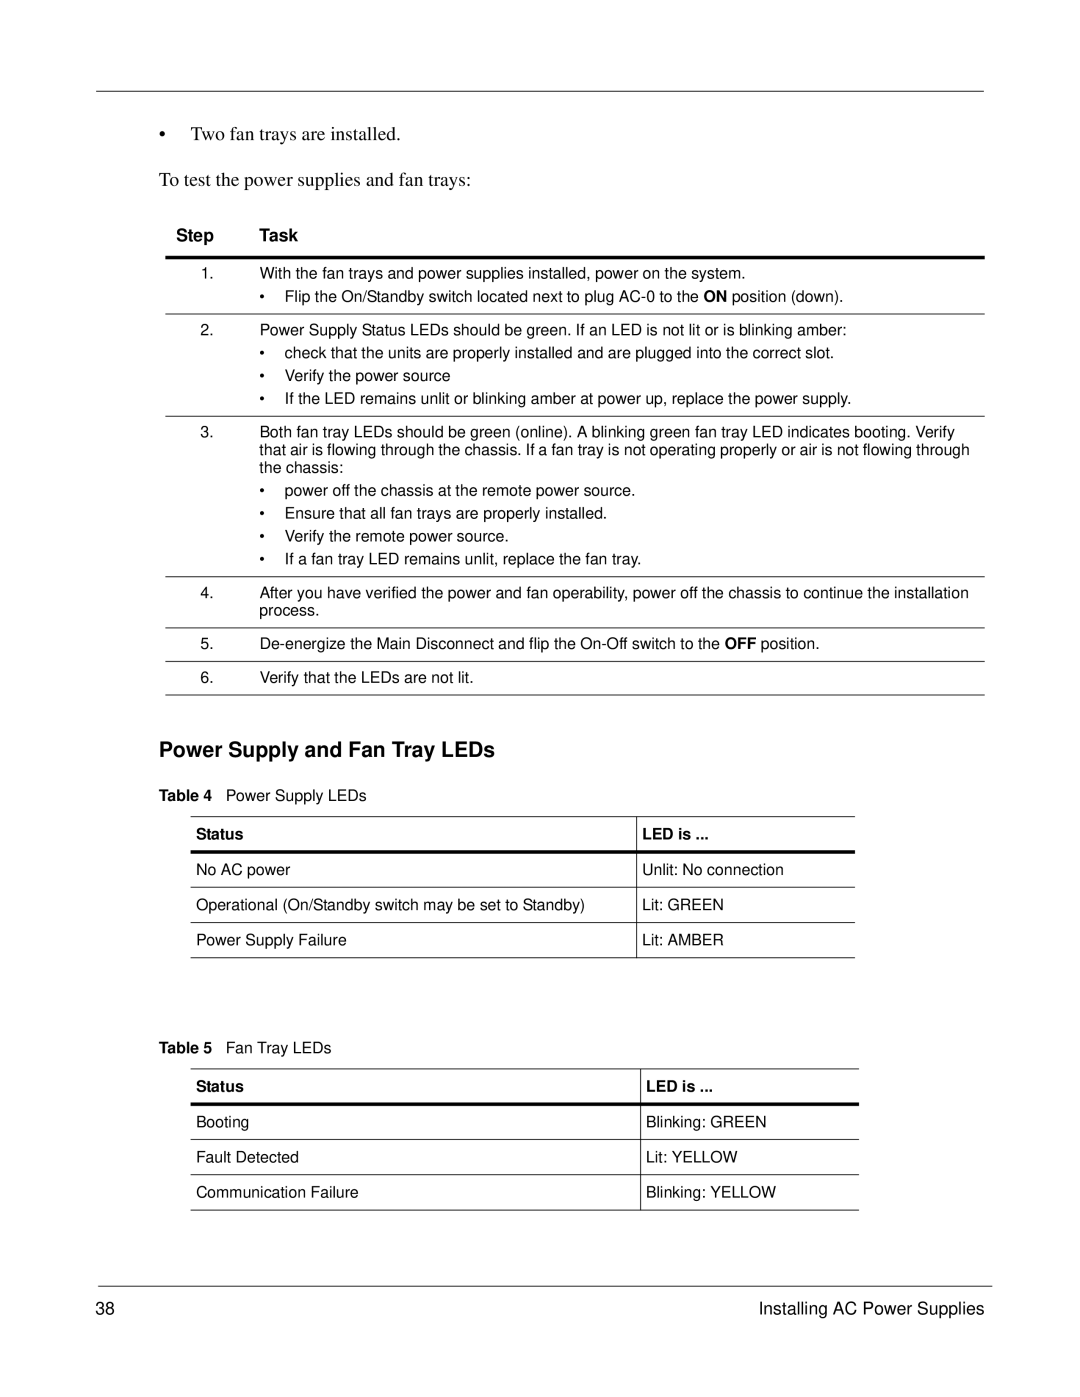
Table 4 Power Supply LEDs
Status | LED is ... |
|
|
No AC power | Unlit: No connection |
|
|
Operational (On/Standby switch may be set to Standby) | Lit: GREEN |
|
|
Power Supply Failure | Lit: AMBER |
|
|
Table 5 Fan Tray LEDs
Status | LED is ... |
|
|
Booting | Blinking: GREEN |
|
|
Fault Detected | Lit: YELLOW |
|
|
Communication Failure | Blinking: YELLOW |
|
|
38 | Installing AC Power Supplies |