16Adjust FB Erasing Edges
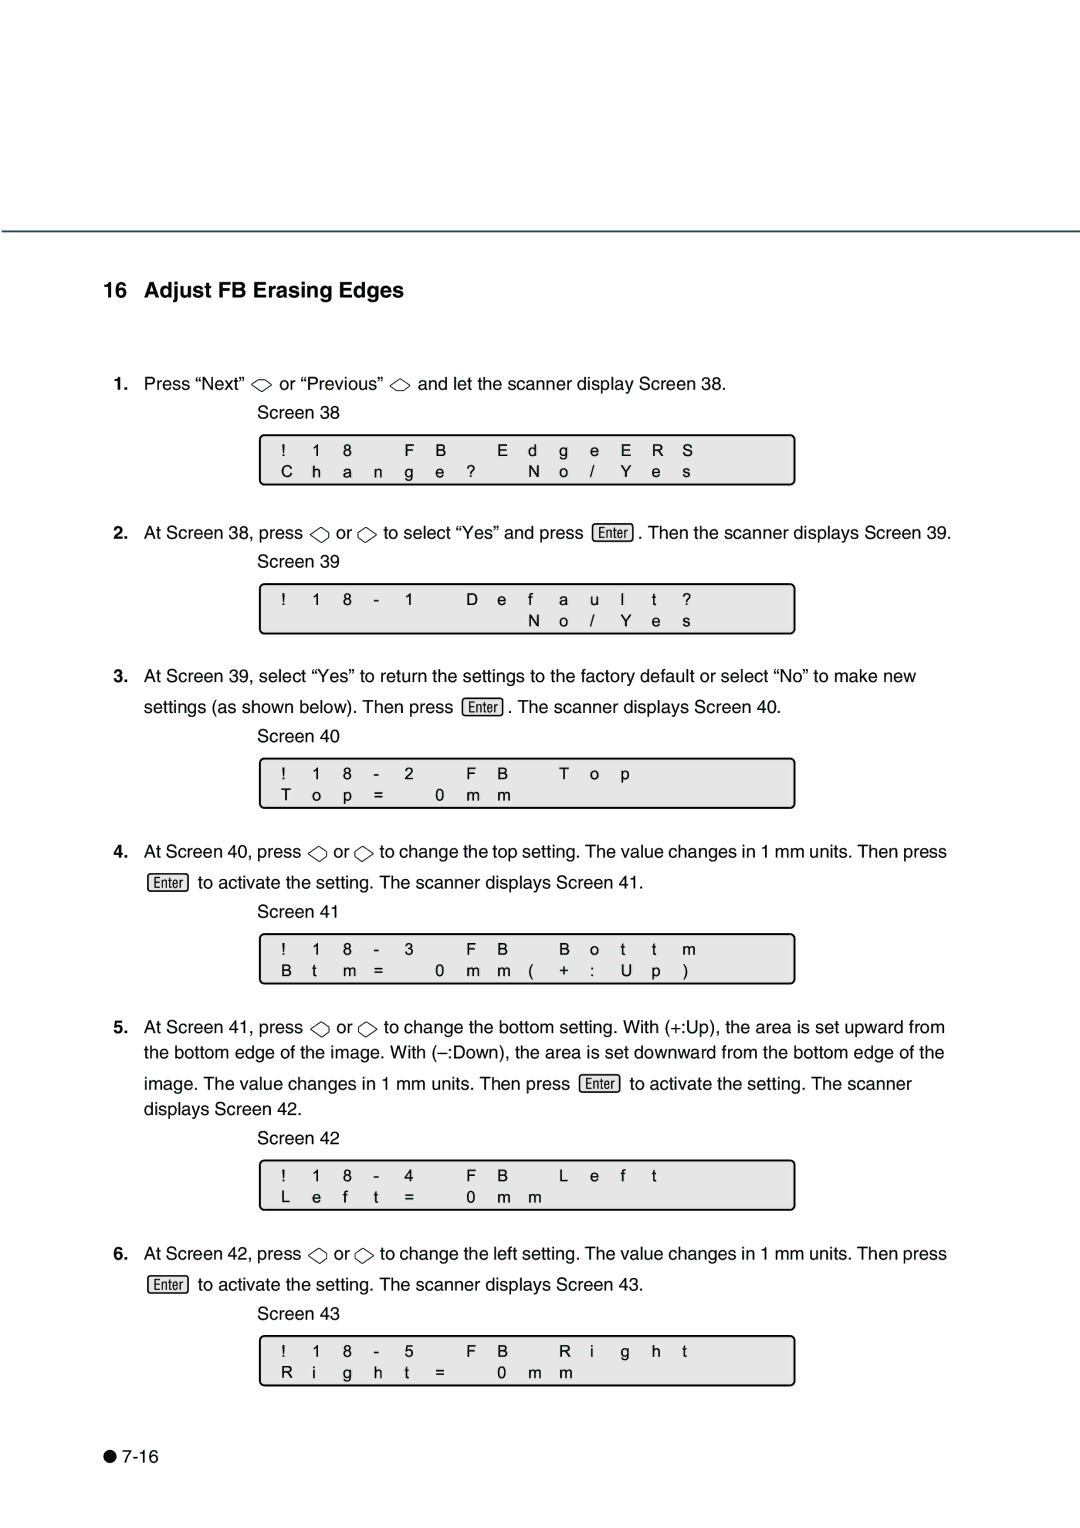
1.Press “Next” ![]() orC!“Previous18h a nge” FBand let?theEscannerdNgeo/displayERYeScreenSs38. Screen 38
orC!“Previous18h a nge” FBand let?theEscannerdNgeo/displayERYeScreenSs38. Screen 38
2.At Screen 38, press! ![]() 1or8
1or8![]() -to
-to![]() u
u![]() Yl
Yl![]() . Thenet s?the scanner displays Screen 39. Screen 39
. Thenet s?the scanner displays Screen 39. Screen 39
3.At Screen 39, selectT! “18oYesp=”
settings (as shown below). Then press ![]() . The scanner displays Screen 40. Screen 40
. The scanner displays Screen 40. Screen 40
4.At Screen 40, pressB! ![]() 1torm8
1torm8![]() =-to
=-to
![]() to activate the setting. The scanner displays Screen 41. Screen 41
to activate the setting. The scanner displays Screen 41. Screen 41
5.At Screen 41, press! ![]() 1or8
1or8![]() -to
-to
image. The value changes in 1 mm units. Then press ![]() to activate the setting. The scanner displays Screen 42.
to activate the setting. The scanner displays Screen 42.
Screen 42
6.At Screen 42, press ![]() or
or ![]() to change the left setting. The value changes in 1 mm units. Then press
to change the left setting. The value changes in 1 mm units. Then press
![]() to activate the setting. The scanner displays Screen 43.
to activate the setting. The scanner displays Screen 43.
ScreenR! 1i43 8g -h t5 = F B0 mmR i g ht
●
