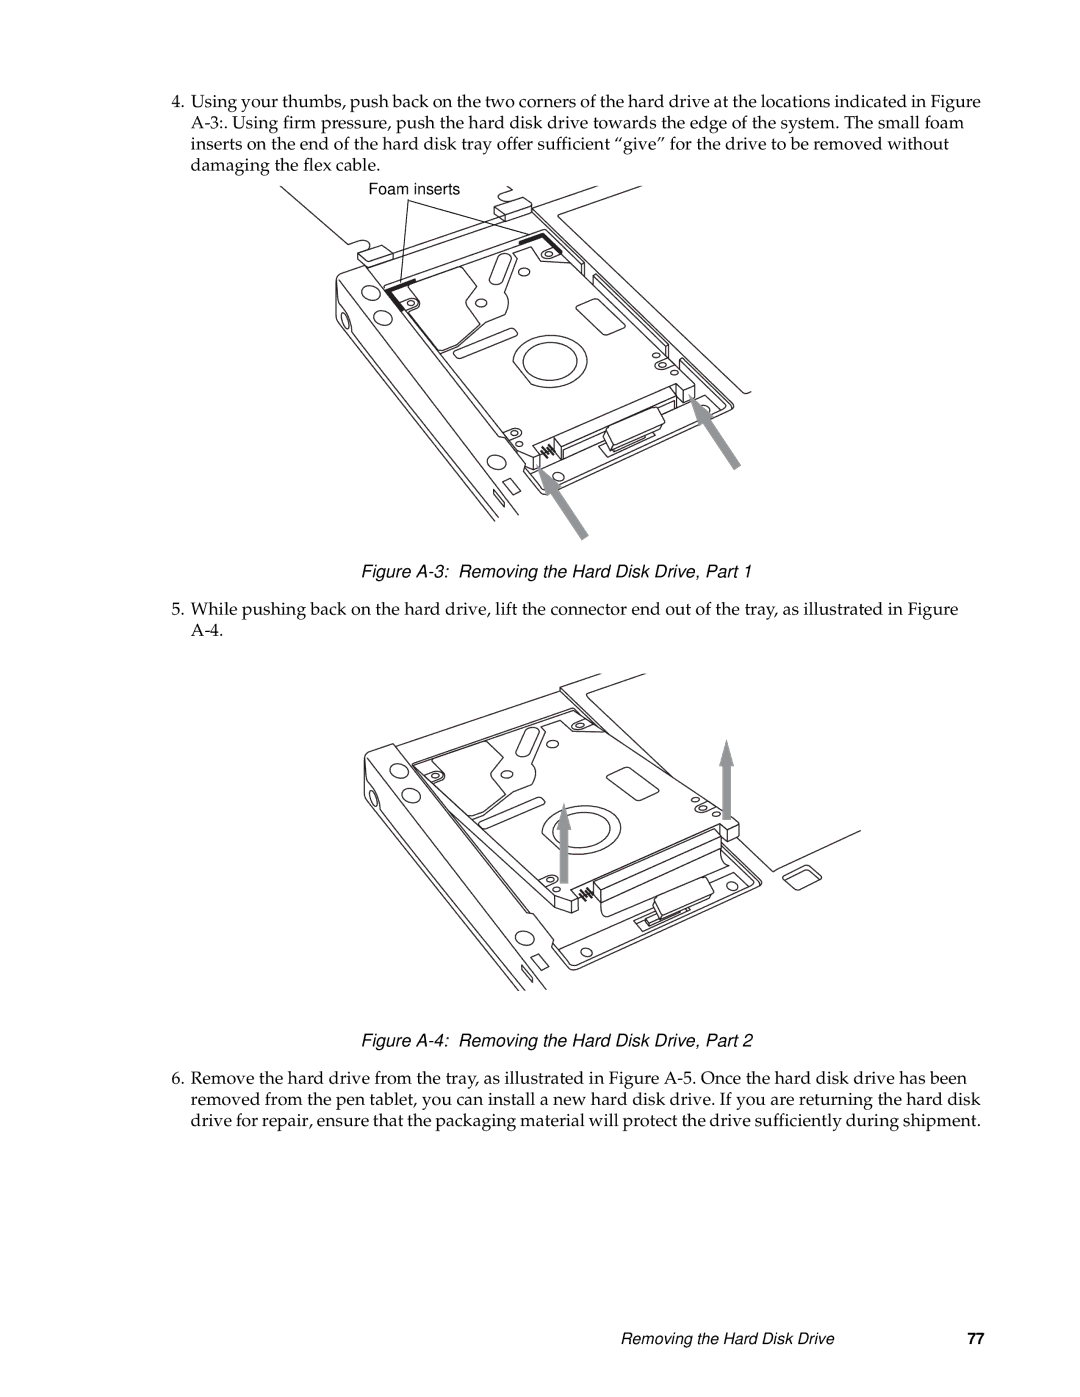
4.Using your thumbs, push back on the two corners of the hard drive at the locations indicated in Figure A-3:.Using firm pressure, push the hard disk drive towards the edge of the system. The small foam inserts on the end of the hard disk tray offer sufficient “give” for the drive to be removed without damaging the flex cable.

Foam inserts

Figure A-3: Removing the Hard Disk Drive, Part 1

5.While pushing back on the hard drive, lift the connector end out of the tray, as illustrated in Figure A-4.

Figure A-4: Removing the Hard Disk Drive, Part 2

6.Remove the hard drive from the tray, as illustrated in Figure A-5. Once the hard disk drive has been removed from the pen tablet, you can install a new hard disk drive. If you are returning the hard disk drive for repair, ensure that the packaging material will protect the drive sufficiently during shipment.

Removing the Hard Disk Drive

77

Page 87
Image 87
Fujitsu FMW4503TS128A01 manual Figure A-3 Removing the Hard Disk Drive, Part