5.Select 2 ![]() CURSOR then push the left button.
CURSOR then push the left button.
6.Select ON then push the left button to enable the net cursor. EBL2 is then auto- matically turned on.
7.Push the right button four times to close the menu.
Setting net cursor dimensions, adjusting net cursor orientation
1.
2.Select 2 [MARK] then push the left button.
3.Select 9 [EBL, VRM, CURSOR SET] then push the left button.
4.Select 8 [  CURSOR SHAPE] then push the left button.
[ CURSOR SHAPE]
1BACK
2CURSOR OFF/ON
3FRONT HALF LENGTH 0.0m
4REAR HALF LENGTH 0.0m
5NET WIDTH
0.0m
6ROTATE STEP 360°/32 POINTS
WARP LENGTH 0.0m
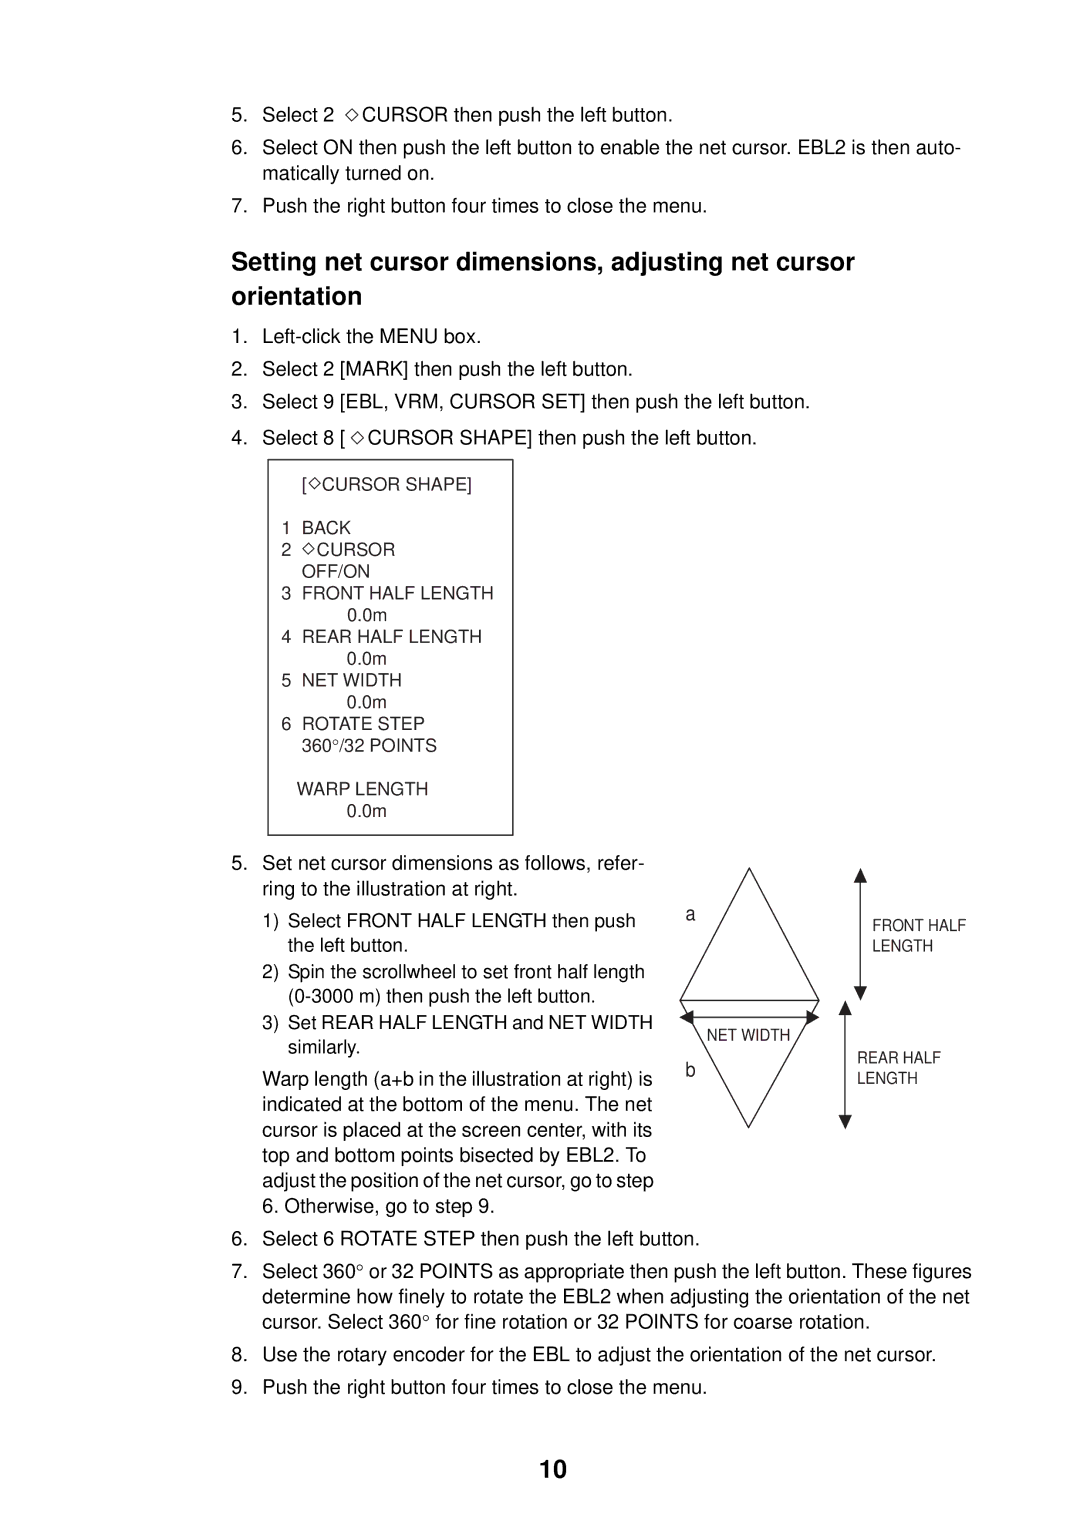
5.Set net cursor dimensions as follows, refer- ring to the illustration at right.
1)Select FRONT HALF LENGTH then push the left button.
2)Spin the scrollwheel to set front half length
3)Set REAR HALF LENGTH and NET WIDTH similarly.
Warp length (a+b in the illustration at right) is indicated at the bottom of the menu. The net cursor is placed at the screen center, with its top and bottom points bisected by EBL2. To adjust the position of the net cursor, go to step 6. Otherwise, go to step 9.
a
NET WIDTH
b
FRONT HALF LENGTH
REAR HALF LENGTH
6.Select 6 ROTATE STEP then push the left button.
7.Select 360° or 32 POINTS as appropriate then push the left button. These figures determine how finely to rotate the EBL2 when adjusting the orientation of the net cursor. Select 360° for fine rotation or 32 POINTS for coarse rotation.
8.Use the rotary encoder for the EBL to adjust the orientation of the net cursor.
9.Push the right button four times to close the menu.
10
