5:6
Camera body 503CW | Adjustment |
Adjustment of the release sequence
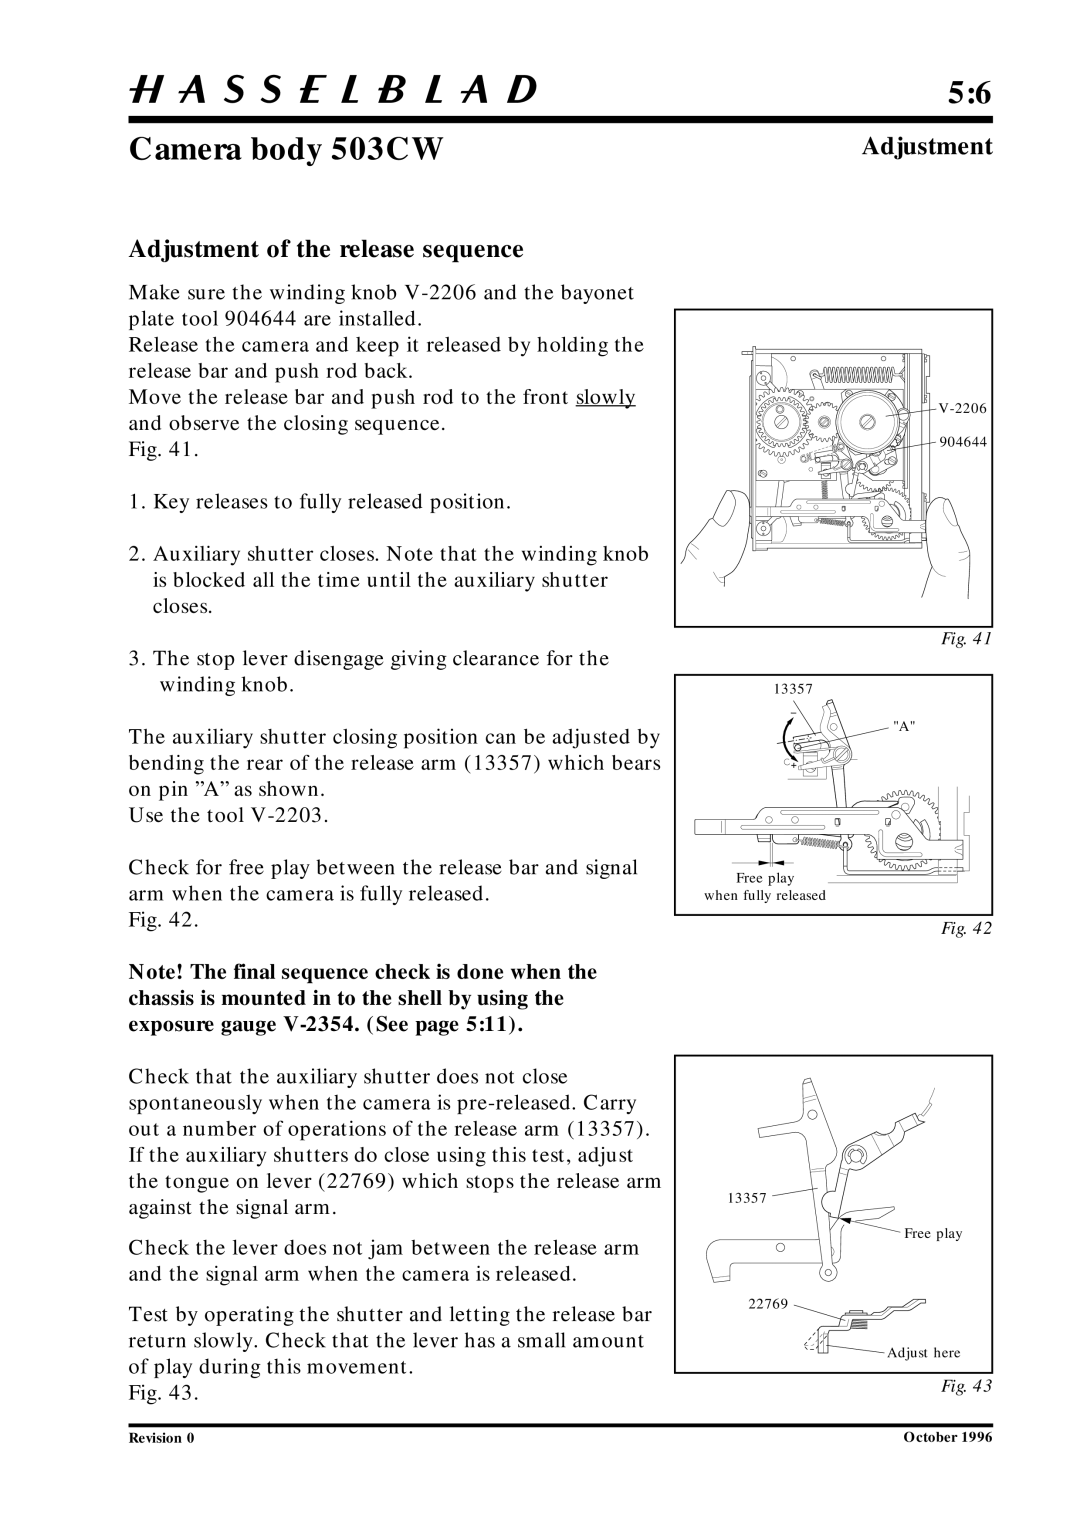
Make sure the winding knob
Release the camera and keep it released by holding the release bar and push rod back.
Move the release bar and push rod to the front slowly and observe the closing sequence.
Fig. 41.
1.Key releases to fully released position.
2.Auxiliary shutter closes. Note that the winding knob is blocked all the time until the auxiliary shutter closes.
904644 |
3.The stop lever disengage giving clearance for the winding knob.
The auxiliary shutter closing position can be adjusted by bending the rear of the release arm (13357) which bears on pin ”A” as shown.
Use the tool
Check for free play between the release bar and signal arm when the camera is fully released.
Fig. 42.
Fig. 41
13357 |
"A" |
Free play |
when fully released |
Fig. 42
Note! The final sequence check is done when the chassis is mounted in to the shell by using the exposure gauge
Check that the auxiliary shutter does not close spontaneously when the camera is
Check the lever does not jam between the release arm and the signal arm when the camera is released.
Test by operating the shutter and letting the release bar return slowly. Check that the lever has a small amount of play during this movement.
Fig. 43.
13357 ![]()
Free play
22769
![]() Adjust here
Adjust here
Fig. 43
Revision 0 | October 1996 |