5:9
Camera body 503CW | Adjustment |
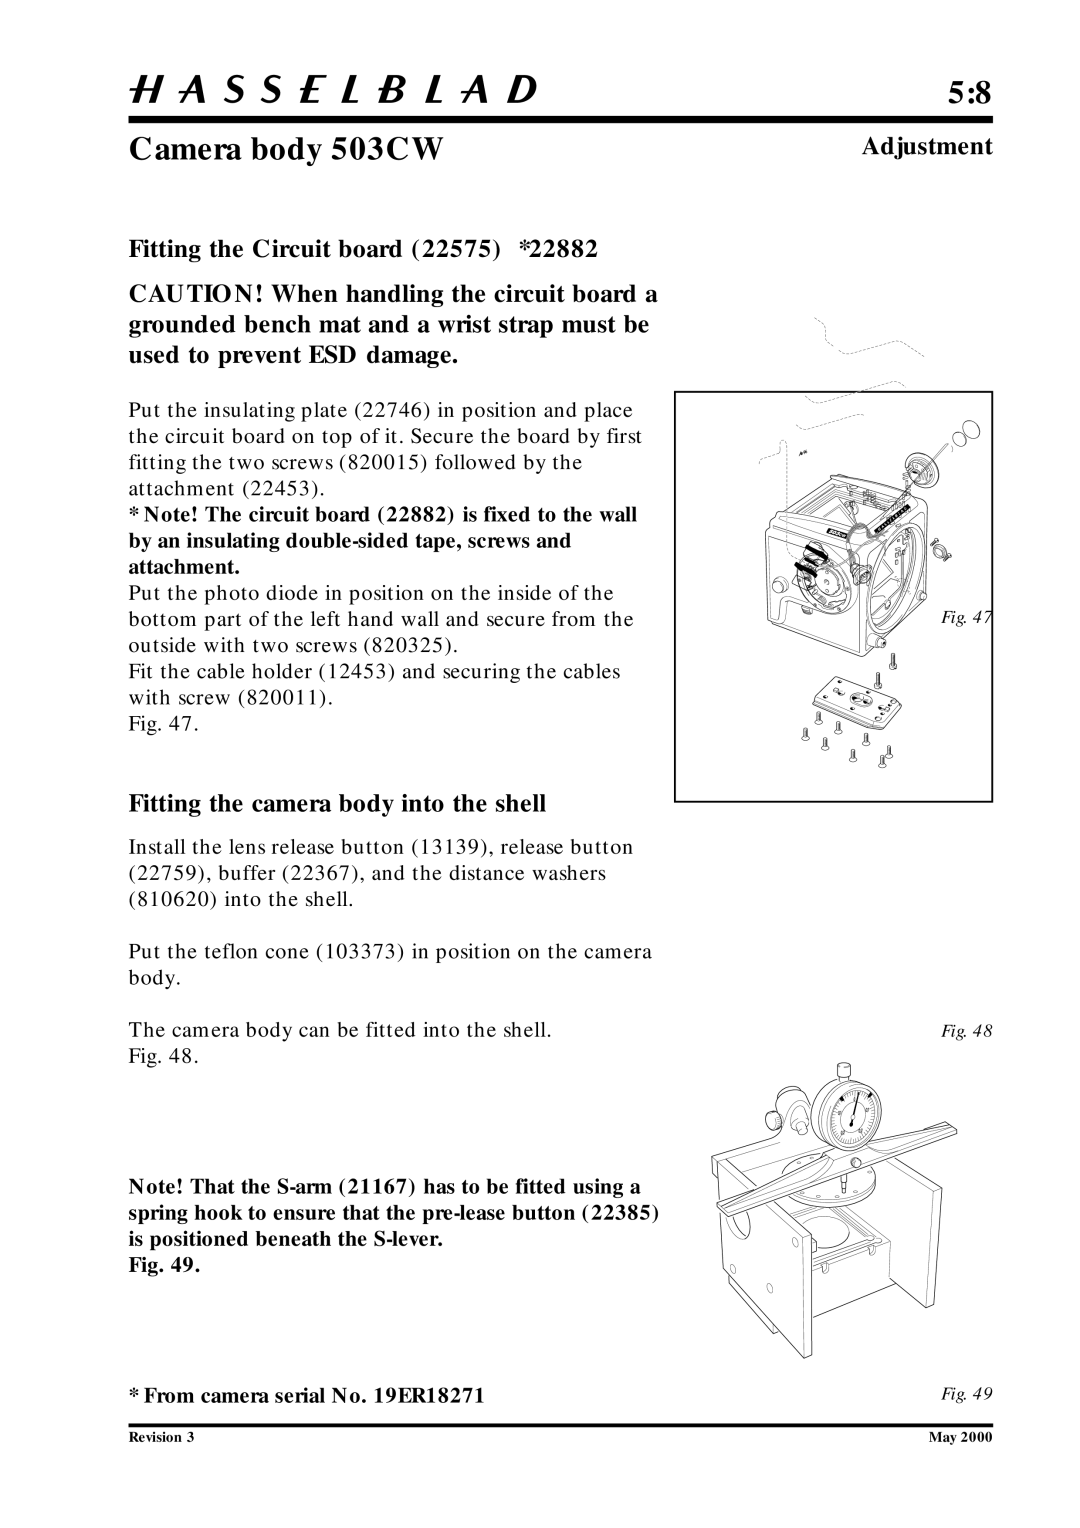
Adjust the lower rear plate/shell alignment and tighten the two rear screws (829755)and seal with loctite.
Fit and tighten the two front screws (820781).
Check the upper edge alignment of rear plate and shell. Adjust, if necessary, the two screws (825760) which are accessible behind the leathers mounted on the shell.
Note! The rear edge of the shell must not protrude over the rear plate at any point.
Fit the tripod foot (30763) with the remaining six screws (829755). Screws sealed with loctite.
Fit the washer (22799) and coupling (22767). Secure with screw (830060).
Fit the ISO selector knob and secure it with the screw (822701). Fit the shim (22473) and leather (13374). Do not damage the sliding contacts.
Fit the two screws (823335) behind the leather securing the chassis connector.
Operate the
The side cover is held in position by double sided tape and the upper part of it held by the screen frame. Mount the spring (30775) in the mirror box using the small screwdriver (Tool No. 905020).
Mount the winding crank.
Operate the camera body and make sure it is working properly.
825760 are accessible |
behind the leathers |
ISO knob |
22767 |
823335 |
22799 |
820781 |
830060 |
829755 |
Fig. 50
Final checks
Place the camera in the focusing gauge
Note! If the camera is to short it must be taken out from the shell again for an adjustment.
"B" |
"A" |
Fig. 51
Revision 1 | January 2001 |