5:7
Camera body 503CW
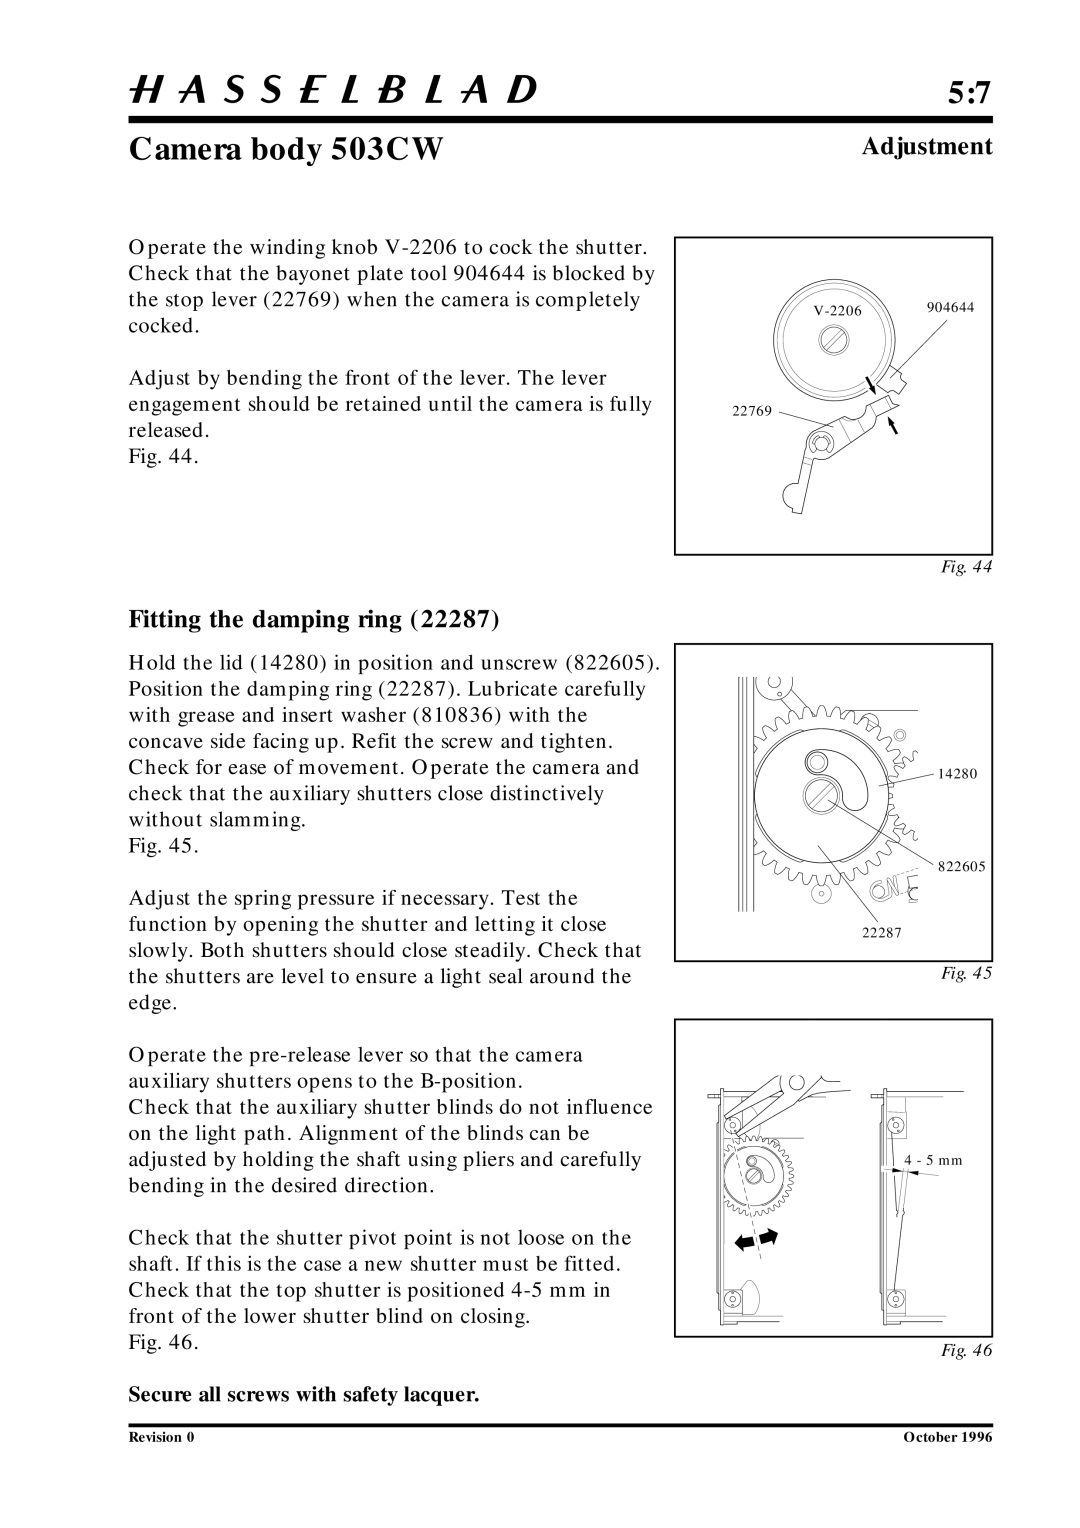
Operate the winding knob
Adjust by bending the front of the lever. The lever engagement should be retained until the camera is fully released.
Fig. 44.
Adjustment
22769
Fig. 44
Fitting the damping ring (22287)
Hold the lid (14280) in position and unscrew (822605). Position the damping ring (22287). Lubricate carefully with grease and insert washer (810836) with the concave side facing up. Refit the screw and tighten. Check for ease of movement. Operate the camera and check that the auxiliary shutters close distinctively without slamming.
Fig. 45.
Adjust the spring pressure if necessary. Test the function by opening the shutter and letting it close slowly. Both shutters should close steadily. Check that the shutters are level to ensure a light seal around the edge.
Operate the
Check that the auxiliary shutter blinds do not influence on the light path. Alignment of the blinds can be adjusted by holding the shaft using pliers and carefully bending in the desired direction.
Check that the shutter pivot point is not loose on the shaft. If this is the case a new shutter must be fitted. Check that the top shutter is positioned
Fig. 46.
14280 |
822605 |
22287 |
Fig. 45
4 - 5 mm |
Fig. 46
Secure all screws with safety lacquer.
Revision 0 | October 1996 |
