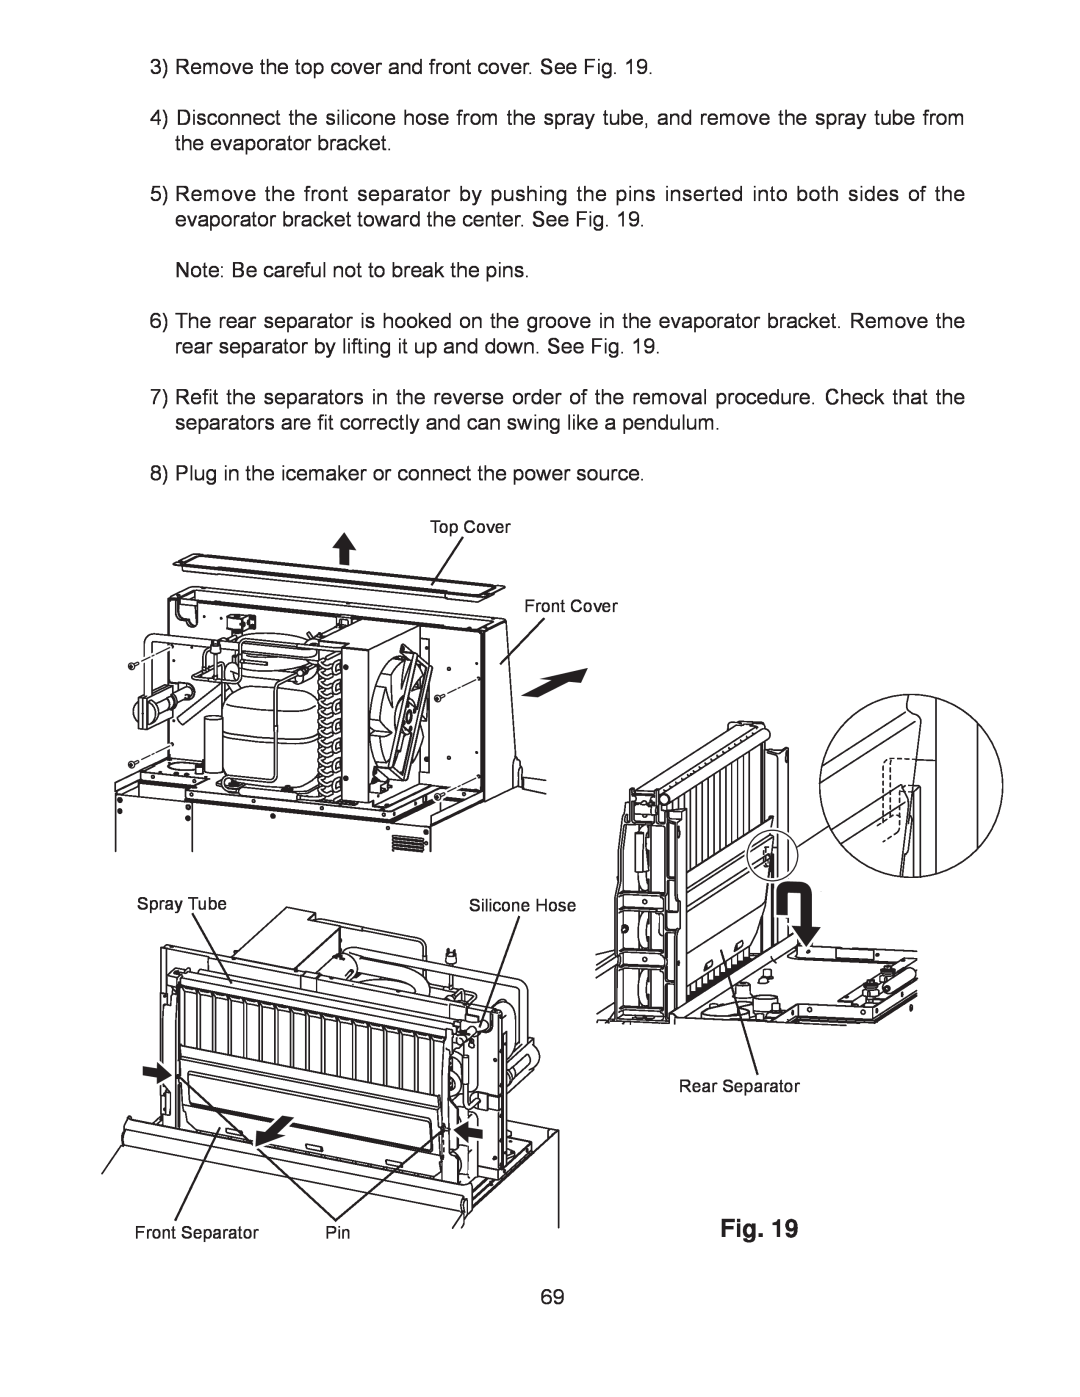
3)Remove the top cover and front cover. See Fig. 19.
4)Disconnect the silicone hose from the spray tube, and remove the spray tube from the evaporator bracket.
5)Remove the front separator by pushing the pins inserted into both sides of the evaporator bracket toward the center. See Fig. 19.
Note: Be careful not to break the pins.
6)The rear separator is hooked on the groove in the evaporator bracket. Remove the rear separator by lifting it up and down. See Fig. 19.
7)Refit the separators in the reverse order of the removal procedure. Check that the separators are fit correctly and can swing like a pendulum.
8)Plug in the icemaker or connect the power source.
Top Cover
Front Cover
Spray Tube | Silicone Hose |
Rear Separator
Front Separator | Pin | Fig. 19 |
69