1.After entering the iSCSI Initiator Configuration screen, which will be the first screen displayed, obtain the IQN for the card and create a host definition on the HP 3PAR StoreServ Storage. For example:
#createhost
2.Assign a VLUN to this host definition to be used as the SAN boot LUN.
3.From the Controller Configuration menu, select Controller Properties.
4.In the properties screen, verify that boot support is enabled. If it is not, scroll to Boot Support and enable it, then save and exit this screen.
5.from the Controller Configuration menu, select iSCSI Target Configuration.
6.In the iSCSI Target Configuration menu, select Add New iSCSI Target and press Enter.
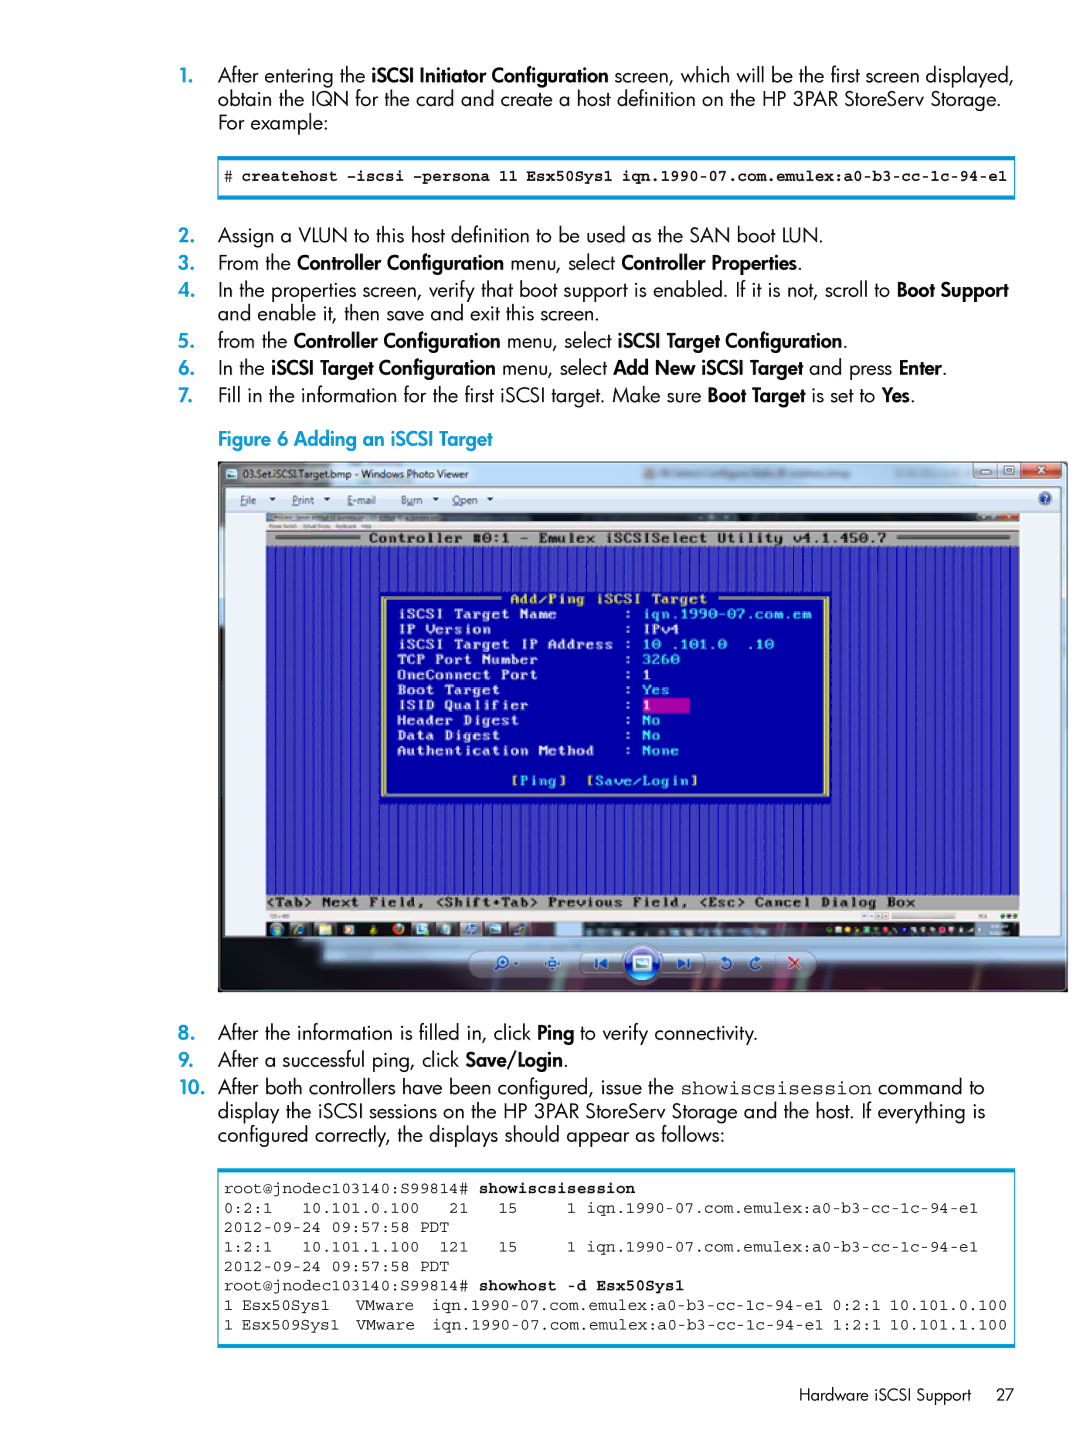
7.Fill in the information for the first iSCSI target. Make sure Boot Target is set to Yes. Figure 6 Adding an iSCSI Target
8.After the information is filled in, click Ping to verify connectivity.
9.After a successful ping, click Save/Login.
10.After both controllers have been configured, issue the showiscsisession command to display the iSCSI sessions on the HP 3PAR StoreServ Storage and the host. If everything is configured correctly, the displays should appear as follows:
root@jnodec103140:S99814# | showiscsisession |
| ||||||
0:2:1 | 10.101.0.100 | 21 | 15 | 1 | ||||
09:57:58 PDT |
|
|
|
| ||||
1:2:1 | 10.101.1.100 | 121 | 15 | 1 | ||||
09:57:58 PDT |
|
|
|
| ||||
root@jnodec103140:S99814# showhost |
| |||||||
1 | Esx50Sys1 | VMware | 0:2:1 10.101.0.100 | |||||
1 | Esx509Sys1 VMware | 1:2:1 10.101.1.100 | ||||||
Hardware iSCSI Support 27