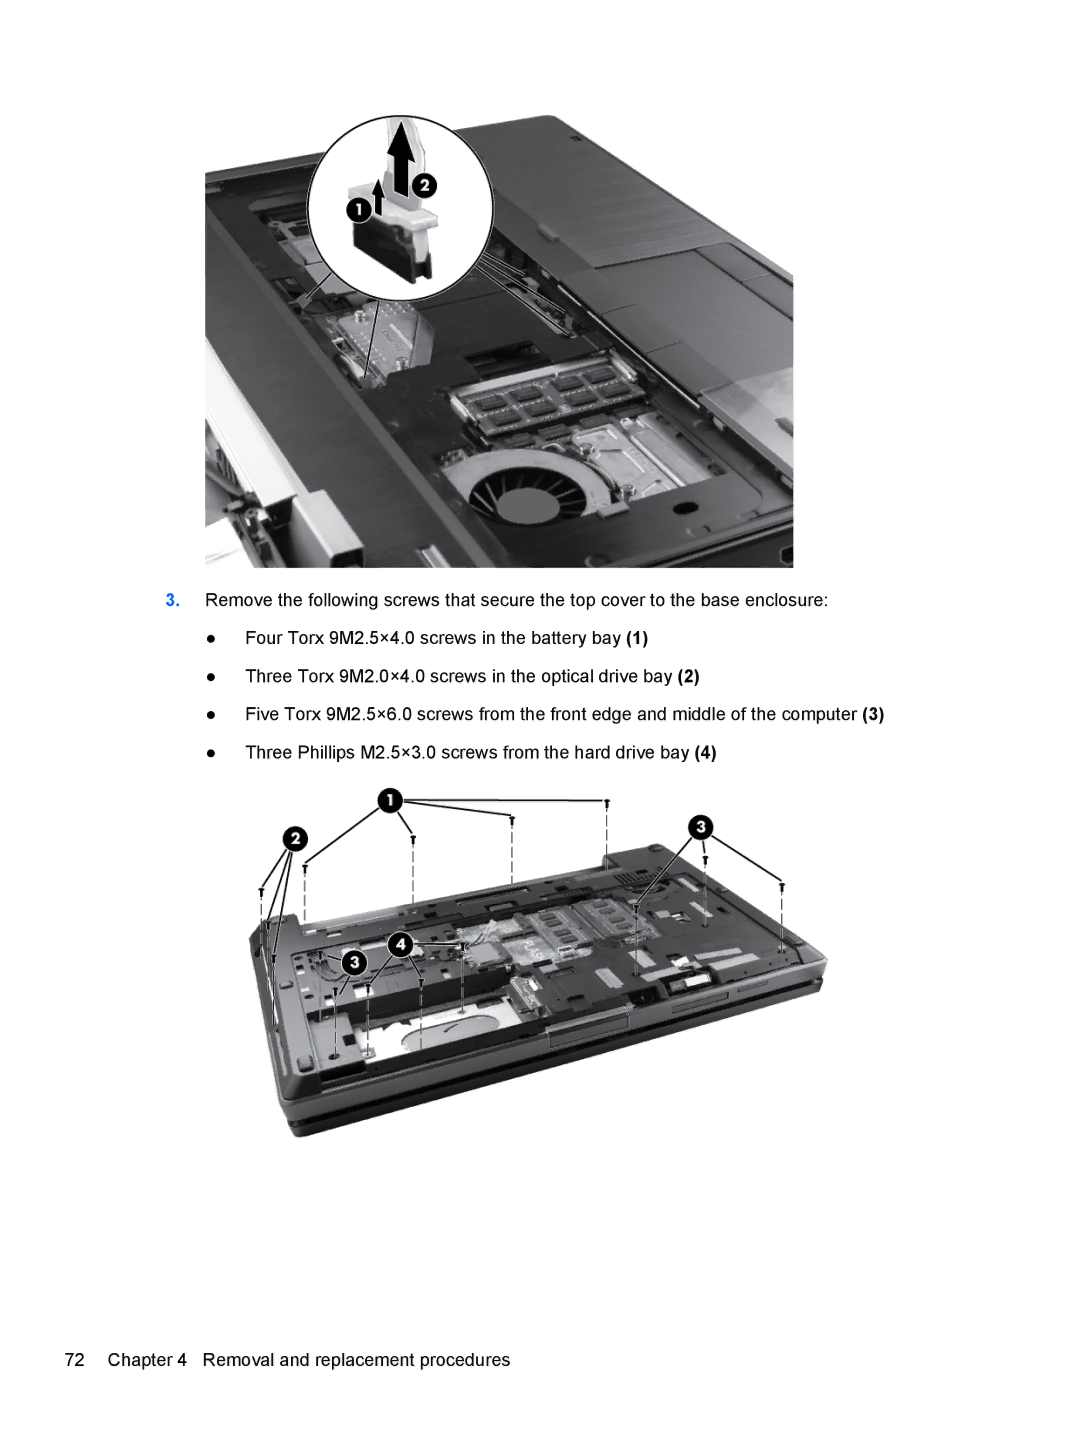
3.Remove the following screws that secure the top cover to the base enclosure:
●Four Torx 9M2.5×4.0 screws in the battery bay (1)
●Three Torx 9M2.0×4.0 screws in the optical drive bay (2)
●Five Torx 9M2.5×6.0 screws from the front edge and middle of the computer (3)
●Three Phillips M2.5×3.0 screws from the hard drive bay (4)
72 Chapter 4 Removal and replacement procedures