3. Installation
Laying out the boundary wire
Run the boundary wire around the working area, but wait before connecting the wire to the charging station.
When you run the boundary wire, remember the boundary wire may need to be adjusted later. Accordingly, run:
•A few extra meters of wire, at the beginning and end, close to the charging station.
•A few extra meters of wire about every 100 ft around the entire loop.
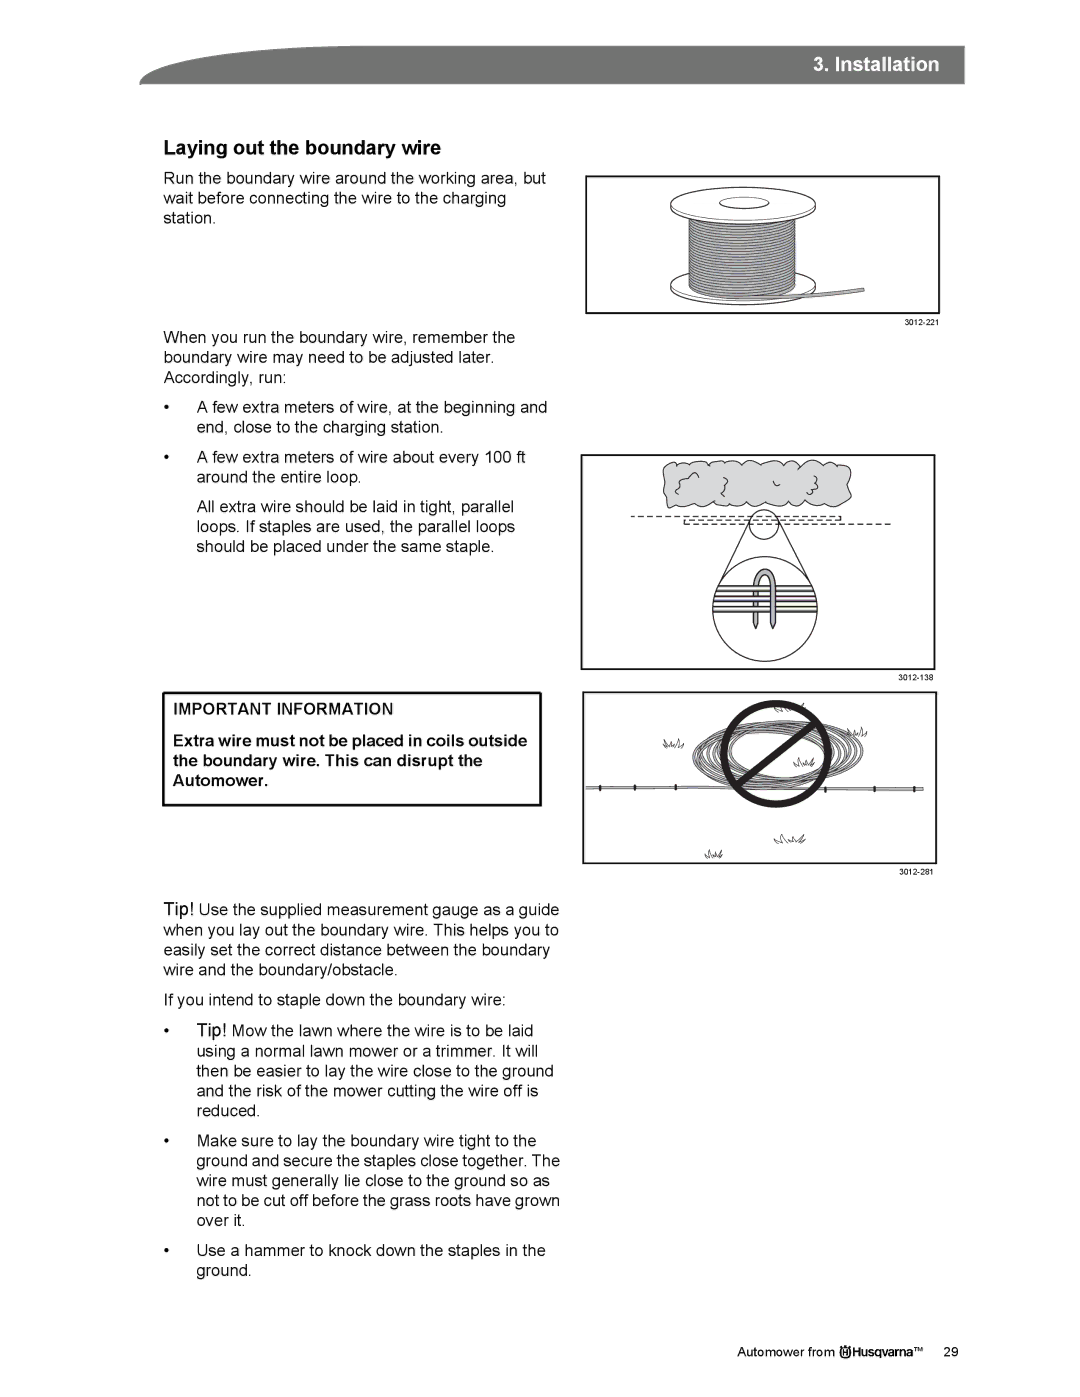
All extra wire should be laid in tight, parallel loops. If staples are used, the parallel loops should be placed under the same staple.
IMPORTANT INFORMATION
Extra wire must not be placed in coils outside the boundary wire. This can disrupt the Automower.
Tip! Use the supplied measurement gauge as a guide when you lay out the boundary wire. This helps you to easily set the correct distance between the boundary wire and the boundary/obstacle.
If you intend to staple down the boundary wire:
•Tip! Mow the lawn where the wire is to be laid using a normal lawn mower or a trimmer. It will then be easier to lay the wire close to the ground and the risk of the mower cutting the wire off is reduced.
•Make sure to lay the boundary wire tight to the ground and secure the staples close together. The wire must generally lie close to the ground so as not to be cut off before the grass roots have grown over it.
•Use a hammer to knock down the staples in the ground.
Automower from | ™ 29 |