Chapter 1:
CMOS Reset
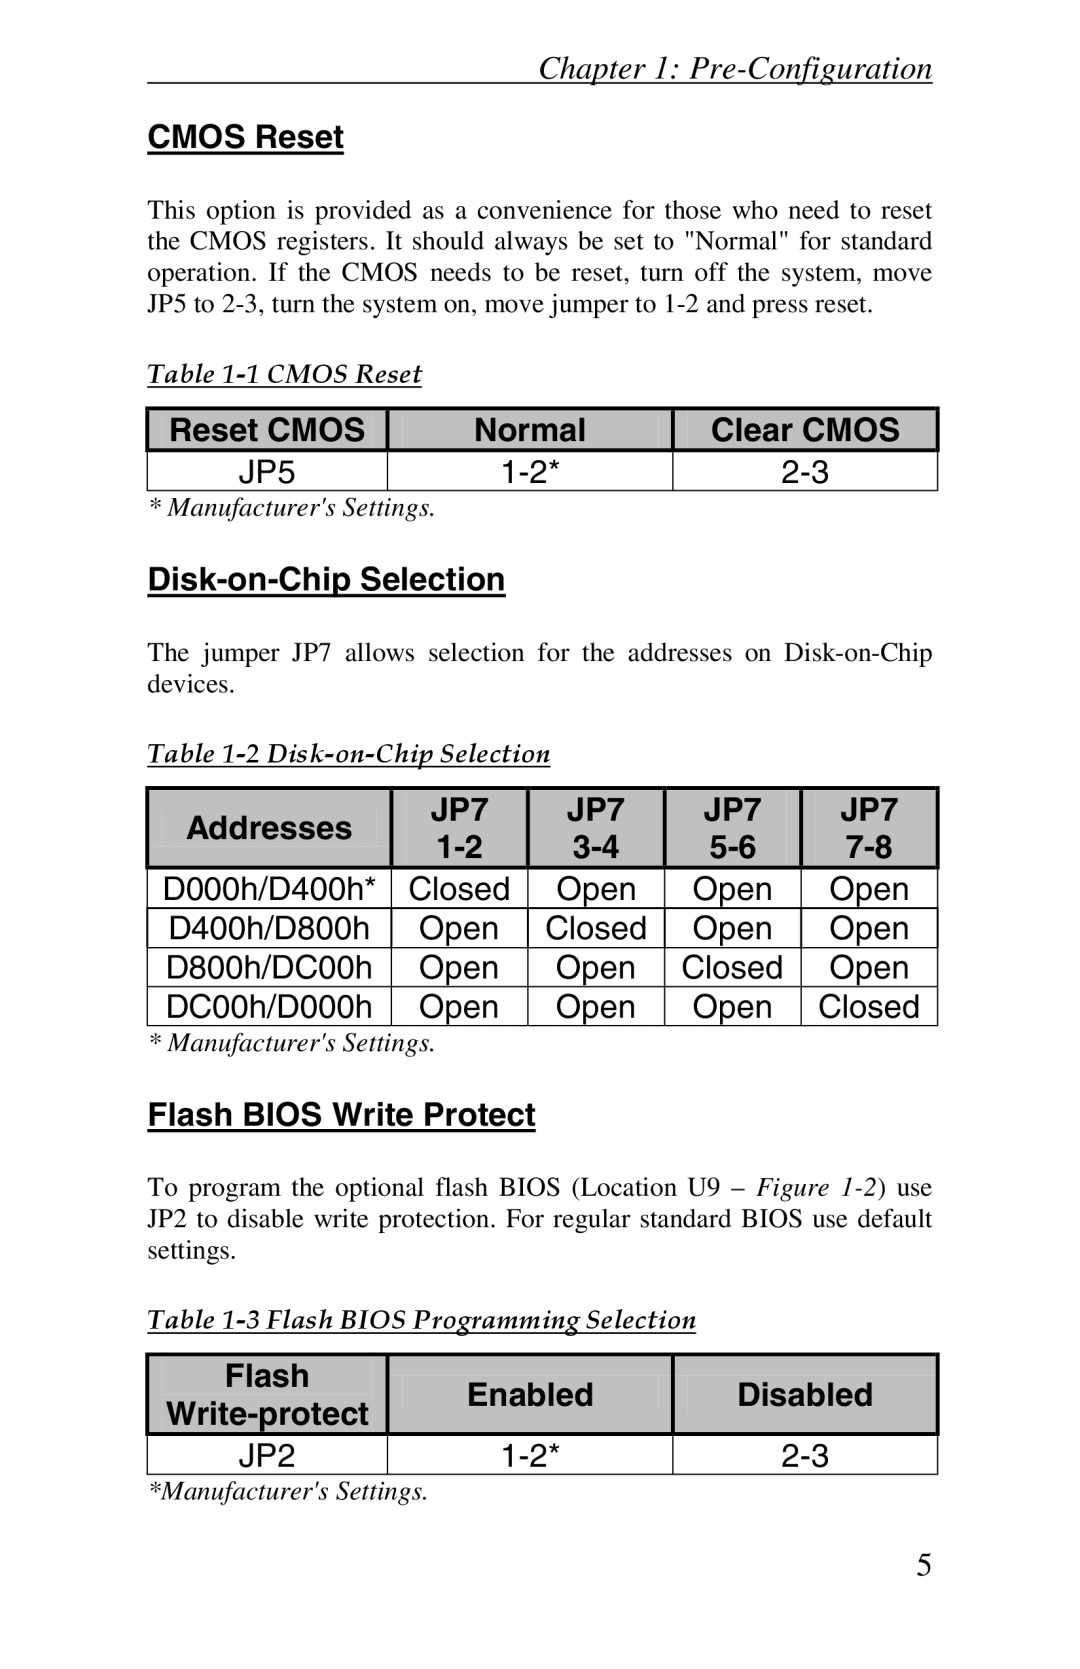
This option is provided as a convenience for those who need to reset the CMOS registers. It should always be set to "Normal" for standard operation. If the CMOS needs to be reset, turn off the system, move JP5 to
Table
Reset CMOS
Normal
Clear CMOS
JP5
* Manufacturer's Settings.
Disk-on-Chip Selection
The jumper JP7 allows selection for the addresses on
Table
Addresses
JP7
JP7
JP7
JP7
D000h/D400h* Closed Open Open Open
D400h/D800h Open Closed Open Open
D800h/DC00h Open Open Closed Open
DC00h/D000h Open Open Open Closed
* Manufacturer's Settings.
Flash BIOS Write Protect
To program the optional flash BIOS (Location U9 – Figure
Table
Flash
Write-protect
Enabled
Disabled
JP2
*Manufacturer's Settings.
5