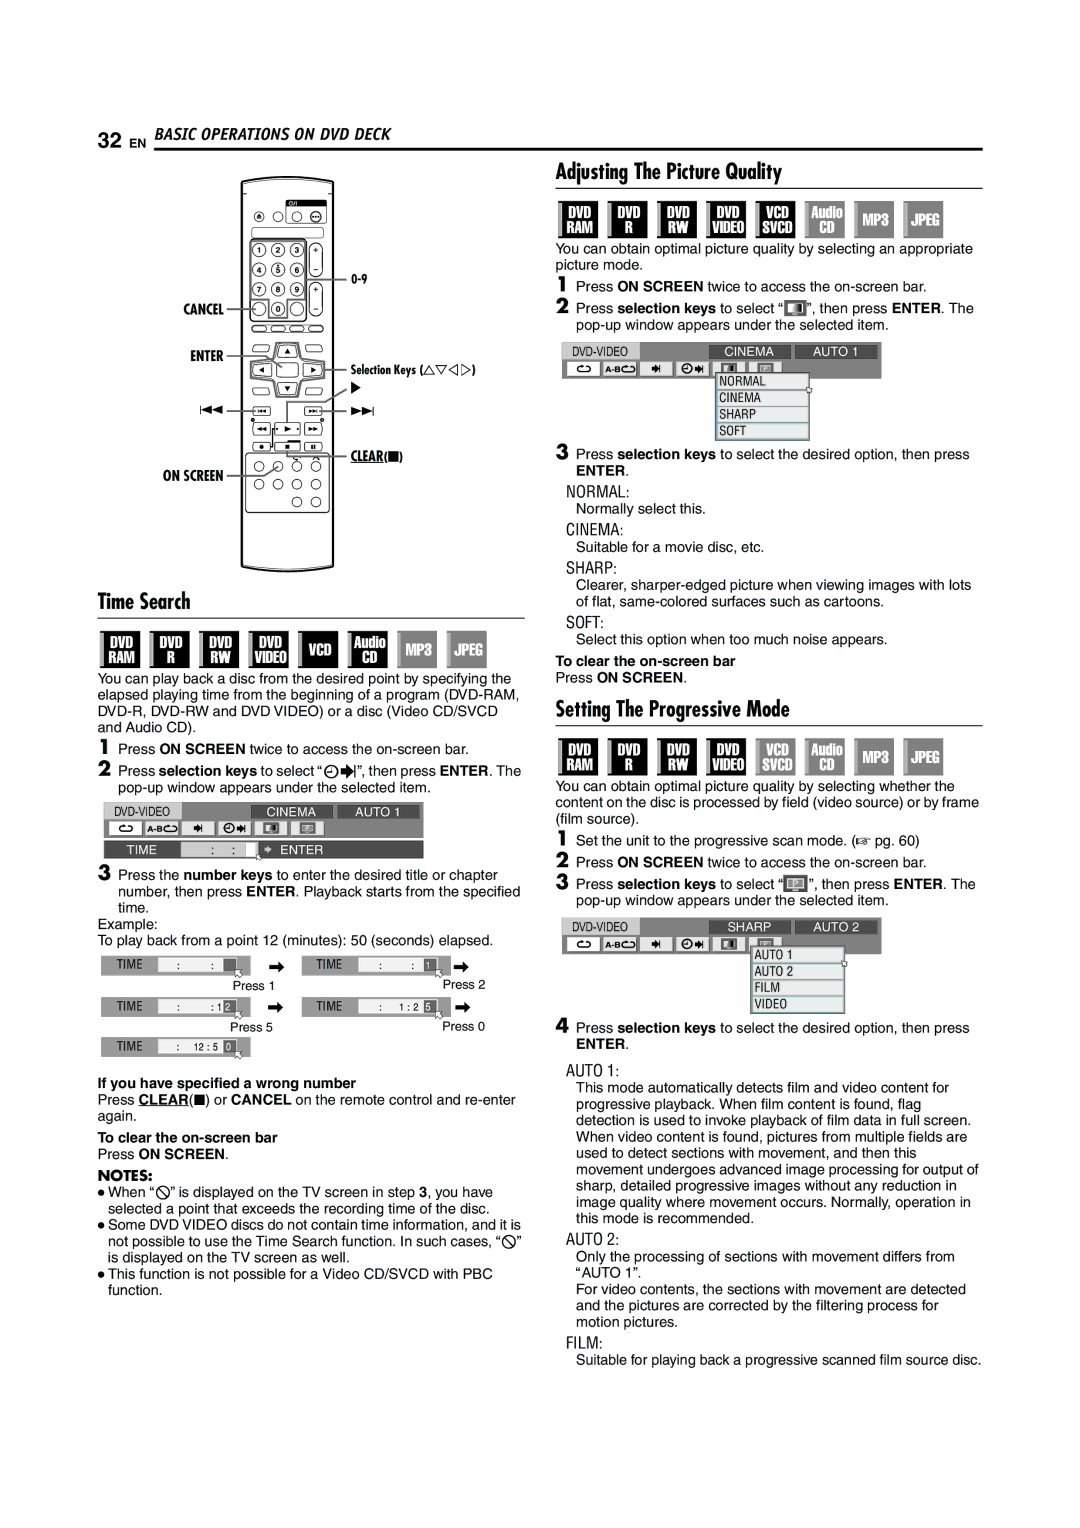
32 EN BASIC OPERATIONS ON DVD DECK
Adjusting The Picture Quality
CANCEL
ENTER
Selection Keys (FGDE)
I
S ![]()
![]() T
T
CLEAR(o)
ON SCREEN
Time Search
You can play back a disc from the desired point by specifying the elapsed playing time from the beginning of a program
1Press ON SCREEN twice to access the
2Press selection keys to select Aj9B, then press ENTER. The
|
|
| CINEMA | AUTO 1 | ||||
|
|
|
|
|
|
|
|
|
|
|
|
|
|
|
|
|
|
TIME : : ![]()
![]() ENTER
ENTER
3Press the number keys to enter the desired title or chapter number, then press ENTER. Playback starts from the specified time.
Example:
To play back from a point 12 (minutes): 50 (seconds) elapsed.
TIME |
|
|
|
| TIME |
|
|
|
Press 1 | Press 2 |
TIME |
|
|
|
| TIME |
|
|
|
Press 5 | Press 0 |
TIME
If you have specified a wrong number
Press CLEAR(o) or CANCEL on the remote control and
To clear the
Press ON SCREEN.
NOTES:
●When A7B is displayed on the TV screen in step 3, you have selected a point that exceeds the recording time of the disc.
●Some DVD VIDEO discs do not contain time information, and it is not possible to use the Time Search function. In such cases, A7B is displayed on the TV screen as well.
●This function is not possible for a Video CD/SVCD with PBC function.
You can obtain optimal picture quality by selecting an appropriate picture mode.
1Press ON SCREEN twice to access the
2Press selection keys to select “![]()
![]()
![]() ”, then press ENTER. The
”, then press ENTER. The
| CINEMA |
| AUTO 1 |
NORMAL |
CINEMA
SHARP
SOFT
3Press selection keys to select the desired option, then press
ENTER.
NORMAL:
Normally select this.
CINEMA:
Suitable for a movie disc, etc.
SHARP:
Clearer,
SOFT:
Select this option when too much noise appears.
To clear the
Press ON SCREEN.
Setting The Progressive Mode
You can obtain optimal picture quality by selecting whether the content on the disc is processed by field (video source) or by frame (film source).
1Set the unit to the progressive scan mode. (A pg. 60)
2Press ON SCREEN twice to access the
3Press selection keys to select “![]()
![]()
![]() ”, then press ENTER. The
”, then press ENTER. The
| SHARP |
| AUTO 2 |
AUTO 1 |
AUTO 2
FILM
VIDEO
4Press selection keys to select the desired option, then press
ENTER.
AUTO 1:
This mode automatically detects film and video content for progressive playback. When film content is found, flag detection is used to invoke playback of film data in full screen. When video content is found, pictures from multiple fields are used to detect sections with movement, and then this movement undergoes advanced image processing for output of sharp, detailed progressive images without any reduction in image quality where movement occurs. Normally, operation in this mode is recommended.
AUTO 2:
Only the processing of sections with movement differs from AAUTO 1B.
For video contents, the sections with movement are detected and the pictures are corrected by the filtering process for motion pictures.
FILM:
Suitable for playing back a progressive scanned film source disc.
