REMOTE CONTROL/SYSTEM CONNECTIONS EN 57

 Remote Control Functions
Remote Control 1/2/3/4 Code Switching
Connecting To A Dolby Digital Decoder Or An Amplifier With
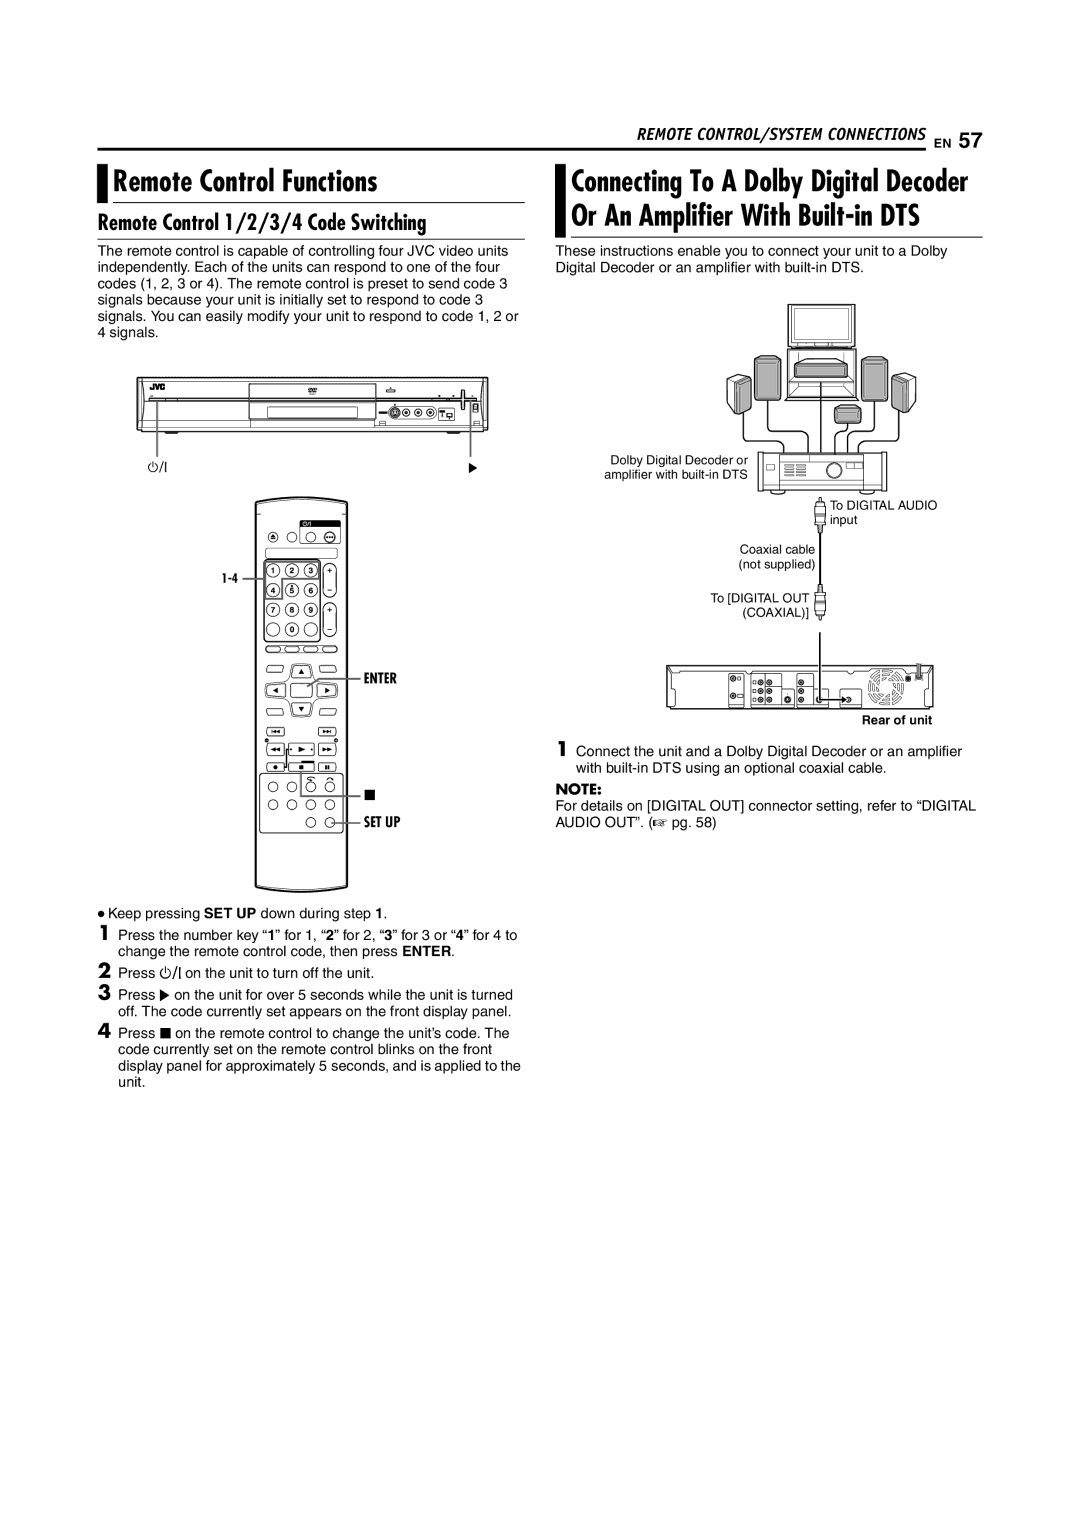
The remote control is capable of controlling four JVC video units independently. Each of the units can respond to one of the four codes (1, 2, 3 or 4). The remote control is preset to send code 3 signals because your unit is initially set to respond to code 3 signals. You can easily modify your unit to respond to code 1, 2 or 4 signals.
These instructions enable you to connect your unit to a Dolby Digital Decoder or an amplifier with
A | I | Dolby Digital Decoder or | |
amplifier with | |||
|
| ||
|
| To DIGITAL AUDIO | |
|
| input | |
|
| Coaxial cable | |
| (not supplied) | ||
|
| ||
|
| To [DIGITAL OUT | |
|
| (COAXIAL)] |
ENTER
o
SET UP
●Keep pressing SET UP down during step 1.
1Press the number key “1” for 1, “2” for 2, “3” for 3 or “4” for 4 to change the remote control code, then press ENTER.
2Press A on the unit to turn off the unit.
3Press I on the unit for over 5 seconds while the unit is turned off. The code currently set appears on the front display panel.
4Press o on the remote control to change the unit’s code. The code currently set on the remote control blinks on the front display panel for approximately 5 seconds, and is applied to the unit.
Rear of unit
1Connect the unit and a Dolby Digital Decoder or an amplifier with
NOTE:
For details on [DIGITAL OUT] connector setting, refer to “DIGITAL AUDIO OUT”. (A pg. 58)