10 EN DISC INFORMATION
DVD VIDEO Marks | Placing A Disc |
Sometimes marks are printed on a DVD disc and/or on its packaging to indicate information regarding the contents and functions of the disc. Check the marks indicating the contents and functions of the disc. Note, however, that in some cases a disc may not include a mark even for a function it supports.
Marks related to video
| Number of subtitles |
|
|
| Number of angles |
|
|
|
|
|
|
| Recorded under the |
|
|
| Screen includes |
|
|
| |||
| standard 4:3 aspect |
|
|
| black bands at the |
| ratio |
|
|
| top and the bottom |
|
|
|
|
| of image which has |
|
|
|
|
| a standard 4:3 |
|
|
|
|
| aspect ratio (letter |
|
|
|
|
| box) |
|
|
|
|
|
|
Video playback is in Wide video mode (16:9) on wide televisions, but in letter box on televisions with standard 4:3 aspect ratio.
Video playback is in Wide video mode (16:9) on wide televisions, but pan and scan is used on televisions with standard 4:3 aspect ratio (either the left or right side of the image is cut- out).
Marks related to audio
Number of audio tracks
Dolby Digital mark
It has been developed by Dolby Laboratories as a digital surround system.
DTS (Digital Theater Systems)
You can enjoy DTS audio if you connect an amplifier with a
Opening the disc tray
Press M to open the disc tray.
CH+
DV DV IN | |
VIDEO L(MONO) AUDIO R |
●Pressing the button again closes the disc tray.
●Use the button to open and close the disc tray.
●Do not block the disc tray with your hand while it is opening or closing as this may result in hardware failure.
●Do not place unplayable discs or any object other than a disc on the disc tray.
●Do not press down strongly on the disc tray or place any heavy objects on it.
Discs without cartridges
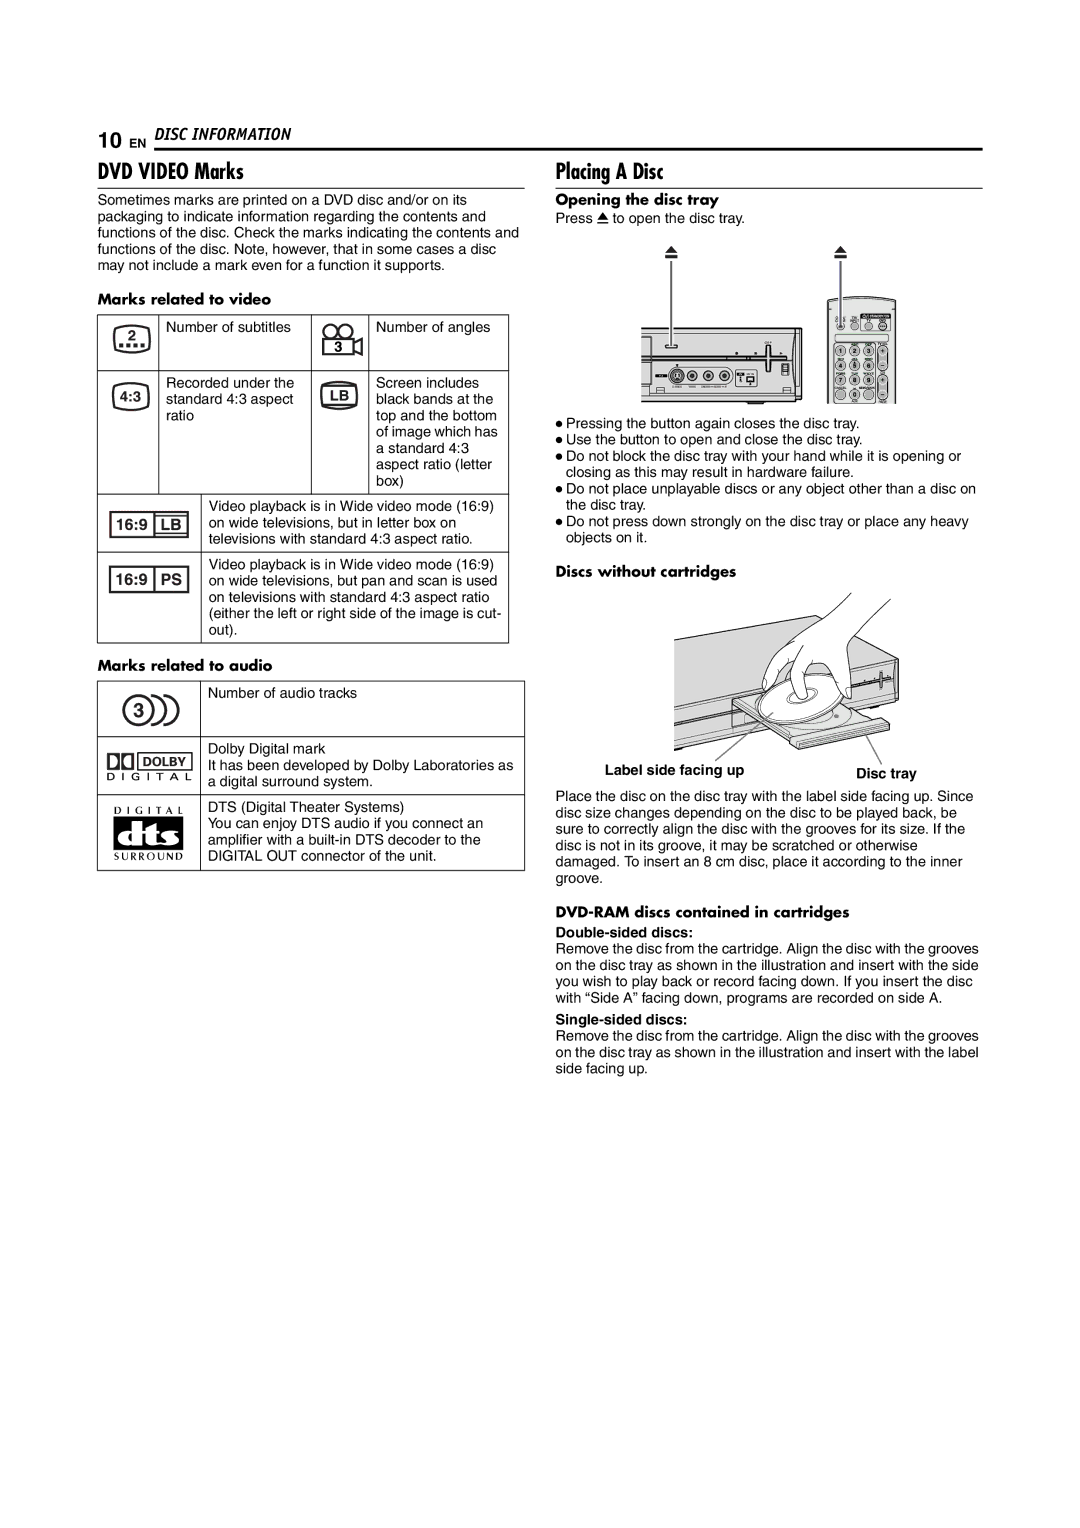
Label side facing up | Disc tray |
Place the disc on the disc tray with the label side facing up. Since disc size changes depending on the disc to be played back, be sure to correctly align the disc with the grooves for its size. If the disc is not in its groove, it may be scratched or otherwise damaged. To insert an 8 cm disc, place it according to the inner groove.
DVD-RAM discs contained in cartridges
Double-sided discs:
Remove the disc from the cartridge. Align the disc with the grooves on the disc tray as shown in the illustration and insert with the side you wish to play back or record facing down. If you insert the disc with “Side A” facing down, programs are recorded on side A.
Single-sided discs:
Remove the disc from the cartridge. Align the disc with the grooves on the disc tray as shown in the illustration and insert with the label side facing up.
