PREPARATIONS
Inserting an SD Memory Card
PREPARATIONS
AC Operation
Cutout
SD memory card cover
By using an SD memory card, you can save and call up menu settings and camera settings for this camcorder.
X See “FILE MANAGE Menu Screen” on page 79.
Check that the POWER switch is OFF.
Inserting an SD Memory Card
1. Open the SD memory card cover.
2.Face the cutout end of the SD memory card inward and insert it in the direction of the arrow.
CAUTION
Be sure not to touch the metal connector area of the SD memory card.
3.Close the SD memory card cover.
Taking out the SD memory card
1.Push the SD memory card in the direction of the arrow.
• The SD memory card comes out slightly.
2.Pull the SD memory card straight out.
About SD Memory Cards
• When you use an SD memory card that was either just pur- |
chased or formatted on a device other than this camcorder, |
format it on this camcorder. |
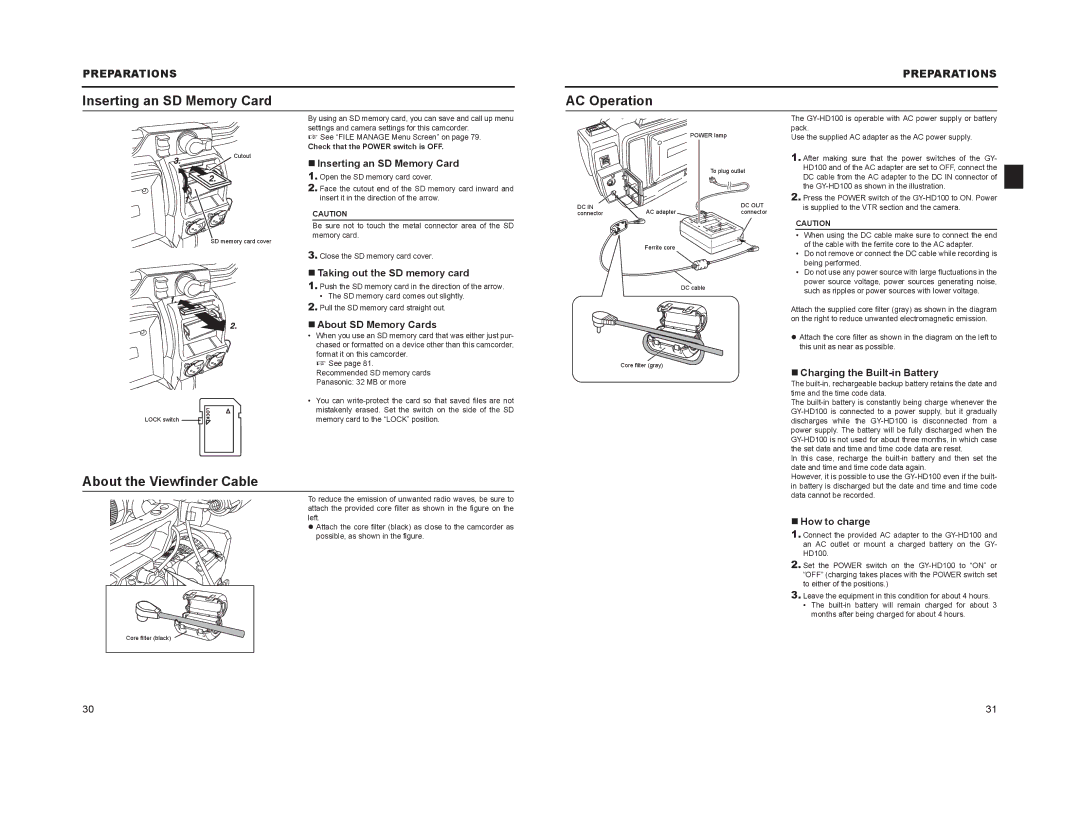
|
| POWER lamp |
|
| To plug outlet |
DC IN |
| DC OUT |
connector | AC adapter | connector |
| Ferrite core |
|
|
| DC cable |
The
Use the supplied AC adapter as the AC power supply.
1.After making sure that the power switches of the GY- HD100 and of the AC adapter are set to OFF, connect the DC cable from the AC adapter to the DC IN connector of the
2.Press the POWER switch of the
CAUTION
•When using the DC cable make sure to connect the end of the cable with the ferrite core to the AC adapter.
•Do not remove or connect the DC cable while recording is being performed.
•Do not use any power source with large fluctuations in the power source voltage, power sources generating noise, such as ripples or power sources with lower voltage.
Attach the supplied core filter (gray) as shown in the diagram on the right to reduce unwanted electromagnetic emission.
zAttach the core filter as shown in the diagram on the left to this unit as near as possible.
LOCK switch ![]()
![]()
X See page 81. |
Recommended SD memory cards |
Panasonic: 32 MB or more |
• You can |
mistakenly erased. Set the switch on the side of the SD |
memory card to the “LOCK” position. |
Core filter (gray)
Charging the Built-in Battery
The
The
In this case, recharge the
About the Viewfinder Cable
To reduce the emission of unwanted radio waves, be sure to attach the provided core filter as shown in the figure on the left.
z Attach the core filter (black) as close to the camcorder as possible, as shown in the figure.
Core filter (black)
However, it is possible to use the
How to charge
1.Connect the provided AC adapter to the
2.Set the POWER switch on the
3.Leave the equipment in this condition for about 4 hours.
•The
30 | 31 |