2.Safety
2.2.1 Locking the handwheel
Always cover the cutting edge with the knife guard and lock the hand- wheel:
•Prior to doing any work on knife and/or specimen.
•Prior to exchanging specimens.
•During work breaks.
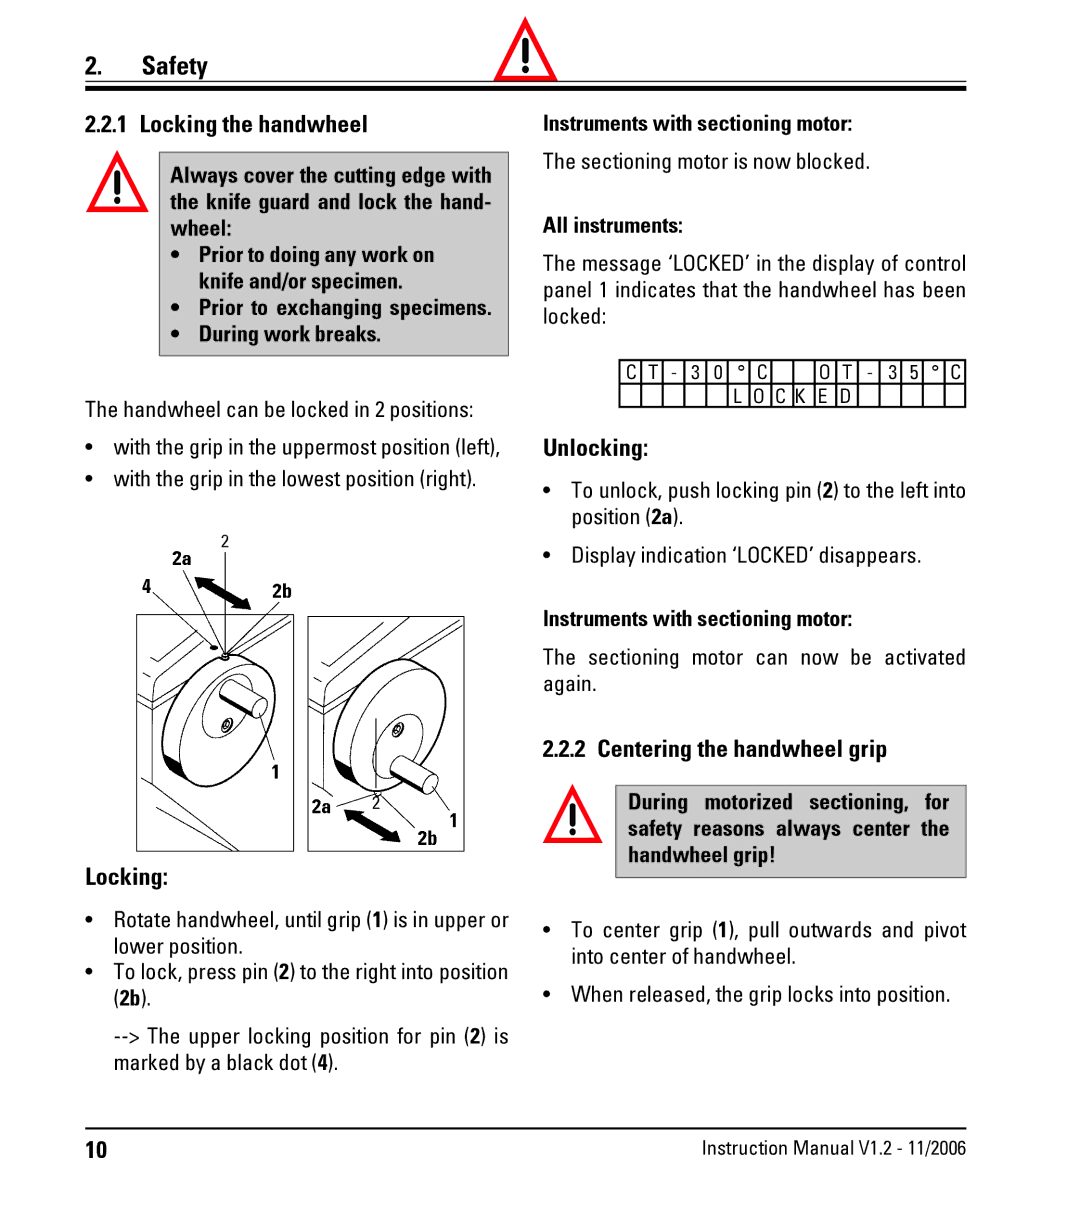
The handwheel can be locked in 2 positions:
•with the grip in the uppermost position (left),
•with the grip in the lowest position (right).
2
2
Locking:
•Rotate handwheel, until grip (1) is in upper or lower position.
•To lock, press pin (2) to the right into position (2b).
Instruments with sectioning motor:
The sectioning motor is now blocked.
All instruments:
The message ‘LOCKED’ in the display of control panel 1 indicates that the handwheel has been locked:
C | T | - | 3 | 0 | ° | C |
|
| O | T | - | 3 | 5 | ° | C |
|
|
|
|
| L | O | C | K | E | D |
|
|
|
|
|
Unlocking:
•To unlock, push locking pin (2) to the left into position (2a).
•Display indication ‘LOCKED’ disappears.
Instruments with sectioning motor:
The sectioning motor can now be activated again.
2.2.2 Centering the handwheel grip
During motorized sectioning, for safety reasons always center the handwheel grip!
•To center grip (1), pull outwards and pivot into center of handwheel.
•When released, the grip locks into position.
10 | Instruction Manual V1.2 - 11/2006 |
