5.Operation
5.5 Daily operation of the instrument
•Select chamber temperature and, in instru- ments with specimen cooling, specimen temperature according to the type of speci- men to be sectioned (see also chapter 6.3 ‘Reference chart for temperature settings’).
•Do not continue with step 5.5.1 before the actual chamber / (specimen) temperature corresponds to the set value. This may take several hours (e.g. when operating the in- strument for the first time or when the instru- ment had been switched off).
Prior to operating the instrument , please read and observe the fol- lowing safety instructions:
•‘Integrated safety devices’ (Chapter 2.2) .
•‘Handling microtome knives
/blades’ (Chapter 2.3.4)
•‘Knife guard / Handwheel lock’ (Chapter 2.3.5)
•’Motorized sectioning’ (Chapter 2.3.6)
•‘Defrosting
/handling frozen tissue’ (Chapter 2.3.7)
•‘Frozen instrument parts and accessories’ (Chapter 2.3.8)
•‘Infectious / radioactive material’ (Chapter 2.3.9)
5.5.1Freezing specimens onto specimen discs with
•Size the specimen.
•Apply sufficient amount of embedding medi- um onto ambient temperature specimen disc.
•Inside the cryochamber, place the specimen onto the disc and orient.
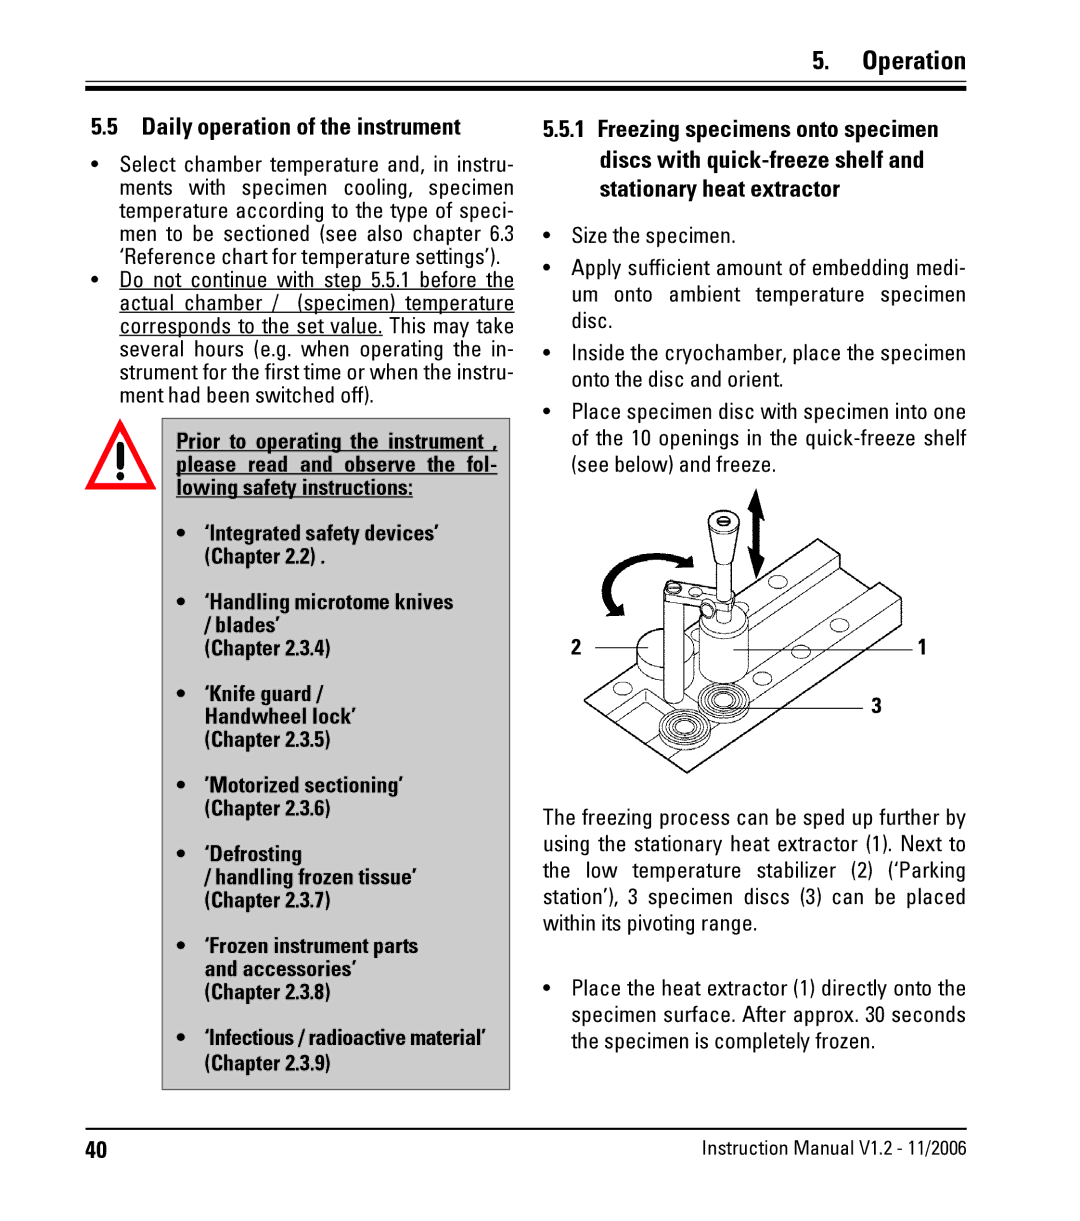
•Place specimen disc with specimen into one of the 10 openings in the
2 |
|
|
| 1 |
| ||||
|
|
3
The freezing process can be sped up further by using the stationary heat extractor (1). Next to the low temperature stabilizer (2) (‘Parking station’), 3 specimen discs (3) can be placed within its pivoting range.
•Place the heat extractor (1) directly onto the specimen surface. After approx. 30 seconds the specimen is completely frozen.
40 | Instruction Manual V1.2 - 11/2006 |
